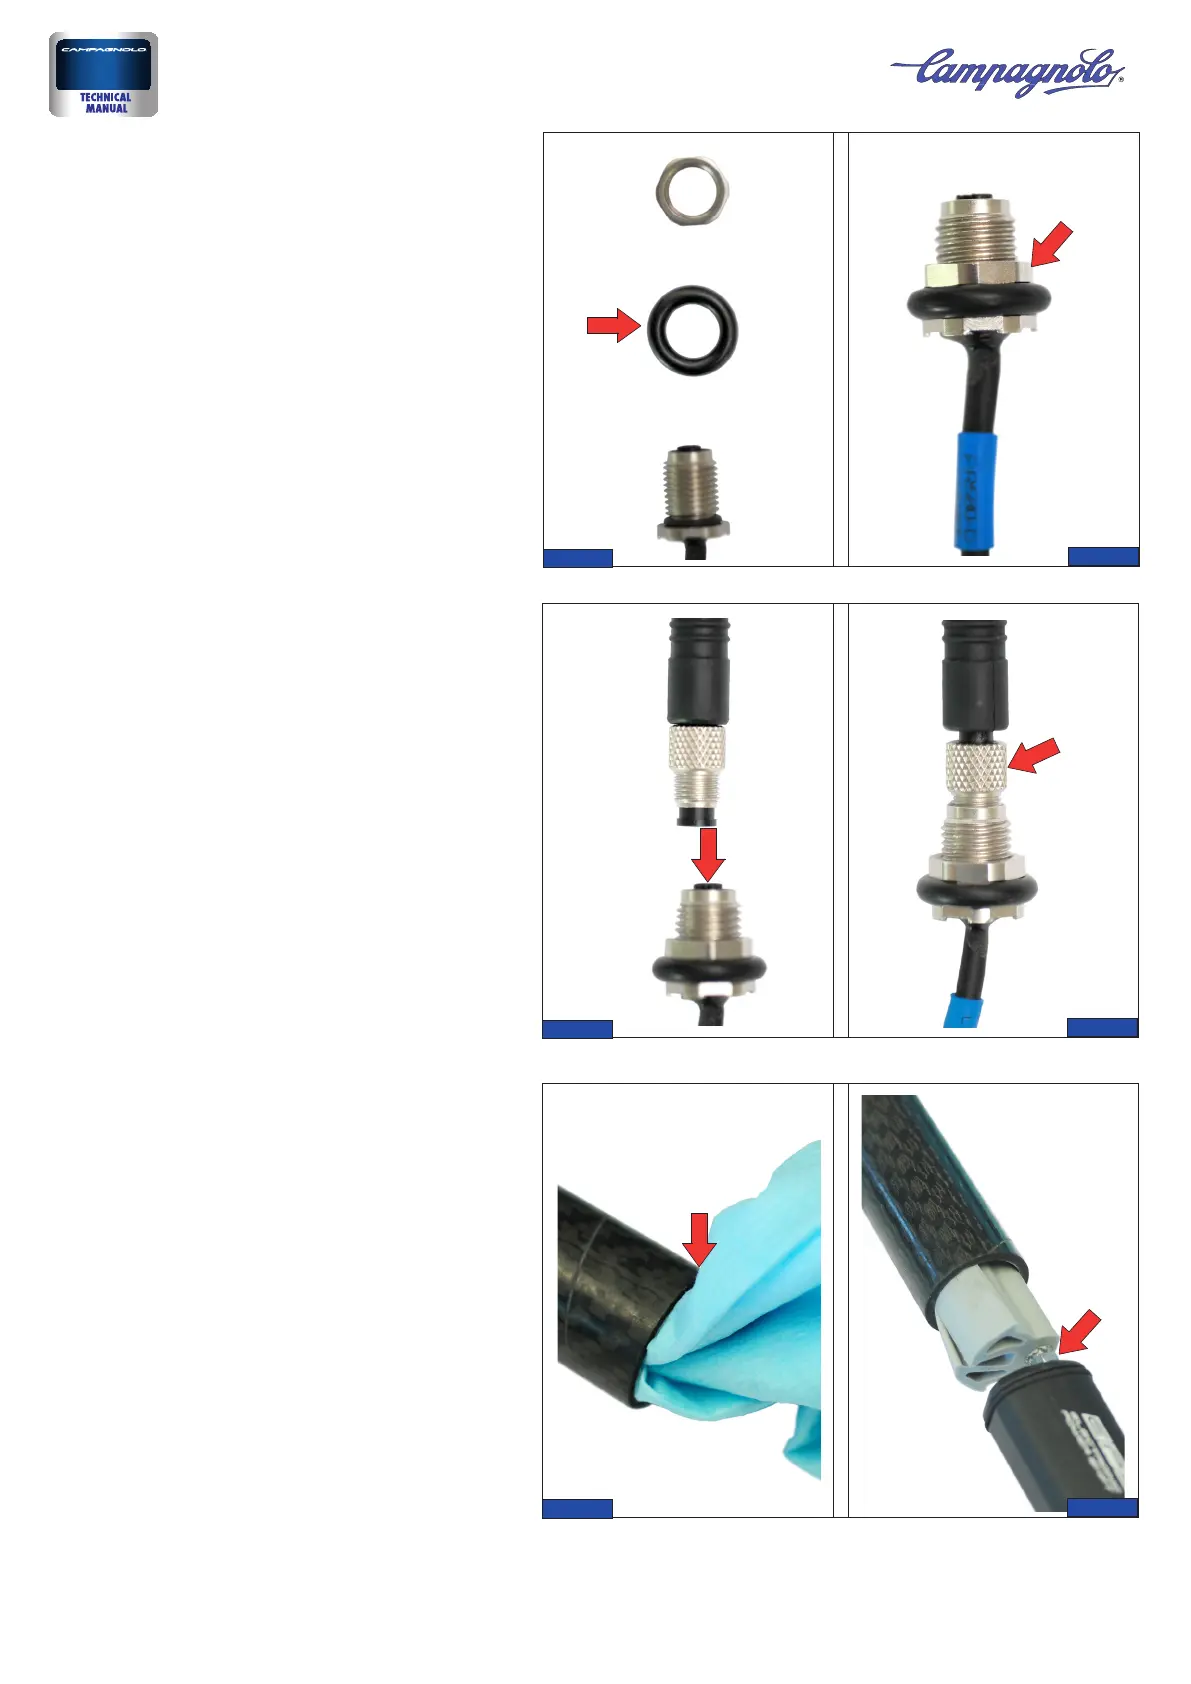
8) Clean and lubricate the internal surface of the seat
support tube in order to increase adherence between
the tube itself and the elastic support (Fig. 13).
9) Insert the elastic support into the entire length of
the seat support tube (Fig. 14) and, in the event of
an asymmetric seat support tube, determine the best
installation position of the elastic support.
Once the support has been inserted if the support is
too easily extracted return to Step 3.
• Gently turn the male connector of the extension in
the female connector of the power unit to find the cor-
rect alignment between the two connectors, then push
the male connector into the female connector (Fig. 11).
• Fully tighten the outer knurled bush of the exten-
sion connector (Fig. 12).
7) If it is necessary to fit the charging cable exten-
sion to the power unit, follow the instructions below,
otherwise proceed to step 8.
• Undo the nut from the power unit connector and
fit the O-ring included with the extension onto the
connector (Fig. 9).
• Apply and re-tighten the nut (Fig. 10).
EPS
9
10
11
12
13
14
4 Rev. 01 /10-2016
 Loading...