4
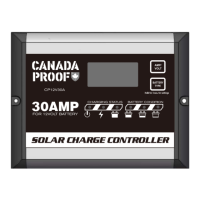
To protect the Battery and the Solar Panel, we strongly recommend that you place a
40A inline fuse on the positive wire on both the “Solar” and “Battery” Circuits. (As close
to the Battery /Panel as possible)
The Solar Controller has 4 terminals which are clearly marked ‘Solar’ and ‘Battery’.
There is a (12V) and earth (GND) terminal for each circuit.
Refer to the wiring diagram below.
Battery Connection Solar Array Connection
Length of
Wire
< 1m
6m 9m 12m
Size (AWG) 8 or 6 10 8 6
1. Using the Terminals supplied, crimp the terminals on your Solar Array wires and
connect to the Solar Panel like shown.
2. Using the Terminals supplied, crimp the terminals on your Battery wires and
connect to the Battery like shown.
When the connections are completed, the Solar Controller will start working
automatically.
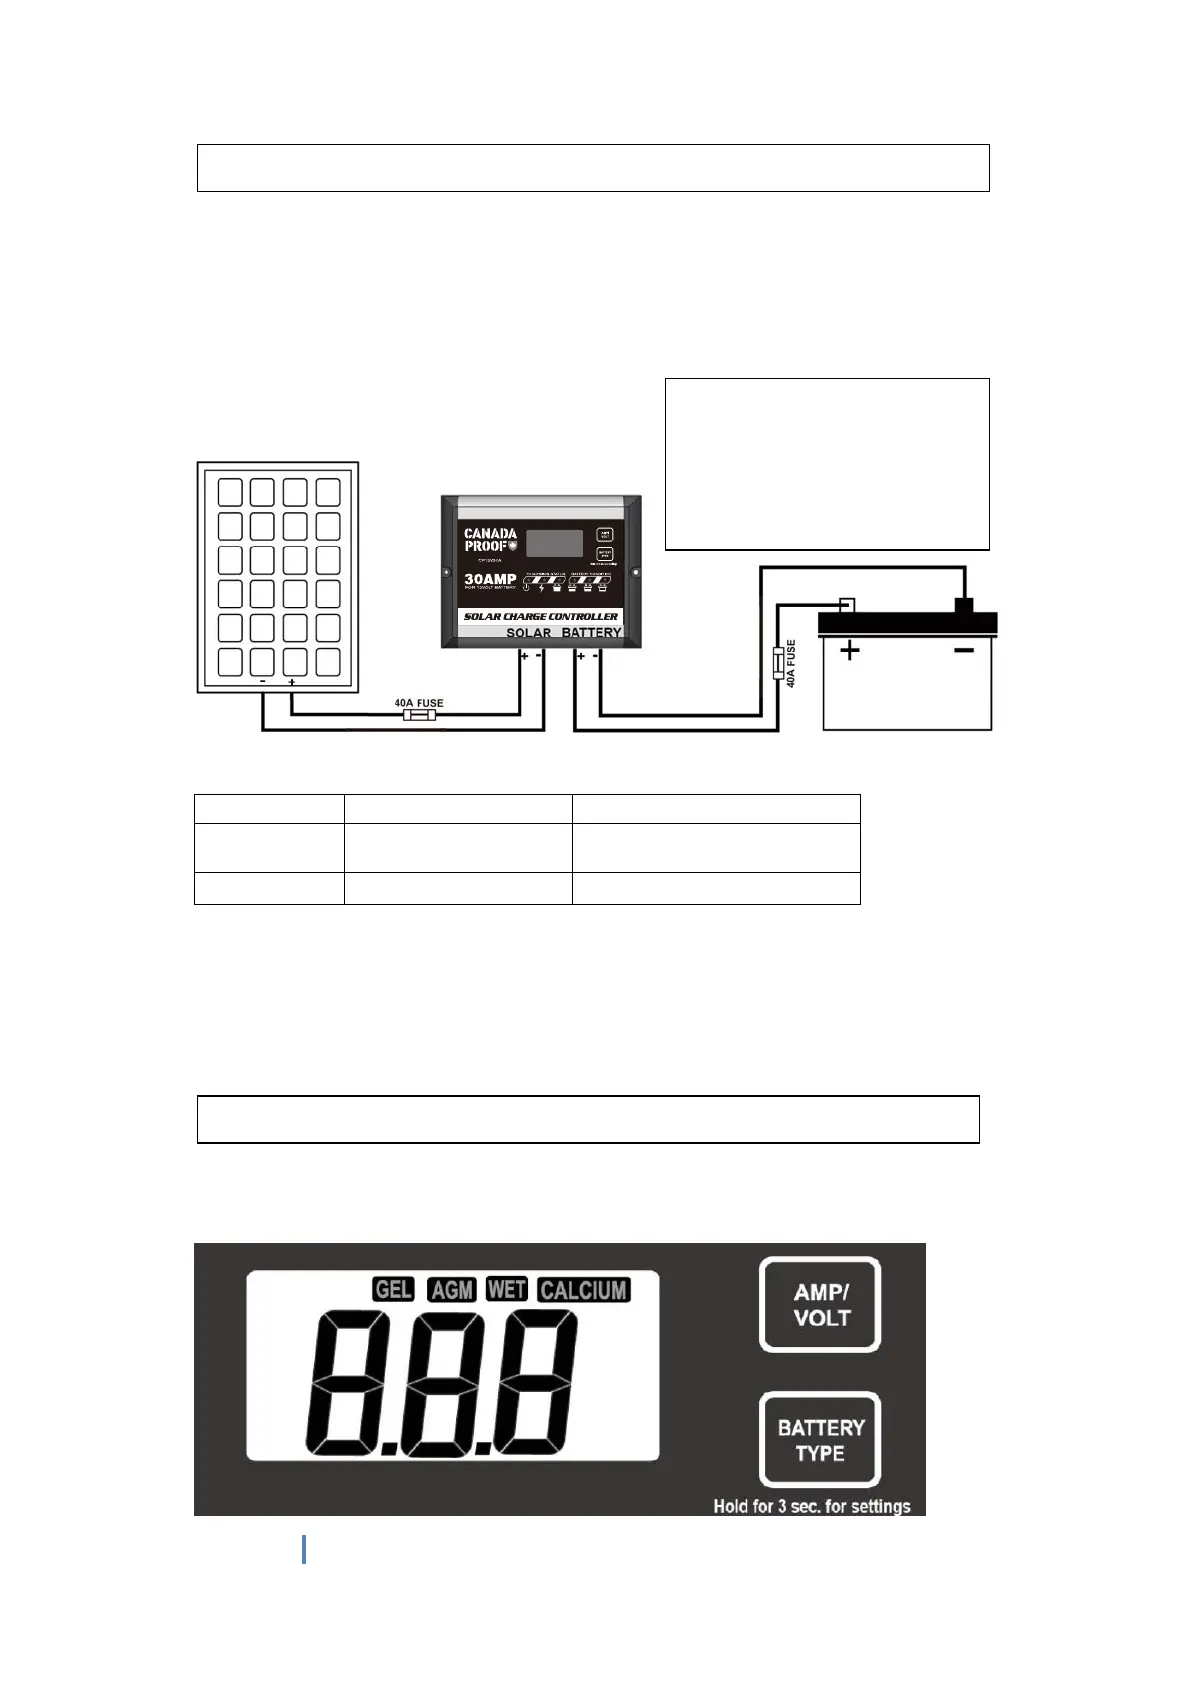
Please check your battery manufacturer’s specifications to select correct battery type.
The unit provides 4 battery types for selections: Gel, AGM, WET (conventional lead
acid), and Calcium.
Correct Wire Size:
Please refer to the wire size chart
below to determine the minimum
size wire needed for each
connection. This will also ensure
you get the best performance out
of your solar regulator.
WIRING CONNECTIONS
OPERATION - LCD DISPLAY