11
1
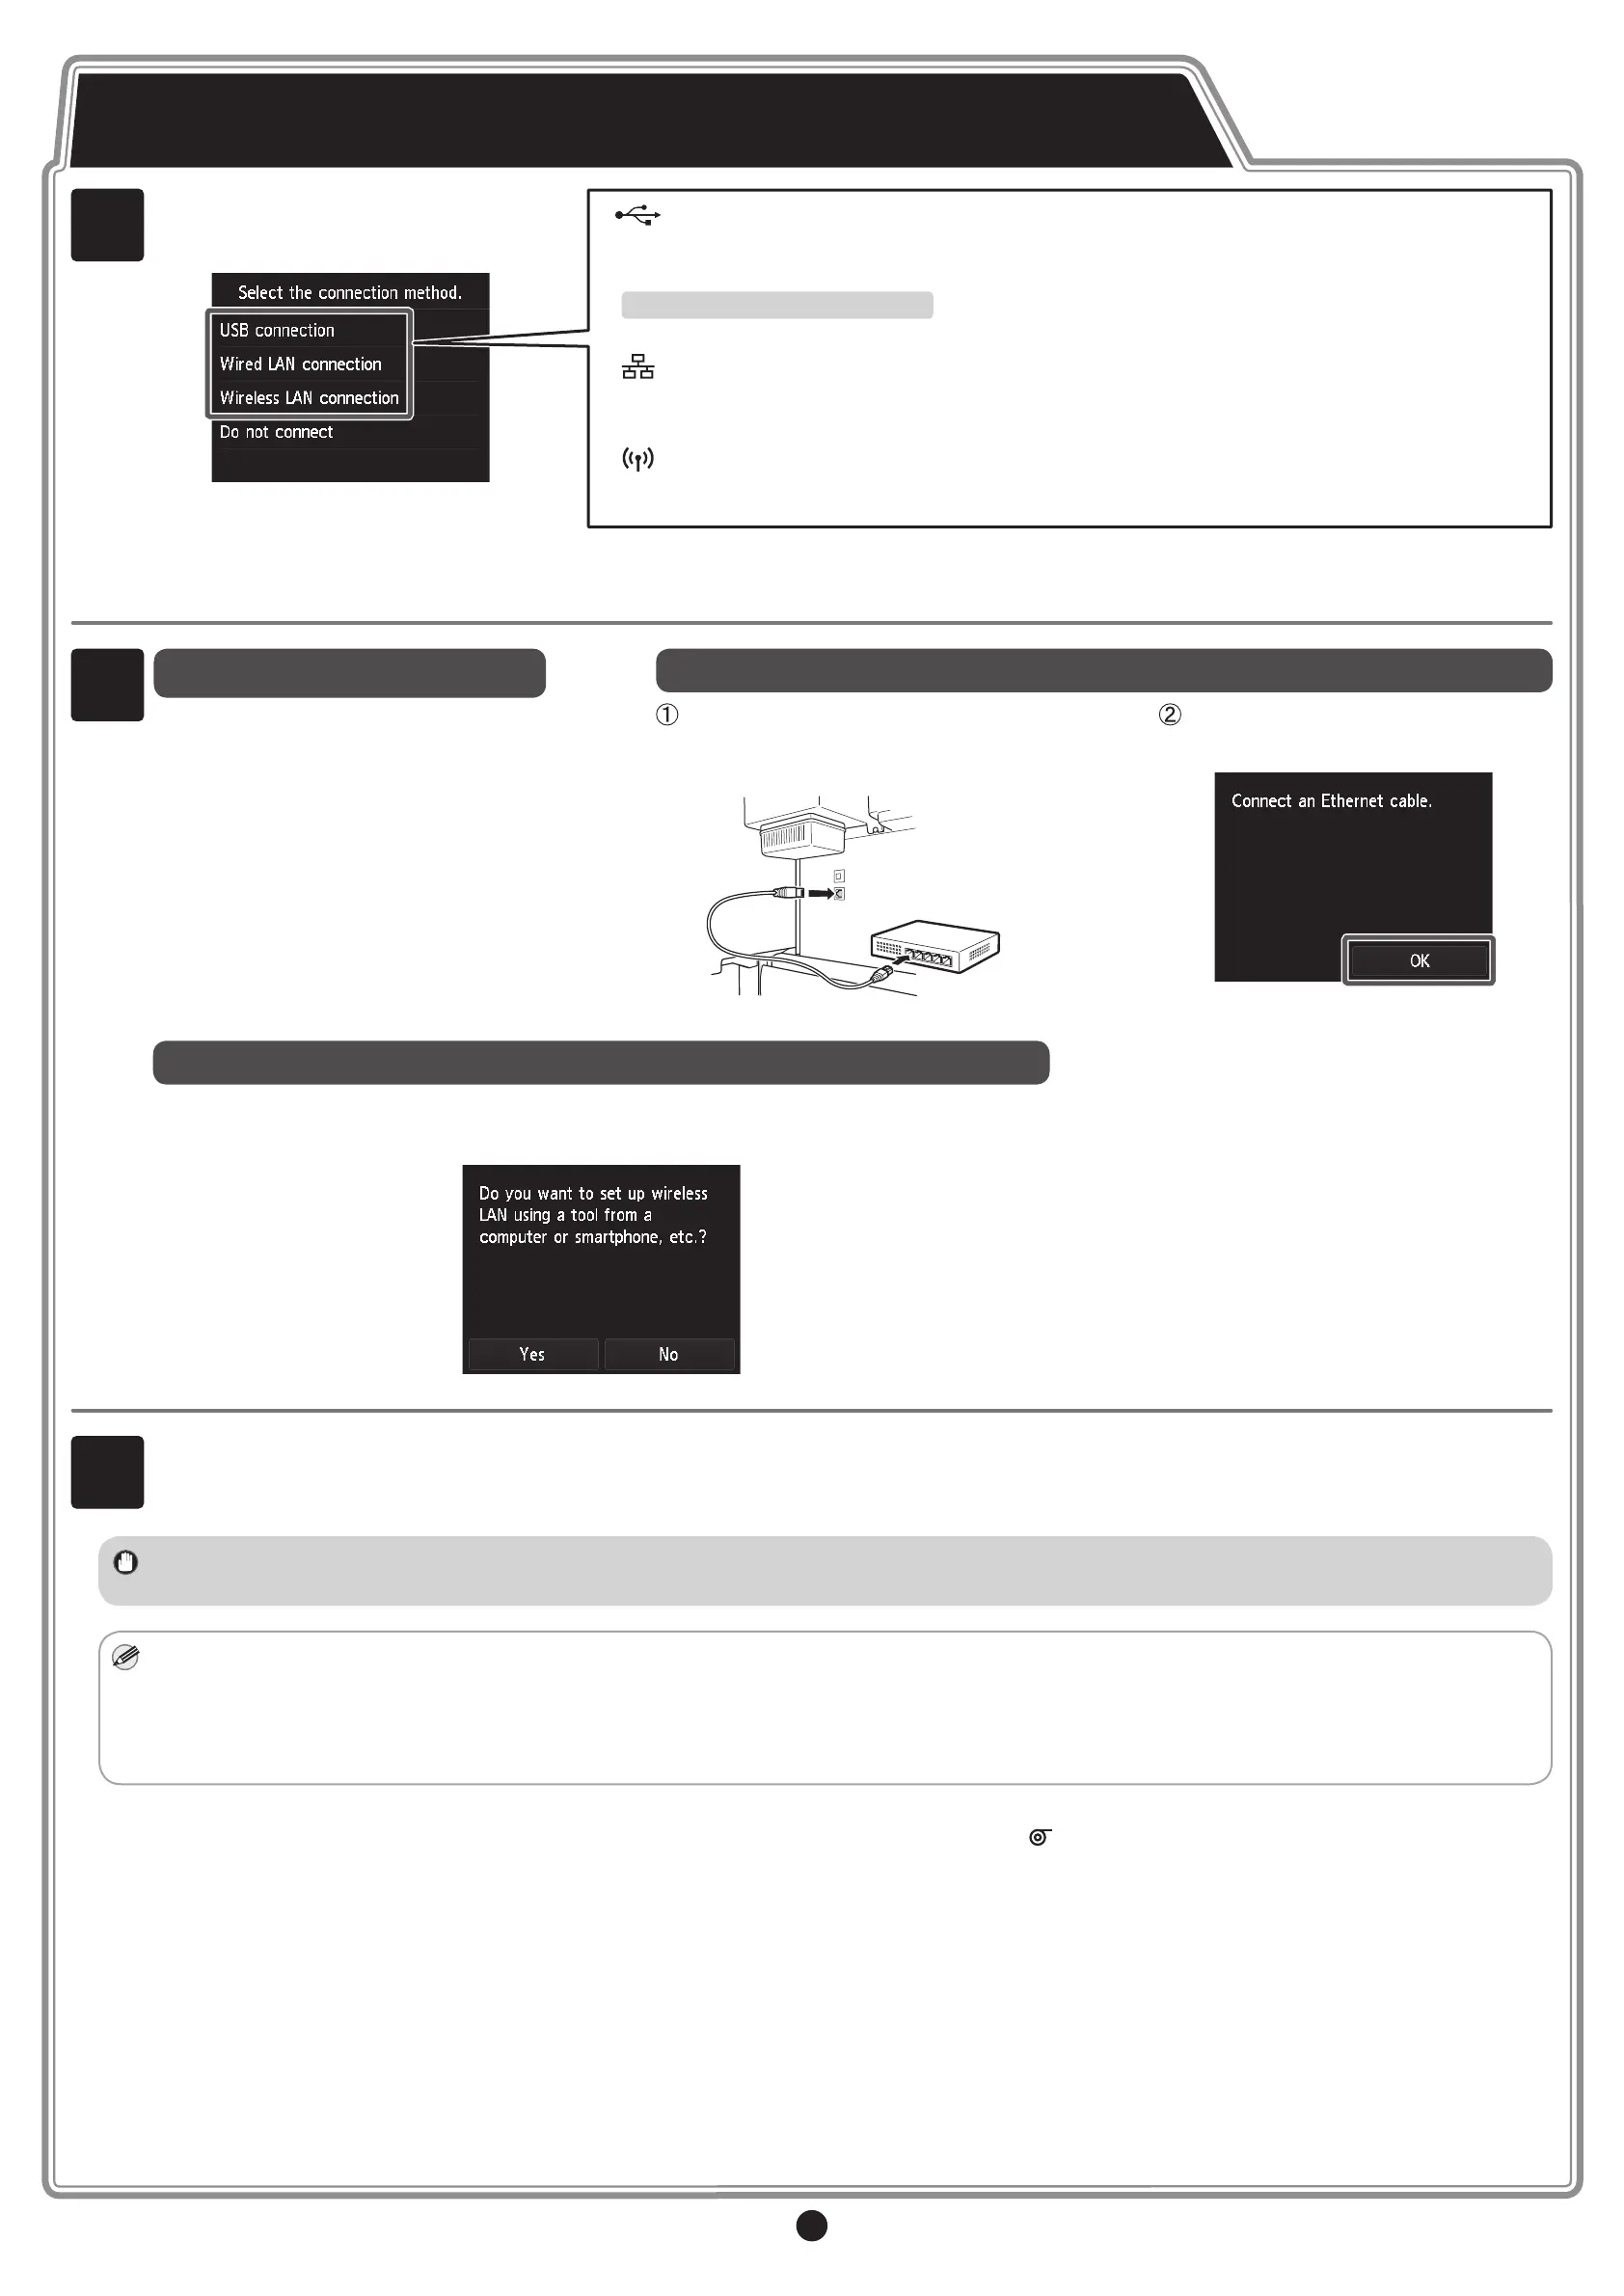
When the screen for selecting the
connection method appears, tap the
connection method to use.
Check the message about the connection
method and tap Yes if there are no
problems.
USB connection
This is the method for connecting the printer to a computer using a USB cable.
Only 1 printer can be connected.
Do not connect the USB cable yet.
Wired LAN connection
This is the method for connecting the printer to the network using a LAN cable.
Wireless LAN connection
This is the method for connecting the printer to the network without using a cable.
2
If you selected USB connection or
Do not connect
Proceed to step 3.
If you selected Wired LAN connection
Use the LAN cable to connect the
wired LAN connector on the back of
the printer to the hub port.
Tap OK, and then proceed to step 3.
3
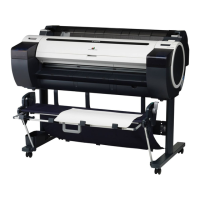
The paper starts feeding, and then the printer automatically starts charging the system with ink and adjusting the print head. Charging the system
with ink and adjusting the print head for the rst time takes about 55 minutes.
During this time, congure the printer and computer connection settings and install the software. (Refer to "Connect to the Printer" on p.12)
Important
• Do not open the covers of the printer or turn the power off while the ink is charging for the rst time and the print head adjustment is executing.
Note
• Charging the system with ink lls the system from the ink tanks to the print head. In addition, cleaning is performed to keep the printer in optimal condition. This
may cause the remaining ink indicator and maintenance cartridge capacity indicator to drop some amount. The starter ink tank is for rst-time installation. It is
recommended that you purchase replacement ink tanks quickly.
• If you selected Do not connect in step 1, setup is nished at this point. However, the connection settings and software installation will need to be performed
separately in order to use the printer from a computer. (Refer to "Connect to the Printer" on p.12)
To load roll paper after setup, tap the paper settings display area from the home screen, then (roll paper icon), then Replace paper, and follow the
instructions on the screen.
For details, refer to the Online Manual that can be accessed by the procedure in "How to Display the Online Manuals" (p.14).
Perform Print Head Adjustment and Select the Connection Method
(on the PRO-4000, PRO-4000S, PRO-6000, and PRO-6000S)
If you selected Wireless LAN connection
To congure the wireless LAN settings using a computer, tap Yes, or to congure the wireless
LAN settings on the printer, tap No, and proceed to step 3.
 Loading...