EasyManuals Logo

Canon imagePROGRAF TM-300 Setup Guide

Canon imagePROGRAF TM-300
14 pages
To Next Page IconTo Next Page
To Previous Page IconTo Previous Page
Page #8 background imageLoading...
Page #8 background image
8
6
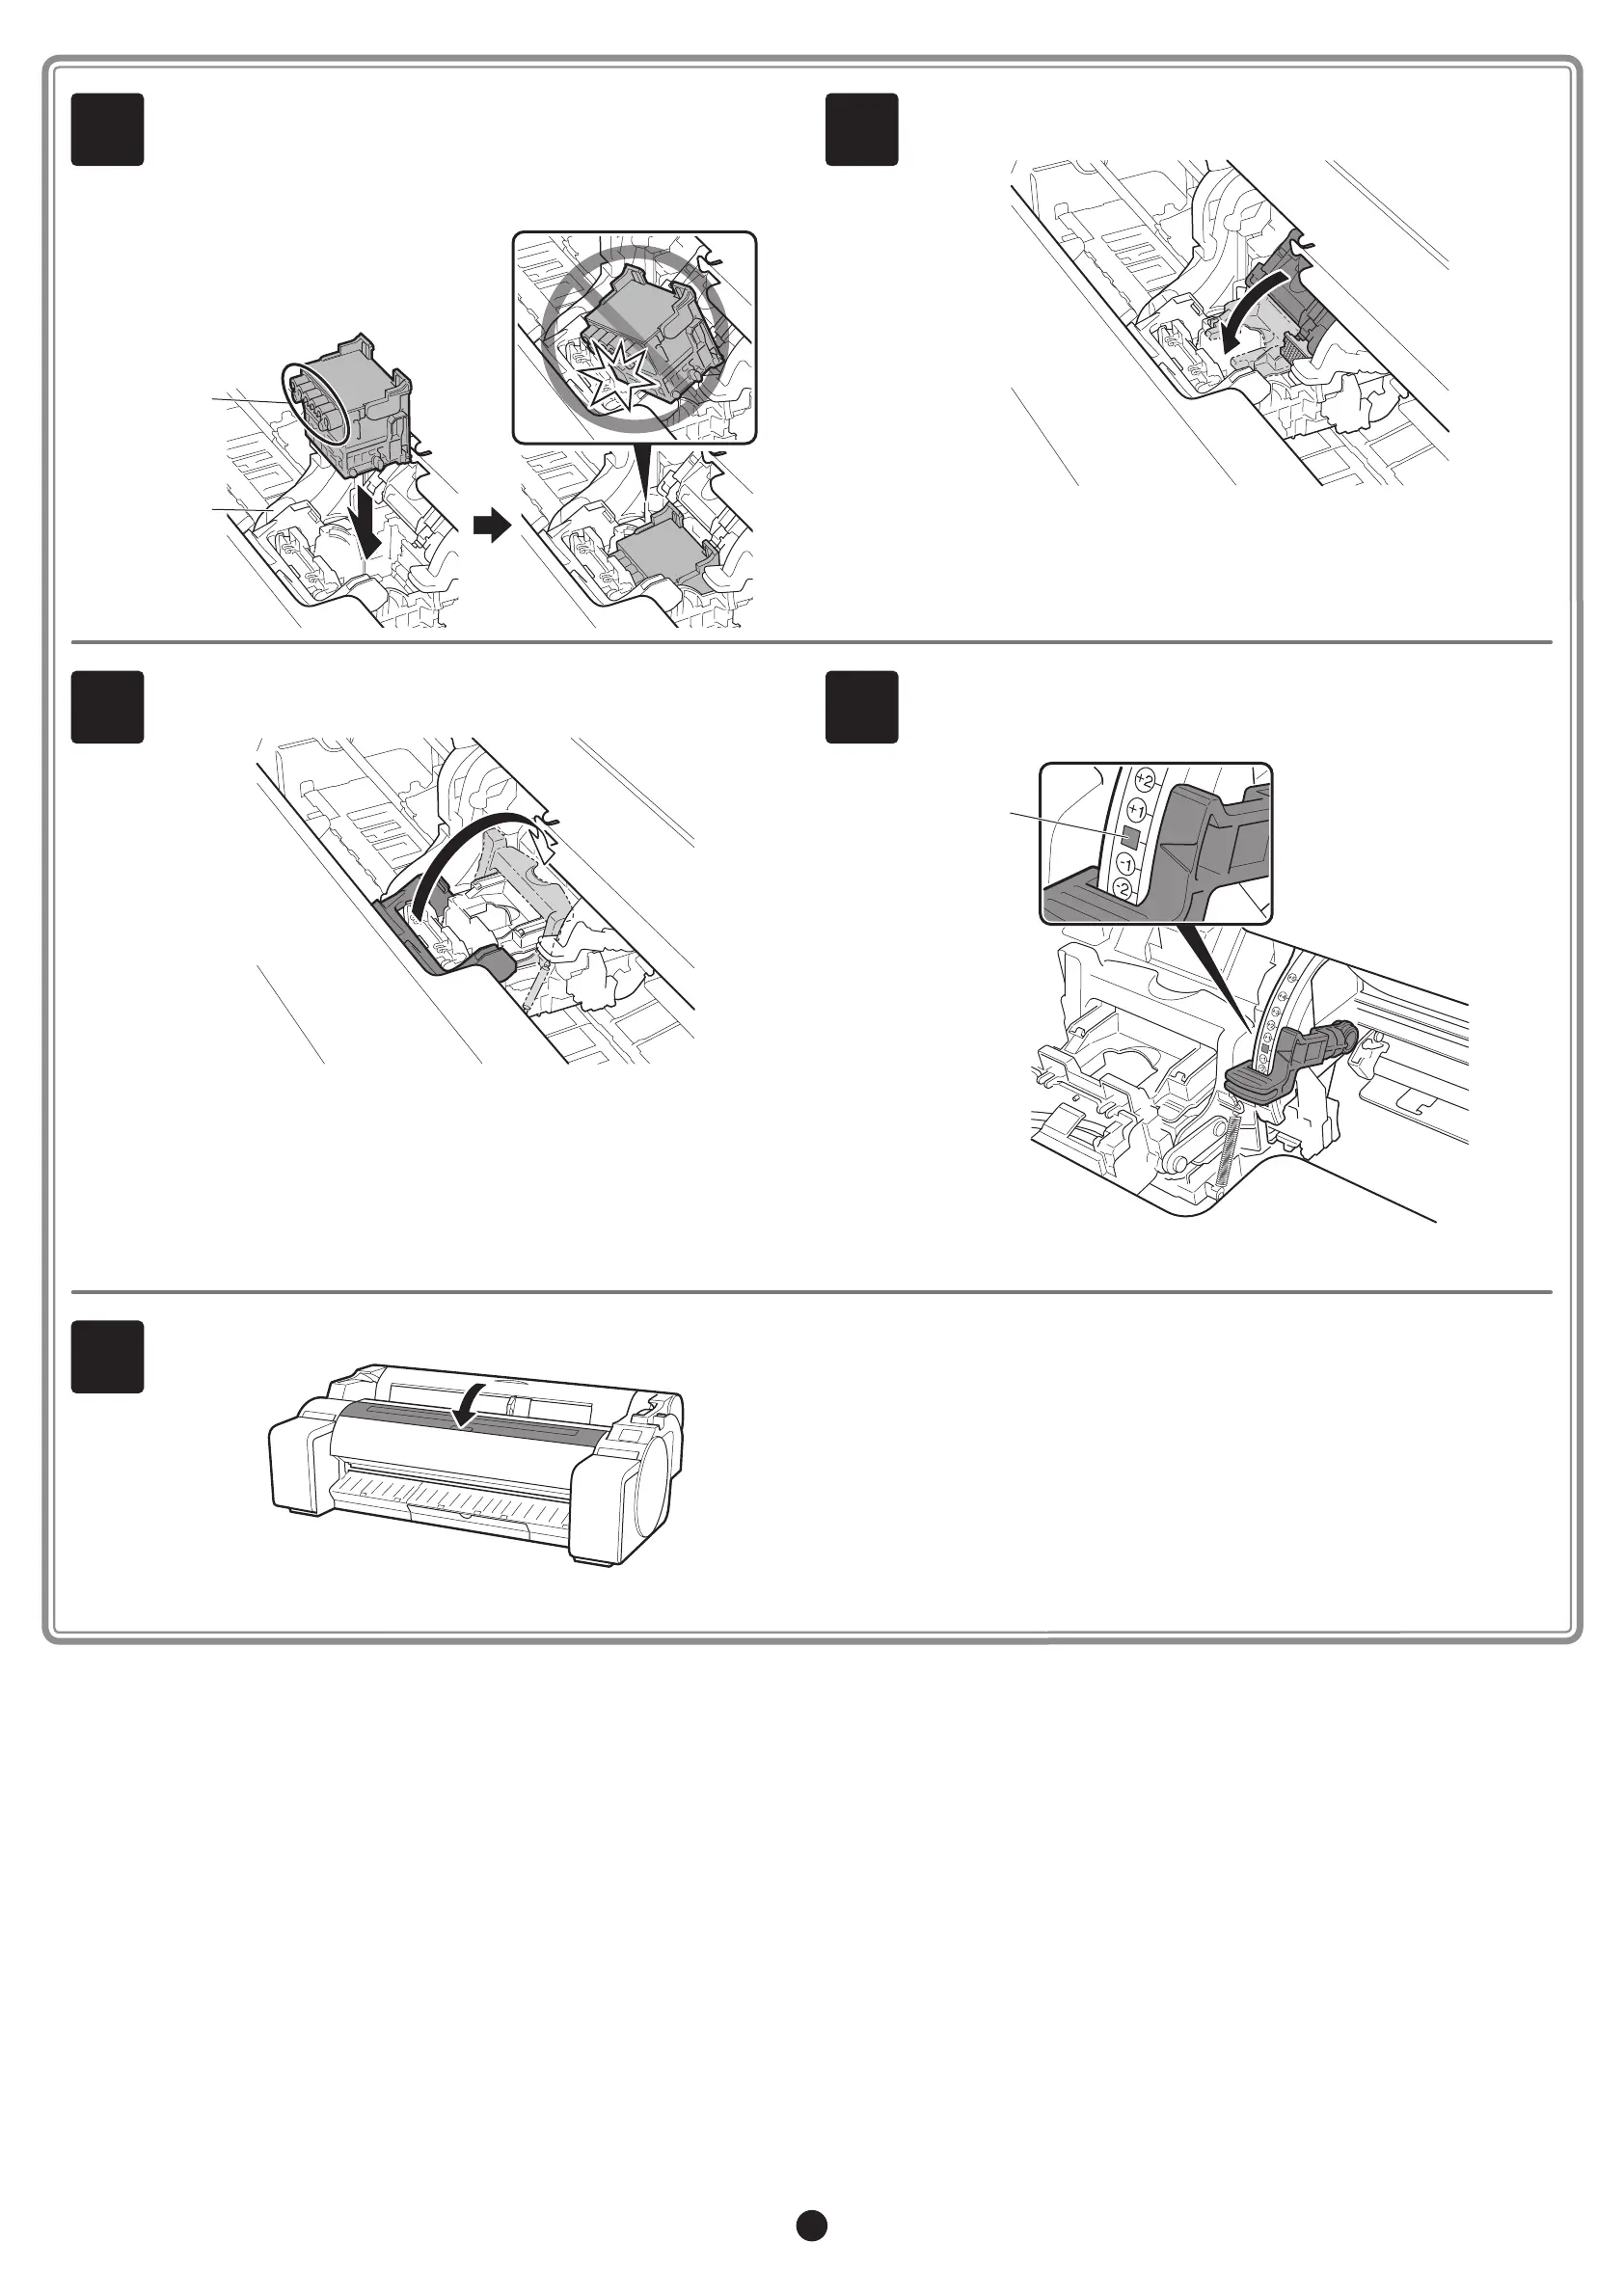
Insert the print head into the carriage (B) with the ink holes (A)
on the upper side and facing towards you as shown in the gure.
Carefully push the print head rmly into the carriage (B), ensuring
that the part covered by the protective caps does not touch the
carriage.
A
B
7
Pull the print head locking cover down toward the front to lock the
print head in place.
8
Push the print head lock lever all the way to the end.
9
Check that the angle adjustment lever is aligned with the position of
the red (A). If it is not aligned, align the angle adjustment lever with
the red (A).
A
10
Close the top cover.

Other manuals for Canon imagePROGRAF TM-300

Questions and Answers:

Question and Answer IconNeed help?

Do you have a question about the Canon imagePROGRAF TM-300 and is the answer not in the manual?

Canon imagePROGRAF TM-300 Specifications

General IconGeneral
Print Resolution2400 x 1200 dpi
Ink TypePigment ink
Media Thickness0.07 - 0.8 mm
InterfaceUSB 2.0, Ethernet, Wi-Fi
Memory2 GB
Operating SystemsWindows, macOS
Power Consumption (Sleep)3.6 W
Print TechnologyInkjet
Maximum Print Width24 inches
Number of Nozzles15, 360
Media Width8 - 24" (203.2 - 609.6 mm)
Media SizesA1, A2, A3, A4, Letter, Legal, Tabloid, Roll paper (24 inches)
Media TypesPlain Paper, Bond Paper, Coated Paper, Glossy Photo Paper
ConnectivityHi-Speed USB, Ethernet, Wireless LAN
Number of Ink Colors5 (MBK, BK, C, M, Y)

Related product manuals