This document provides a quick setup and operation guide for the Canon imageRUNNER 2645i/2645/2635i/2630i/2630/2625i/2625 series of multifunction devices. It covers initial configuration, basic functions like copying, printing, faxing, and scanning, as well as essential maintenance and troubleshooting.
Function Description:
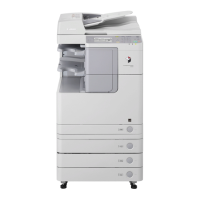
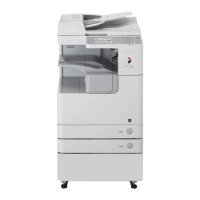
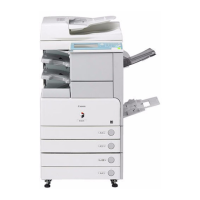
The Canon imageRUNNER 2600 series are multifunction devices designed for office environments, capable of copying, printing, faxing (on models with a fax board), and scanning. These devices are part of the imageRUNNER family, known for their integrated document management capabilities.
Important Technical Specifications:
The document does not explicitly list detailed technical specifications such as print speed, resolution, or memory. However, it implies certain features:
- Model Range: imageRUNNER 2645i/2645/2635i/2630i/2630/2625i/2625. The 'i' suffix likely indicates models with enhanced features or connectivity.
- Wireless LAN Module: Approved Wireless LAN Module (Model name: K30365) is included, indicating wireless connectivity options.
- Power Supply: Nominal mains input 230 V, 50 Hz (rated input 220 to 240 V, 50/60 Hz).
- Laser Product: Confirmed as a Class 1 laser product in IEC60825-1:2014 and EN60825-1:2014.
- Optional Equipment: Cassette Feeding Unit-AN and Super G3 FAX Board are mentioned as optional, affecting available functions and screen displays.
- Consumables: Canon NPG-84 Toner Black toner cartridge and Staple-P1 (for Inner Finisher-J option) are specified.
Usage Features:
Initial Setup:
Upon first power-on, the "Setup Guide" screen is displayed automatically.
- CASE1 (Copy Function First): Allows immediate use of copying after setting:
- Language/Keyboard Layout Settings
- Toner mixing
- Paper Size/Type Settings
After these, users can press on the "Authentication Login" screen to complete the first setup, enabling a limited variety of functions including copying.
- CASE2 (All Functions): Requires Administrator privileges for full configuration:
- Language/Keyboard Layout Settings
- Toner mixing
- Paper Size/Type Settings
- Logging In as an Administrator (default PIN: '7654321')
Once logged in, the Administrator can configure:
- User Authentication Settings
- Date/Time Settings
- Network Setting
- Fax Settings (if fax board is installed)
- Gradation Adjustment
- Report Printing
Additional settings like Network Environment, Installing Drivers, and E-mail/I-Fax Communication are also available.
Document Placement:
- Platen Glass: For single pages, books, magazines, or newspaper clips. Place the document with the scan side face down, fitting it into the corner.
- Feeder (if attached): For continuous scanning of multiple pages. Place documents with the scan side face up, adjusting slide guides.
Operation Panel:
- Touch Panel Display: Main interface for operation.
- [Settings/Registration] key: Accesses settings.
- [Energy Saver] key: For power saving.
- [Start] key: Initiates operations.
Basic Functions:
- Copying:
- Place original.
- Select on Home screen.
- Specify settings (e.g., 1-Sided/2-Sided, Enlarging/Reducing).
- Enter number of copies.
- Press [Start].
- Printing:
- Open document on computer, select print function.
- Select printer driver, then [Preferences] or [Properties].
- Specify paper size, source, type, and other print settings (e.g., 2-sided, Booklet Printing).
- Select [OK], then [Print] or [OK].
- Faxing (if FAX Board is installed):
- Place original.
- Select on Home screen.
- Enter destination.
- Specify fax settings (e.g., Sequential Broadcast, Memory Reception, PC Fax).
- Press [Start].
- Scanning:
- Place original.
- Select or on Home screen.
- Select scan type (e.g., Store in USB memory device, Send e-mail, Send to file server, Scan from computer using scanner driver).
- Enter necessary information.
- Press [Start].
Loading Paper:
- Paper Drawer (1 and 2):
- Pull out the drawer.
- Slide light blue knobs to adjust paper guides to the paper size markings.
- Fan the paper stack, align edges, and load with print side face up, ensuring not to exceed the line.
- Place the drawer back into the machine.
- If paper size/type changed, replace label and update settings via <Settings/Regist. Shortcut> -> .
- Multi-Purpose Tray:
- Load one sheet at a time for coated or poorly feeding paper.
- Adjust paper guides to paper size markings. Pull out tray extension for large paper.
- Fan the paper stack, align edges, and load with print side face down, ensuring not to exceed the line.
- Check paper size/type on screen and press . If incorrect, change manually via -> to specify paper size and type.
Maintenance Features:
Troubleshooting:
- Machine Not Seem to Work:
- Check if power is ON and not in sleep mode.
- If display and power button are not lit, press the power switch.
- Check if power cord is connected correctly.
- If issues persist, consult User's Guide.
- Paper Jams:
- On-screen instructions guide clearing jams. Example: "Open the cover on the right side of the main unit."
- Replacing Consumables:
- Toner Cartridge: Canon genuine toner cartridge (NPG-84 Toner Black).
- Staple: Staple-P1 (for Inner Finisher-J option).
- Printing Results Not Satisfactory:
- Images Shifted/Slanted: Adjust paper guides (both in paper drawer and multi-purpose tray) exactly.
- Irregularities/Faint Images:
- Solution 1: Paper may have absorbed moisture; replace with new paper.
- Solution 2: Perform gradation adjustment via <Adjustment/Maintenance> -> -> .
- Black Streaks in Images (feeder models only):
- Clean document feed scanning areas: Open feeder, clean lower side scanning area with supplied glass-cleaning sheet or a water-dampened cloth, then wipe dry. Do not use glass cleaner or alcohol.
- If streaks persist, execute (refer to User's Guide).
- Bleed-through Occurs:
- Solution 1: Set original type properly via <Copy (Prevent Bleed-Thru)> on Home screen, then confirm.
- Solution 2: Set lower background density via function on Home screen -> -> -> Background Density [Adjust].
Important Safety Instructions:
- Installation:
- Avoid locations with blocked ventilation, dampness, direct sunlight, high temperatures, open flames, flammable substances, strong vibrations, or near equipment generating magnetic/electromagnetic waves.
- Ensure proper ventilation.
- Avoid condensation.
- Do not install near computers, TVs, radios, or on low thermal resistance surfaces.
- For altitudes above 3,000 m, hard disk operation may be affected.
- Connecting Telephone Line: Connect only to public switched telephone networks (PSTN). Do not connect to digital or dedicated lines.
- Wireless LAN: Install within 50 meters of router, avoid obstructions, keep away from other radio-emitting devices, and medical equipment.
- Moving the Machine: Contact authorized Canon dealer.
- Power Supply:
- Use specified voltage.
- Connect to grounded socket with provided power cord.
- Do not modify power cord, place heavy objects on it, or plug/unplug with wet hands.
- Avoid extension cords or multi-plug strips.
- Insert plug completely.
- Unplug during thunderstorms.
- Ensure stable voltage.
- Keep power cord away from heat sources.
- Handling:
- Unplug immediately and contact Canon dealer if unusual noise, smell, smoke, or heat occurs.
- Do not disassemble or modify.
- Keep children away from power cords, cables, gears, and electrical parts.
- Do not use flammable sprays.
- Turn OFF power and unplug cables before moving.
- Do not touch metal part of USB connector when plugging/unplugging with power plug in AC outlet.
- If using a cardiac pacemaker, move away if abnormalities are felt.
- Do not place heavy objects on machine.
- Unplug if not used for long periods.
- Use caution when opening/closing covers and near rollers.
- Inside machine and output slot can be hot; avoid contact.
- Close feeder/platen glass cover gently.
- Do not insert hands/fingers into feeder/platen glass cover.
- Do not insert hand into machine when paper drawer is removed.
- Press [Energy Saver] for safety when not in use for long periods.
- Laser Safety: Class 1 laser product. Do not open covers other than instructed.
- Fixing Unit: Avoid prolonged exposure to heat from fixing unit during paper jam removal or inspection.
- Consumables:
- Do not throw toner cartridges/waste toner containers into open flame or store near open flame.
- If toner spills, gather carefully or wipe with damp cloth, avoid inhalation. Do not use vacuum cleaners without dust explosion safeguards.
- Keep toner and consumables out of reach of children.
- If toner touches skin/clothes, wash immediately with water. If ingested or in eyes, consult physician.
- Do not dismantle toner cartridge.
- Do not touch electrical contacts.
- Store toner cartridges in a cool location, away from direct sunlight, and not upright.