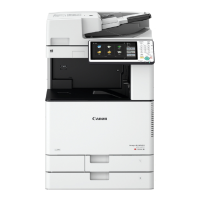
Do you have a question about the Canon imageRUNNER ADVANCE C3525i II and is the answer not in the manual?
| Print Resolution | 1200 x 1200 dpi |
|---|---|
| Copy Resolution | 600 x 600 dpi |
| Scan Resolution | 600 x 600 dpi |
| Hard Disk Drive | 250 GB |
| Paper Input Maximum | 2, 300 sheets |
| Paper Output Capacity | 250 sheets |
| Type | Color Laser |
| Functions | Print, Copy, Scan |
| Copy Speed | 25 cpm |
| Fax Resolution | 400 x 400 dpi |
| Paper Capacity | 1, 200 sheets |
| Max Paper Size | 12" x 18" |
| Duplex Printing | Yes |
| Network Connectivity | Ethernet, Wi-Fi |
| Operating System Compatibility | Windows, macOS, Linux |
| Warm-up Time | 30 seconds or less |
| Memory | 3.0 GB RAM |
| Interface | USB, Ethernet |
| Supported Media Types | Plain, Heavy, Recycled, Color, Bond, Label, Envelope |
| Supported Media Sizes | Letter, Legal, Executive, A4, A5, B5 |
| Supported Media Weights | 14 lb Bond to 80 lb Cover |
| Scanner Type | Flatbed, ADF |
| Display | 10.1-inch Touchscreen |
| Power Source | 120 V AC, 60 Hz |
| Power Consumption | 1.5 kW |
| Print Speed | Up to 25 ppm (Letter) |
Prepare for customer visit by checking machine status and history via the Snapshot tool.
Inquire about machine condition and specific issues like copy quality, errors, or jams.
Execute the COM-TEST to check machine communication status.
Inspect drum counters and replace drums if they exceed specified thresholds.
Check P/U roller counters and replace rollers if they exceed 100% usage.
Remove and clean the ITB unit and its cleaning blade area.
Clean the registration patch sensor unit carefully, avoiding alcohol and dry wiping.
Clean the area around the fixing unit after its removal.


