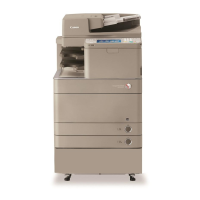
Do you have a question about the Canon imageRUNNER ADVANCE C5255 and is the answer not in the manual?
| Internal memory | 2 GB |
|---|
| Dimensions (WxDxH) | 620 x 700 x 1082 mm |
|---|
Instructions on how to position documents for copying on feeder or platen.
How to choose the 'Copy' option from the main device menu.
How to input the desired quantity of copies using the numeric keypad.
Starting the copy process after all settings are configured.
Introduces the main screen for configuring copy settings and options.
Options for booklet creation, page arrangement, and inserts.
Adjusting scan quality based on original type and exposure levels.
Options for collating, stapling, and special copy features like transparency sheets.
Instructions for positioning documents on the feeder or platen.
How to access the fax feature from the main device menu.
Entering fax numbers or selecting destinations from the address book.
Starting the fax sending process after configuring settings.
Managing fax destinations via Address Book, One-Touch, and details.
Configuring resolution, scan size, and direct send options.
Adjusting original type, density, and sharpness for fax scanning.
Options for two-sided originals, book scanning, and different size originals.
Instructions for positioning documents on the feeder or platen.
How to access the Scan and Send feature from the main device menu.
Selecting destinations using the address book or other methods.
Starting the data transmission process after configuration.
Using Address Book, One-Touch, or New Destination for sending.
Accessing previous, favorite, and color/resolution settings.
Specifying file formats and adding Cc/Bcc recipients.
Adjusting original type, density, and sharpness for scanning.
Instructions for positioning documents on the feeder or platen.
How to access the Scan and Store feature from the main device menu.
Choosing a mail box or other storage location for scanned files.
Starting the scanning operation after selecting storage.
Adjusting color, resolution, and original type for scan quality.
Setting file format, copy ratio, and scan size.
Managing favorite settings, defaults, and 2-sided original settings.
Adjusting density and specifying file names for scanned data.
Accessing the stored files feature from the main menu.
Choosing the specific mail box or storage for files.
Choosing files from the list and initiating the print command.
Configuring print settings and starting the printing process.
Accessing the stored files feature from the main menu.
Choosing the specific mail box or storage for files.
Choosing files from the list and initiating the send command.
Configuring destination and starting the sending process.
Screens for selecting files and performing basic actions like print or send.
Menus for editing files, displaying details, and deleting.
Merging, inserting pages, deleting pages, and changing file names.
Adding new files via scan or duplicating existing files.
Selecting color, paper, and managing print settings.
Starting printing, setting number of copies, and printing samples.
Options for favorite settings, merging files, and storing settings.
Options for two-sided printing, finishing, and specifying print range.
Adjusting print resolution and halftone methods.
Matching paper size and enlarging the print area.
Printing password-protected documents and comments.
Booklet printing, N-on-1 layouts, and enlarge/reduce options.
Overview of basic send functions for stored files.
Screen for specifying destination details for sending files.
Using Address Book, One-Touch, or New Destination for sending.
Sending to oneself, personal folders, and file formats.
Understanding the Remote UI's purpose and situations where it's useful.
Step-by-step guide to activate the Remote UI feature on the machine.
Steps to access the machine's web interface using its IP address.
Checking job status and configuring machine settings via Remote UI.
Opening the print dialog from the application's File menu.
Accessing and configuring printer driver settings.
Configuring desired print options like layout and finishing.
Initiating the print process after all settings are finalized.


