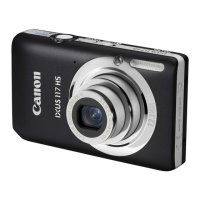
Do you have a question about the Canon IXUS 115 HS and is the answer not in the manual?
Details how to access and use the included PDF manuals from the CD-ROM for further guidance.
Covers test shots, copyright, warranty, LCD details, and camera body temperature warnings.
Provides instructions on how to attach the camera strap and hold the camera securely for shooting.
Provides information on the approximate number of shots and playback time based on CIPA standards.
Explains the icons and messages displayed on the screen to indicate the battery's charge state.
Offers tips on effectively using the battery and charger for optimal performance and longevity.
Guides on inserting the battery and memory card into the camera for operation.
Explains that the shutter sound length can vary depending on the scene and shooting conditions.
Explains that scene icons appear to indicate the camera's determined scene for optimal settings.
Guides users on how to select a subject for focus and maintain it using Servo AF for shooting.
Provides an overview of shooting times for movies based on memory card capacity and default settings.
Lists the minimum hardware and software requirements for transferring images to a computer.
Details the steps for installing the camera software from the included CD-ROM on both Windows and Macintosh systems.
Explains how to connect the camera to the computer using the interface cable for image transfer.
Guides users on how to launch the CameraWindow application on Windows and Macintosh for image transfer.
Lists the accessories that are included with the camera package.
Details separately sold power accessories, including battery chargers and AC adapter kits.
Explains how to use the mode switch to select different shooting modes for varied photographic scenarios.
Details how to change the screen display during shooting and playback to show different information levels.
Explains the automatic brightening of the display in dark conditions and potential screen noise.
Explains that the histogram graph in detailed display shows brightness distribution to help judge exposure.
Guides users on how to silence or adjust camera operation sounds, including a shortcut method.
Details how to adjust screen brightness using the camera's menu system for optimal viewing comfort.
Explains how to use a dedicated button to quickly adjust screen brightness to maximum, regardless of the menu setting.
Details how to check the current time by pressing and holding a specific button, with options for display color and orientation.
Explains how to disable the digital zoom function through the camera's menu settings to maintain image quality.
Details how to adjust the self-timer delay (0-30 seconds) and the number of shots (1-10) for personalized shooting.
Explains how the Portrait mode creates a soft effect, ideal for capturing people's images.
Describes the Kids&Pets mode designed to capture moving subjects like children and pets without missing opportunities.
Details how to take city nightscapes by combining continuous shots to reduce shake and noise without a tripod.
Explains how the Low Light mode helps reduce camera shake and subject blur when shooting in dark environments.
Guides on capturing brightly lit people on sandy beaches, compensating for strong reflected sunlight.
Covers shooting aquatic life and underwater scenery, recommending the use of a waterproof case.
Explains how to shoot trees and leaves in vivid colors, capturing new growth, autumn leaves, or blossoms.
Explains how to view movies created with the Movie Digest function, noting battery consumption and image quality limitations.
Details how to shoot images with vivid and intense colors using the Super Vivid effect.
Explains how to create posterized shots that resemble old posters or illustrations.
Guides on retaining a single color in an image while converting the rest to black and white for a unique composition.
Explains how to swap one color in an image for another during recording, allowing for creative color manipulation.
Details how to shoot images in black and white, sepia, or blue and white tones for artistic effects.
Explains how the camera automatically shoots when it detects a smile, even without pressing the shutter button.
Details how the camera shoots approximately two seconds after detecting a wink, useful for group photos with the photographer.
Explains how the camera detects a new face and automatically shoots, facilitating group photos where the photographer is included.
Explains that continuous shooting sets group images together, showing only the first image in the group with an indicator.
Provides troubleshooting steps for obtaining correct exposure when shutter speed and aperture values appear in orange.
Guides on manually setting white balance by matching the light source of the actual shooting scene for accurate color reproduction.
Explains how to manually adjust white balance for color compensating filter effects, using blue (B) and amber (A) settings.
Discusses the effects of lowering ISO for sharper images versus raising it for faster shutter speeds, noting potential image coarseness.
Suggests choosing manual i-Contrast levels (Low, Medium, High) for more control over brightness and contrast adjustments.
Explains how to fine-tune contrast, sharpness, and color saturation for five different levels, offering personalized image tones.
Details how to adjust specific color parameters like red, green, blue, and skin tones at five distinct levels for customized image appearance.
Recommends using a tripod and shooting in a specific mode to prevent blur and ensure focus in macro photography.
Explains Face AiAF's function in detecting faces for automatic focus, exposure, and white balance adjustments.
Introduces Tracking AF for selecting and focusing on a specific subject, ensuring it stays in focus even when moving.
Describes the Center AF frame mode, which locks focus on the center of the image, ideal for specific point focusing.
Explains Focus Lock, allowing users to recompose the shot after locking focus by keeping the shutter button half-pressed.
Lists additional shooting modes available for recording various types of movies, such as Super Slow Motion.
Provides a table showing frame rates and estimated playback times for super slow motion movies.
Explains how to view super slow motion movies and use software to adjust playback speed.
Presents a table detailing image quality settings, recording pixels, frame rates, and estimated shooting times for different memory card capacities.
Explains how to use the index display to view multiple images simultaneously for quick searching and selection.
Describes how to scroll through images in a line and jump by shooting date for efficient searching.
Guides on selecting and viewing movies created with the Movie Digest function by date.
Lists available search filters such as Favorites, Shot Date, My Category, and Still image/Movie for displaying specific images.
Describes how filtered playback allows viewing and processing of selected images, noting that changing categories or editing cancels the filtered view.
Explains how to customize slideshow settings, including repeat playback, transition effects, and display time per image.
Details how to view images from High-speed Burst shots individually, and how to process all grouped images at once.
Guides on how to ungroup images taken in High-speed Burst mode to view and manage them individually.
Explains how to connect the camera to a standard TV using the AV cable to view images and troubleshoot display issues.
Advises on checking and switching the camera's video output setting (NTSC/PAL) to match the TV system for correct display.
Details connecting the camera to an HD TV via an HDMI cable for viewing images.
Explains how to control camera playback and image viewing on compatible TVs using the TV's remote control via HDMI CEC.
Guides on how to protect individual images from accidental erasure by applying a protection setting.
Explains how to access the Protect function via the menu to select images or a range for protection.
Details the process of selecting and protecting individual images one by one, with confirmation steps.
Explains how to protect a range of images by selecting a starting and ending image.
Describes the final step of applying the protection setting to selected images or all images.
Guides on selecting all images for protection at once, simplifying the process for batch protection.
Details the process for selecting and erasing individual images from the camera.
Details how to select a range of images to erase, allowing for batch deletion of specific image sequences.
Guides on selecting all images on the memory card for erasure, providing a quick way to clear the card.
Guides on accessing the Favorites function through the camera's menu to tag or untag images.
Explains how to complete the favorite tagging process, ensuring images are marked correctly.
Guides on selecting a category for images, allowing users to organize their photos based on shooting conditions or detected subjects.
Guides on selecting individual images and assigning them to specific categories for better organization.
Guides on selecting a range of images to categorize, allowing for efficient batch organization of photos.
Suggests using manual i-Contrast levels (Low, Medium, High) for more control over brightness and contrast adjustments.
Introduces PictBridge compliant printers and notes that this chapter uses SELPHY CP series printers for examples.
Explains how to easily print images by connecting the camera to a PictBridge compliant printer using the supplied interface cable.
Guides on choosing print settings such as date, file number, print type, and image optimization options.
Explains how to trim a portion of an image for printing and adjust the frame size and position.
Guides on selecting paper size, paper type, and print layout options like Bordered, Borderless, N-up, and ID Photo.
Details how to print ID photos, specifying the required image resolution, aspect ratio, and length/width settings.
Explains how to print movies as still images or sequences, noting limitations for certain printer models.
Guides on adding images to a print list (DPOF) directly after shooting or during playback for efficient printing.
Explains how to set print types, dates, and file numbers that apply to all images chosen for printing.
Details how to select individual images and specify the number of copies for printing, including limitations for index prints.
Guides on selecting a range of images for printing, specifying the starting and ending images in the sequence.
Explains how to select all images at once for printing, simplifying the process for batch printing.
Explains how to print images added to the print list (DPOF) by connecting to a PictBridge printer and selecting "Print now".
Details how to customize camera operation sounds, including mute options and selecting preset sounds.
Explains how to disable the function description hints and tips that appear in the FUNC. menu or main MENU.
Guides on performing low-level formatting for memory cards when the camera malfunctions or shows errors, noting data erasure.
Explains how to change the startup screen that appears when the camera is turned on, with options for preset images or recorded images.
Details the process of registering a chosen image as the custom startup screen for the camera.
Explains how to change file numbering settings between Continuous and Auto Reset for organizing image files.
Guides on creating folders based on shooting date, in addition to the default monthly folders, for better image organization.
Explains how to adjust the time it takes for the lens to retract after shooting, allowing for immediate retraction if desired.
Advises on how to disable the automatic power-off feature to save battery power, recommending turning off the camera manually.
Explains how to adjust the duration before the camera screen automatically turns off to save battery power.
Describes how to set the camera's time zone to record images with local dates and times when traveling abroad.
Guides on setting the world time zone and daylight saving time, ensuring accurate date/time recording for travel.
Explains how to disable the AF assist beam, which aids focusing in low light conditions, to save battery or for specific shooting scenarios.
Guides on disabling the red-eye reduction function, which uses a lamp to reduce red-eye effects during flash shooting.
Details how to adjust the duration for which images are displayed on the screen immediately after taking a shot.
Explains how to change the display format of images after shooting, choosing between basic image display or detailed information.
Guides on enabling grid lines on the screen to assist with vertical and horizontal composition while shooting.
Explains the different Image Stabilization (IS) modes: Continuous, Shoot Only, Panning, and Off, for reducing camera shake.
Allows users to select whether playback starts with the last viewed image or the most recently shot image.
Explains how to disable the auto-rotate function that automatically rotates vertical images for correct viewing.
Guides on checking the Eye-Fi card's connection status and access point SSID through the camera's menu.
Explains how to disable Eye-Fi transfer through the camera settings to prevent wireless transmission.
Covers issues related to the power button not working and battery consumption, offering solutions and checks.
Addresses the issue of the lens not retracting, providing steps to resolve it by managing the memory card cover and power.
Briefly mentions issues with distorted or missing images on TV output, referring to a specific page for details.
Lists common shooting problems like "Cannot shoot," screen display issues, and flashing symbols, offering solutions.
Covers problems with AF frame, dark/bright subjects, flash issues, and image graininess.
Addresses image graininess, red-eye, and slow recording, suggesting solutions like ISO adjustment and card formatting.
Covers issues with movie recording time, automatic stops, and distorted subjects, suggesting card speed and quality adjustments.
Addresses problems with playing back images or movies, including file structure changes and potential interruptions.
Discusses issues with transferring images to a computer, recommending transfer speed reduction as a solution.
Points to potential problems with image transfer using an Eye-Fi card, referring to relevant sections for resolution.
Explains common memory card messages like "No memory card," "Memory card locked," and "Memory card error," with solutions.
Covers messages related to "Cannot record!" and "Insufficient space on card," advising on memory card installation and space management.
Explains messages like "No Image," "Protected!," and "Unidentified Image," relating to image display and compatibility problems.
Lists error messages indicating incompatibility with specific functions like magnification, rotation, or editing.
Explains error messages related to invalid selection ranges and exceeding limits for operations like printing or protection.
Covers communication errors during transfer/printing and naming errors due to file conflicts or maximum file number limits.
Addresses hardware-specific errors like "Lens Error" and "A camera error," as well as "File Error" and "Print error," with troubleshooting advice.
Provides a detailed diagram and explanation of the shooting information display, including battery, mode, and exposure settings.
Explains the various scene icons used in AUTO mode to represent different shooting conditions and camera adjustments.
Details the information displayed in playback mode, including image properties, histogram, and file details.
Lists shooting functions and their availability across different shooting modes, providing a reference for feature usage.
Outlines the options available in the Set Up Menu for customizing camera settings like sound, language, and power saving.
Lists functions for managing images in playback mode, including erase, protect, rotate, and categorize.
Details options for printing images, such as selecting images, paper settings, and print styles.
Lists functions accessible via the Playback Mode FUNC. Menu, covering rotate, print settings, protect, and slideshow options.
| Megapixel | 12.1 MP |
|---|---|
| Camera type | Compact camera |
| Sensor type | CMOS |
| Image stabilizer | Yes |
| Image sensor size | 1/2.3 \ |
| Supported aspect ratios | 3:2, 4:3, 16:9 |
| Maximum image resolution | 4000 x 3000 pixels |
| Still image resolution(s) | 480 x 480, 640 x 360, 640 x 424, 640 x 480, 1200 x 1200, 1600 x 1064, 1600 x 1200, 1920 x 1080, 2112 x 2112, 2816 x 1584, 2816 x 1880, 2816 x 2112, 2992 x 2992, 4000 x 2240, 4000 x 2664 |
| Optical zoom | 4 x |
| Combined zoom | 16 x |
| Focal length range | 5 - 20 mm |
| Maximum aperture number | 5.9 |
| Minimum aperture number | 2.8 |
| Number of aspheric elements | 2 |
| Lens structure (elements/groups) | 6/5 |
| Maximum focal length (35mm film equiv) | 112 mm |
| Minimum focal length (35mm film equiv) | 28 mm |
| Focus | TTL |
| Focus adjustment | Auto |
| Auto Focus (AF) points | 9 |
| Auto focusing (AF) modes | Continuous Auto Focus, Single Auto Focus, Tracking Auto Focus |
| Closest focusing distance | 0.03 m |
| Light metering | Centre-weighted, Evaluative (Multi-pattern), Spot |
| ISO sensitivity | 100, 200, 400, 800, 1600, 3200, Auto |
| Light exposure modes | - |
| ISO sensitivity (max) | 3200 |
| ISO sensitivity (min) | 100 |
| Fastest camera shutter speed | 1/1500 s |
| Slowest camera shutter speed | 15 s |
| Flash modes | Auto, Flash off, Flash on, Red-eye reduction, Slow synchronization |
| Flash range (tele) | 0.5 - 2 m |
| Flash range (wide) | 0.3 - 4 m |
| Digital SLR | No |
| Power source type | Battery |
| Camera shutter speed | 1/15 - 1/1500 s |
| Video memory capacity | 4GB |
| Compatible operating systems | Windows 7/ Vista SP1-2/ XP SP3\\r Mac OS X v10.5 – 10.6 |
| Video resolutions | 320 x 240, 640 x 480, 1280 x 720 pixels |
| Motion JPEG frame rate | 24 fps |
| Video formats supported | H.264, MOV |
| Maximum video resolution | 1920 x 1080 pixels |
| Analog signal format system | NTSC, PAL |
| Internal memory | - MB |
| Compatible memory cards | MMC, MMC+, SD, SDHC, SDXC |
| Field of view | 100 % |
| Display diagonal | 3 \ |
| Display resolution (numeric) | 230000 pixels |
| USB version | 2.0 |
| Material | Metal |
| Product color | Gray |
| Scene modes | Beach, Children, Fireworks, Night, Portrait, Self-portrait, Snow, Underwater |
| Image editing | Resizing |
| Photo effects | Black&White, Neutral, Positive film, Sepia, Skin tones, Vivid |
| White balance | Auto, Cloudy, Custom modes, Daylight, Fluorescent, Tungsten |
| Shooting modes | Movie, Scene |
| Camera playback | Movie, Single image |
| Image processor | DIGIC 4 iSAPS |
| Self-timer delay | 2, 10 s |
| Camera file system | DPOF 1.1, Exif 2.3 |
| Playback zoom (max) | 10 x |
| On Screen Display (OSD) languages | ARA, CHI (SIMPL), CHI (TR), CZE, DAN, DEU, DUT, ENG, ESP, FIN, FRE, GRE, HUN, ITA, JPN, KOR, NOR, POL, POR, RUM, RUS, SWE, THA, TUR, UKR |
| Battery type | NB-4L |
| Battery life (CIPA standard) | 230 shots |
| Operating temperature (T-T) | 0 - 40 °C |
| Operating relative humidity (H-H) | 10 - 90 % |
| Depth | 19.9 mm |
|---|---|
| Width | 93.1 mm |
| Height | 55.8 mm |
| Weight (including battery) | 140 g |