Do you have a question about the Canon MV 200 and is the answer not in the manual?
Essential safety and operating guidelines for the camcorder.
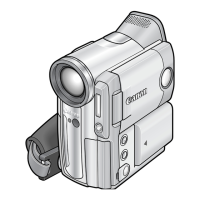
Acknowledges the purchase and introduces the camcorder's benefits.
Overview of the camcorder's key features and technologies.
Instructions on attaching ferrite cores to cables for noise reduction.
Details on connecting the power adapter and charging the battery.
Step-by-step guide to charging and inserting the battery pack.
Procedure for inserting and ejecting MiniDV cassettes.
How to use the tape's write-protect tab to prevent accidental erasure.
Step-by-step guide to starting and stopping basic video recording.
Procedures to follow after completing a recording session.
Explanation of SP and LP recording modes and how to switch between them.
How to use the optical and digital zoom functions for framing shots.
How to open, angle, and use the camcorder's LCD screen.
Using the screen for self-monitoring or subject viewing during recording.
How to adjust and use the camcorder's internal speaker for playback.
Steps for playing recorded footage directly on the camcorder.
Overview of additional playback functions like pause and fast forward.
Advanced playback features like frame advance and slow motion.
How to connect the camcorder to a TV or VCR for playback.
Advice on improving video quality through technique.
Proper grip and posture for stable camera handling.
Benefits and considerations for using a tripod.
Guidelines for framing subjects and managing the scene.
Choosing appropriate shot types and angles for storytelling.
Techniques for panning and tilting the camera.
How to activate and deactivate the image stabilization feature.
General guide on navigating and using the camcorder's menu system.
Menu options related to editing recorded footage.
Menu options for configuring camera settings.
How to operate the camera remotely and understand the tally lamp.
How to disable the wireless controller to prevent interference.
How to switch off the recording indicator lamp.
Procedure for setting the camcorder's internal clock and date.
Detailed steps for setting the year, month, day, hour, and minute.
How to enable or disable the date and time display during recording.
Options for customizing the date and time display format.
How to view recorded data like date, time, shutter, and exposure.
Guide to capturing still images using the camcorder.
How to quickly find specific photos or recordings by date.
Using record search and review to manage recordings.
Overview of the eight available recording programs.
How to choose a specific recording program.
The simplest point-and-shoot recording mode.
Standard automatic recording mode with manual function options.
Recording mode with FlexiZone AF and AE capabilities.
Recording program optimized for fast-action sports scenes.
Recording program for emphasizing subjects against a soft background.
Program for recording subjects under concentrated lighting.
Program for scenes with bright backgrounds, like beaches or snow.
Program for recording in dimly lit conditions.
How to apply various digital effects to recordings.
Recording with a sepia monochrome tint.
Creating a series of still images for a slow-motion effect.
How to choose and activate digital effects.
Activating fade and wipe effects for each use.
Recording in widescreen format for TV playback.
Options for recording audio in different modes.
Connecting external audio devices for monitoring and recording.
Using the automatic wind screen to reduce wind noise.
How to use the self-timer for recording yourself.
Techniques for manually controlling focus.
How to lock the focus at a specific point.
Using the focus wheel for manual adjustment.
Techniques for manually controlling exposure.
How to lock the exposure to maintain brightness.
Manually adjusting brightness when exposure is locked.
How to change the shutter speed for creative control.
Adjusting white balance for accurate color reproduction.
Using zero set memory to mark and return to specific tape locations.
Overview of the automatic scene selection and recording process.
Initial setup steps for using the auto editing function.
Ensuring the camcorder can remotely control the VCR.
Initial setup and calibration for the editing function.
Chart of VCR brands and corresponding settings for auto editing.
How to select start and end points for scenes in the editing program.
Previewing the editing program and starting the final recording.
Executing the auto editing program to record scenes to the VCR.
Fine-tuning the start and end points of recorded scenes.
Method for determining optimal cut-in/cut-out values.
How to remove scenes or clear the entire editing program.
Changing the sequence of scenes in the editing program.
Manual video copying method when remote control is not available.
Connecting digital devices via the DV terminal.
Using the DV terminal for digital dubbing on MV200i.
Information on using the optional DV capture kit.
Understanding copyright restrictions on playback and dubbing.
Initial camera setup and accessory attachment.
Information on battery life, charging, and usage.
Guidelines for maintaining battery health and longevity.
How to install and replace the internal backup battery.
Adjusting the mix of stereo 1 and stereo 2 audio outputs.
General care and cleaning instructions for the camcorder.
Specific maintenance tasks for camera components.
Information for using the camcorder internationally.
How to prevent and handle condensation issues.
Solutions for common recording, playback, and operational problems.
Visual representation of camcorder components and compatible accessories.
List and details of available optional accessories.
Accessory for using 46mm filters with the camcorder.
Accessory for increasing the camera's focal length.
Accessory for widening the camera's field of view.
Set of special effects filters for creative recording.
Set of filters for controlling lighting conditions.
Optional battery-powered video light.
Accessory for improved grip and security.
Accessory for optimal microphone positioning.
Accessory for charging multiple batteries.
Lightweight case for camera protection.
Kit for transferring video to a computer.
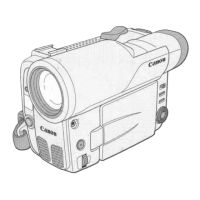
Diagram and labels identifying camcorder controls and parts.
Explanation of icons and indicators shown on the camcorder's screen.
Information on how time code is recorded and displayed.
Explanations of warning messages displayed by the camera.
Detailed technical specifications of the camcorder.