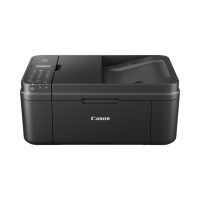
This document outlines the setup and operation of the Canon MX420 multifunction device, specifically focusing on its fax capabilities in "Tel Priority Mode" when connected to an answering machine or a phone with a built-in answering machine. The guide provides step-by-step instructions for connecting phone lines and configuring the receive mode for fax reception.
Function Description:
The Canon MX420 is a multifunction device that includes fax functionality. This manual details how to set up the fax feature in "Tel Priority Mode," which is designed for environments where the device shares a single phone line with a telephone and an answering machine. In this mode, the device prioritizes telephone calls, allowing the answering machine to pick up calls first. If the MX420 detects fax tones after the answering machine picks up, it will take over the call to receive the fax.
The setup process involves:
- Connecting Phone Lines: Instructions are provided for two scenarios:
- Connecting the MX420 with an external answering machine.
- Connecting the MX420 with a phone that has a built-in answering machine.
- Setting Up the Receive Mode: This involves navigating the device's menu to select "Tel Priority Mode" and enabling "User-friendly reception."
Usage Features (Fax):
- Tel Priority Mode: This mode allows the MX420 to share a phone line with an answering machine. When a call comes in, the answering machine will answer first. If fax tones are detected, the MX420 will automatically take over the line to receive the fax. If no fax tones are detected, the call will proceed as a voice call handled by the answering machine.
- User-friendly reception: This setting, when enabled in "Tel Priority Mode," likely optimizes the device's behavior for seamless integration with an answering machine, ensuring that faxes are received without manual intervention once the answering machine picks up.
- Receiving Faxes When Home:
- Pick up the handset of the phone connected to the MX420.
- Listen for fax tones.
- Hang up the handset when the tones stop.
- The MX420 will then receive the fax document.
- Receiving Faxes When Away:
- The answering machine will answer the incoming call.
- If the MX420 detects fax tones, it will automatically take over the call and receive the fax document.
Important Technical Specifications (Implied):
- Connectivity: Requires a standard phone line (wall jack) for fax operation.
- Included Accessories: A phone cord is included with the Canon printer for connecting to the wall jack and the device.
- Interface: The device features a control panel with an LCD screen for menu navigation, dedicated buttons for "ON," "COPY," "FAX," "OK," "FUNCTION," "BACK," and directional (UP/DOWN) buttons for menu selection.
- Jacks: The MX420 has specific jacks on its rear for phone line connections:
- "L" jack: For the main phone line connection from the wall jack.
- "Telephone" jack: For connecting an external telephone or answering machine.
Maintenance Features (Implied):
- Menu Navigation: The device's menu system allows users to configure various settings, including fax receive modes. This implies a user-friendly interface for managing device functions.
- Troubleshooting: The "SERVICE & SUPPORT" logo suggests that Canon provides support for setup and operational issues.
Setup Process Overview:
- Power On: Turn on the MX420 by pressing the ON button.
- Access Fax Mode: Press the FAX button.
- Enter Fax Standby: The fax standby screen will appear.
- Access Function Menu: Press the center FUNCTION button.
- Navigate to Receive Mode Settings: The Receive mode settings screen will appear.
- Select Tel Priority Mode: Use the UP or DOWN button to select "TEL priority mode."
- Access Advanced Settings: Press the right FUNCTION button under the "Advanced" label.
- Select User-friendly Reception: Use the UP or DOWN button to select "User-friendly reception."
- Confirm User-friendly Reception: Ensure "User-friendly reception" is selected.
- Press OK: Press the OK button.
- User-friendly Reception Screen: The "User-friendly reception" screen will appear.
- Select ON: Use the UP or DOWN button to select "ON."
- Confirm ON: Ensure "ON" is selected.
- Press OK: Press the OK button.
- Confirmation Screen: A confirmation screen ("Following setting complete.") will appear briefly.
- Return to Advanced: You will return to the "Advanced" selection screen.
- Go Back: Press the BACK button.
- Return to Receive Mode Settings: You will return to the "Receive mode setting" screen. Confirm that "Tel priority mode" is selected.
- Press OK: Press the OK button.
- Return to Fax Standby: You will return to the "Fax standby screen." The MX420 is now ready to receive a fax in Tel Priority Mode.