Do you have a question about the Canon MX452 and is the answer not in the manual?
Press the FAX button to enter fax standby mode on the device.
Click the Next button to proceed with the fax setup.
Diagram shows 'Before' and 'After' phone line connection configurations.
Connect the provided phone cord to the DSL/Cable Modem.
Connect the phone cord to the 'LINE' jack on the multifunction device.
Remove the white plug from the 'EXT.' jack on the multifunction device.
Connect the second phone cord to the 'EXT.' jack on the multifunction device.
Connect the existing phone cord to the telephone handset.
Turn on the MX452 device using the ON button.
Press the FAX button to start the setup sequence.
Verify the fax standby screen is displayed.
Press the Menu button to open the device's menu.
The FAX menu screen will appear.
Use navigation buttons to select 'Receive mode set'.
Press the OK button to confirm the selected mode.
Use navigation buttons to select 'TEL priority mode'.
Press the OK button to confirm the 'TEL priority mode' setting.
Select 'Yes' to configure advanced settings.
Press the OK button to confirm advanced settings.
Choose 'User-friendly RX' for the receiving method.
Press the OK button to confirm the 'User-friendly RX' setting.
Select 'ON' to activate the receive mode.
Press the OK button to finalize the receive mode configuration.
Device returns to the fax standby screen with the new mode active.
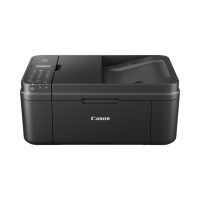
The Canon MX452 is a versatile multifunction printer designed to handle a variety of tasks, including printing, scanning, copying, and faxing. This manual specifically focuses on setting up the fax function in "Tel Priority Mode" without an answering machine, particularly for users with a DSL/Cable Modem connection. This mode is ideal for environments where a dedicated phone line is shared between voice calls and fax communications, ensuring that voice calls take precedence while still allowing for efficient fax reception.
The Canon MX452, when configured in Tel Priority Mode, prioritizes incoming voice calls over fax reception. This means that if a call comes in, the device will allow the user to answer it as a voice call. If the call is a fax, the user can manually initiate fax reception after picking up the handset and hearing fax tones. This setup is particularly useful in home or small office environments where a single phone line serves multiple purposes, preventing the fax machine from automatically answering and potentially disrupting voice calls.
The fax function itself allows for sending and receiving documents over a standard telephone line. In Tel Priority Mode, the machine does not automatically answer incoming calls. Instead, it relies on the user to pick up the phone. If fax tones are detected, the user can then instruct the MX452 to receive the fax. This manual intervention ensures that personal calls are not mistaken for faxes and answered by the machine.
The setup process for the fax function in Tel Priority Mode involves several key steps, starting with the physical connection of the phone lines and then configuring the receive mode through the device's operation panel.
The connection process is crucial for ensuring proper fax operation, especially with a DSL/Cable modem.
This specific wiring configuration is essential for the Tel Priority Mode to function correctly, as it allows the MX452 to monitor the line for incoming calls while still passing the signal through to the handset.
Once the physical connections are made, the device's internal settings need to be adjusted.
With the setup complete, receiving a fax in this mode requires user interaction:
IMPORTANT: The crucial aspect of this mode is that you must pick up the handset on the phone connected to the multifunction to initiate fax reception. If you don't pick up, the fax machine will not automatically answer, and the fax will not be received. This prevents unwanted faxes from being answered automatically and ensures that you have control over which calls are treated as faxes.
While the manual primarily focuses on setup and usage, general maintenance for a multifunction printer like the Canon MX452 would typically involve:
For the fax function specifically, maintenance would include:
The Tel Priority Mode, while requiring manual intervention for fax reception, offers a practical solution for shared phone lines, giving users control and flexibility. The detailed setup instructions ensure that even users with DSL/Cable modem connections can successfully configure their MX452 for efficient fax operations.
| Functions | Print, Copy, Scan, Fax |
|---|---|
| Print Resolution | Up to 4800 x 1200 dpi |
| Connectivity | USB, Wi-Fi |
| Scanner Type | Flatbed, ADF |
| ADF Capacity | 30 sheets |
| Maximum Copying Resolution | 600 x 600 dpi |
| Input Capacity | 100 sheets |
| Print Speed (Color) | Approx. 5.5 ipm |
| Scanner Resolution | 1200 x 2400 dpi |
| Copier Settings | Standard |
| Operating System Support | Windows, Mac |
| Fax Transmission Speed | Approx. 3 seconds per page |
| Paper Sizes | Letter, Legal, Envelope |
| Ink Cartridges | PG-240 Black, CL-241 Color |
| Dimensions | 15.2" x 7.9" |
| Print Speed (Black) | Approx. 9.7 ipm |