EasyManua.ls Logo

Canon PIXMA iP2000 Series User Manual

Canon PIXMA iP2000 Series
2 pages
To Next Page IconTo Next Page
Page #1 background imageLoading...
Page #1 background image
Series
Photo Printer
Start Here
Easy Setup Instructions
Connect one end of a USB cable to the
computer, the other to the printer.
Pinch the paper guide and slide it to the
left. Load a sheet of blank paper in the
paper support. Slide the guide toward the
left edge of the paper.
IMPORTANT: BE SURE THE PRINTER
IS OFF, or the computer will attempt
to install the printer driver before
the printer is ready.
Plug the power cord into the back of the
printer and connect the other end to a
power outlet.
Continue with Step 6
on side two.
IMPORTANT: For correct printer
operation, make sure ink tanks
are secure in slots.
Insert the black ink tank (BCI-24 Black)
into the slot on the right. Then press in
until the ink tank clicks into place.
Repeat the procedure for the color ink
tank (BCI-24 Color), inserting it into the
remaining slot.
Open the paper support and pull out the
output tray.
Remove the black ink tank (BCI-24 Black)
from its package and pull off the orange
protective cap.
NOTE: To avoid spilling ink, do not touch
the bottom of the tank once you have
removed the protective cap.
Remove the print head from its package.
Raise the gray lock lever on the printer.
Slide the print head into the holder until
it is securely seated.
Do not press it down
Lower the lever until it clicks into place.
NOTE: Do not touch the electrical contacts
or print head nozzles.
Remove the orange protective cap.
Tear at notch to open
Electrical
contacts
Print Head Nozzles
Open the front sheet feeder and the front cover.
Remove the shipping tape and packing
material from the print head holder.
Remove all shipping tape from the printer.
Write down the serial number located
to the right of the print head holder.
You will need this to register the product.
Carefully remove all items from the box.
PIXMA iP2000
Photo Printer
Documentation
and Software Kit
Power Cord
Print Head
Ink Tanks
BCI-24 Black BCI-24 Color
1
1
2
3
1
5
4
3
1
2
1
2
3
4
5
2
3
Close the front cover.
2
Prepare the Printer
1
Unpack the Printer
3
Install the Print Head
4
Install the Ink Tanks
5
Connect the Printer
And Load Paper
Packing Material
Print Head Holder
Shipping Tape
Serial Number
Click
Protective Cap
Click
Paper Support
USB Cable
USB Port
Paper Guide
IMPORTANT: Ensure that the gray lock
lever is raised into the notches located
above the print head holder before
proceeding or the print head may not
install correctly.
Shipping Tape
Question and Answer IconNeed help?

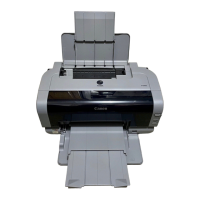
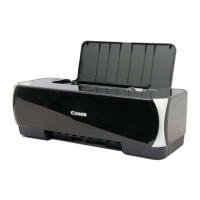
Do you have a question about the Canon PIXMA iP2000 Series and is the answer not in the manual?

Canon PIXMA iP2000 Series Specifications

General IconGeneral
Maximum Print ResolutionUp to 4800 x 1200 dpi
Printer TypeInkjet
ConnectivityUSB
Operating System CompatibilityWindows, Mac
Paper SizesLetter, Legal

Summary

Unpack the Printer

Prepare the Printer

Install the Print Head

Install the Ink Tanks

Connect the Printer And Load Paper

Windows Printer Driver Installation

Turn on computer and leave printer off

Ensure the computer is on and the printer is off before starting the driver installation process.

Close open software applications

Close all running software, including antivirus, before inserting the setup CD-ROM.

Run the setup program

Insert the setup CD-ROM and allow the program to run automatically, or launch manually via the Run command.

Select Easy Install

Choose 'Easy Install' from the main menu to install application software, electronic manuals, and printer drivers.

Accept License Agreement

Review and accept the license agreement to proceed with the driver and electronic instruction manual installation.

Turn printer on during connection

Turn the printer on when the 'Printer Connection' window appears to allow initialization.

Install remaining software

Follow on-screen instructions to install additional software and confirm completion via the 'Installation Results' window.

Mac OS X Printer Driver Installation

Turn on Mac and printer

Power on your Mac and the printer, then insert the setup CD-ROM to begin installation.

Navigate CD-ROM folders

Access the CD-ROM, open the 'Mac OS X' folder, then the 'Printer Driver' folder.

Install printer driver package

Double-click the PIXMA iP2000 driver package file (.pkg) to start the installation.

Register product

Double-click the 'Product Registration' icon to register your product after installation.

Install application software

Access CD-ROM again, open the 'Application' folder, and install 'Easy-PhotoPrint' following on-screen instructions.

Authenticate and confirm installation

Enter administrator credentials when prompted and confirm installation to proceed.

Related product manuals