Do you have a question about the Canon PIXMA iX6850 Series and is the answer not in the manual?
Connect power and USB cables to the printer and computer.
Open the printer cover and prepare the internal components for installation.
Insert the ink cartridges into their designated slots within the printer.
Close the printer cover after installing the ink cartridges.
Perform the ink cartridge alignment process as shown in the diagrams.
Complete the setup process by following the final steps and indications.
Connect the printer to your computer using a USB cable or wirelessly.
Troubleshoot issues when the Alarm lamp flashes orange by pressing the RESUME/CANCEL button.
| Print Technology | Inkjet |
|---|---|
| Max Print Resolution | 9600 x 2400 dpi |
| Print Speed (A4, Mono) | 14.5 ipm |
| Print Speed (A4, Color) | 10.4 ipm |
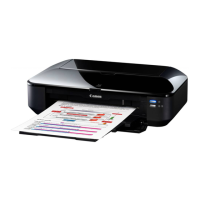
| Max Paper Size | A3+ |
| Number of Ink Cartridges | 5 |
| Borderless Printing | Yes |
| Two Sided Printing | Manual |
| Standard Paper Input | 150 sheets |
| Dimensions (W x D x H) | 584 x 310 x 159 mm |
| Weight | 8.1 kg |
| Connectivity | Wi-Fi, Ethernet, USB |
| Supported Operating Systems | Windows, Mac |
| Ink Cartridge Configuration | PGI-550PGBK, CLI-551BK/C/M/Y |
| Paper Sizes | A3+, A3, A4, A5, B4, B5, Letter, Legal, Envelopes |
| Interface Type - PC / Mac | USB 2.0, Wi-Fi, Ethernet |
| Software Included | My Image Garden |