2
3
4
1
XXXXXXXX © CANON INC. 2016
CD-ROM (Windows)
4
2
3
1
4
5
6
4
6
2
3
2
3
(A)
(B)
5
Movie
1
1
7
(B)
1
Movie Android iOS
Movie Android iOS
Movie Android iOS
ES
EN
ES
EN
ES
ES
EN
EN
ES
EN
EN
ES
EN
ES
ES
EN
ES
EN
ES
EN
ES
EN
ES
EN
Manuales
ESPAÑOL
Guía de inicio 1
Tutoriales en vídeo
Compruebe que la luz de Alarma (Alarm) está
apagada.
Si la luz de Alarma (Alarm) (B) parpadea, pulse el botón ACTIVADO
(ON) para desactivar la impresora y vuelva a empezar desde
.
Compruebe que la luz de ACTIVADO (ON) (A) se
enciende.
Tenga cuidado con la tinta de la cinta protectora.
Inserte el cartucho FINE en la ranura con un ángulo
ligeramente elevado.
Presione el cartucho FINE hacia adentro y hacia
arriba hasta que encaje en su posición.
Repita de
a para instalar el otro cartucho FINE.
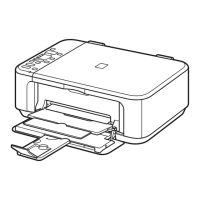
Cargue papel con la cara imprimible hacia arriba.
Apagada
No conecte el cable USB todavía.
Espere a que deje de parpadear la luz de
ACTIVADO (ON).
Parpadeando
Encendida
Parpadeando
Si la luz de Alarma (Alarm) (B) parpadea, compruebe
que se han instalado correctamente la tinta negra y de
color de los cartuchos FINE.
Manuals
ENGLISH
Getting Started 1
Video Tutorials
Check that the Alarm lamp is off.
If the Alarm lamp (B) ashes, press the ON button to
turn OFF the printer, then redo from
.
Check that the ON lamp (A) lights.
Be careful of ink on the protective tape.
Insert the FINE Cartridge into the slot at a slight
upward angle.
Do not connect the USB cable yet.
Push the FINE Cartridge in and up rmly until it
snaps into place.
Repeat
to to install the other FINE Cartridge.
Load paper with the print side facing up.
Off
Wait until the ON lamp stops ashing.
Flashing
Lit
If the Alarm lamp (B) ashes, check that the both black
and color FINE Cartridges are installed correctly.
Flashing
QT6-1639-V01
PRINTED IN XXXXXXXX
RMC (Regulatory Model Code): K10446