EasyManua.ls Logo

Canon PIXMA MG3222 series User Manual

Canon PIXMA MG3222 series
4 pages
To Next Page IconTo Next Page
Page #1 background imageLoading...
Page #1 background image
1
XXXXXXXX © CANON INC. 2012
5
6
1
3
4
2
1
2
series
series
Retire la cinta.
Compruebe que se le han suministrado los siguientes elementos.
Conexión de red:
Prepare los dispositivos de
red, como el router o el punto
de acceso, según convenga.
No conecte aún el cable USB.
Conecte el cable de alimentación.
55
Pulse el botón ACTIVADO (ON).
66
Abra la cubierta delantera y la
bandeja de salida del papel.
11
Retire la cinta naranja y el material de protección.
33
Cierre la tapa de salida del papel.
44
Preparativos
Elementos
suministrados
Abra la tapa de salida del papel.
22
Si aparece E > 4 > 0 en la pantalla,
pulse el botón ACTIVADO (ON) para
apagar el equipo y repita desde .
¡Léame en primer lugar!
Consérvelo a mano para utilizarlo
como referencia en el futuro.
Windows es una marca comercial o una marca comercial registrada de Microsoft
Corporation en EE. UU. y/u otros países.
Windows Vista es una marca comercial o una marca comercial registrada de Microsoft
Corporation en EE. UU. y/u otros países.
Mac, Mac OS, AirPort y Bonjour son marcas comerciales de Apple Inc., registradas en
EE. UU. y en otros países.
Número de modelo: K10381
Para llevar a cabo la instalación, coloque el equipo cerca del punto de acceso* y del
ordenador.
(* necesario para LAN inalámbrica)
Guía de inicio
ESPAÑOL
Equipo multifunción fotográco Canon Inkjet
Ayuda de Canon
Asistencia técnica por correo electrónico:
www.usa.canon.com/support
Asistencia técnica gratuita: 1-800-OK-CANON
Esta opción proporciona asistencia telefónica técnica personal, sin
cargo por servicio, de lunes a viernes (excepto festivos), durante
el periodo de garantía.
Se dispone de un dispositivo telefónico auxiliar para sordos (TDD) en
1-866-251-3752.
Remove the tape.
Check the included items.
Network connection:
Prepare network devices
such as a router or an access
point as necessary.
Do not connect the USB cable yet.
Connect the power cord.
55
Press the ON button.
66
Open the Front Cover and the
Paper Output Tray.
11
Remove the orange tape and protective material.
33
Close the Paper Output Cover.
44
Preparation
Included Items
Open the Paper Output Cover.
22
If E > 4 > 0 are displayed on the
screen, press the ON button to turn
OFF the machine, then redo from
.
Getting Started
Read me rst!
Keep me handy for future reference.
Windows is a trademark or registered trademark of Microsoft Corporation in the U.S.
and/or other countries.
Windows Vista is a trademark or registered trademark of Microsoft Corporation in the
U.S. and/or other countries.
Mac, Mac OS, AirPort and Bonjour are trademarks of Apple Inc., registered in the U.S.
and other countries.
Model Number: K10381
To perform setup, place the machine near the access point* and computer.
(* Required for wireless LAN)
ENGLISH
Canon Inkjet Photo All-In-One
Getting Help from Canon
Email Tech Support — www.usa.canon.com/support
Toll-Free Tech Support— 1-800-OK-CANON
This option provides live telephone technical support, free of
service charges, Monday-Friday (excluding holidays), during the
warranty period.
Telephone Device for the Deaf (TDD) support is available at
1-866-251-3752.
QT5-5588-V01
PRINTED IN XXXXXXXX
Question and Answer IconNeed help?

Do you have a question about the Canon PIXMA MG3222 series and is the answer not in the manual?

Canon PIXMA MG3222 series Specifications

General IconGeneral
Print TechnologyInkjet
Max Print Resolution4800 x 1200 dpi
Scanner TypeFlatbed
Scanner Resolution1200 x 2400 dpi
Copier FunctionYes
FunctionsPrint, Scan, Copy
Wireless PrintingYes
Weight12.1 lbs
ConnectivityUSB, Wi-Fi
Paper Sizes Supported4" x 6", 5" x 7", 8" x 10", Letter, Legal, U.S. #10 Envelope
Operating System SupportWindows, Mac
Mobile PrintingYes
Ink CompatibilityPG-240 Black, CL-241 Color
Print Speed (Black)Approx. 9.2 ipm (Black)
Print Technology DetailFINE (Full-photolithography Inkjet Nozzle Engineering)
Dimensions17.7 (W) x 12.0 (D) x 6.0 (H) inches

Summary

Getting Started Guide

Getting Help from Canon

Provides contact details for technical support via phone and email.

Setup Location Requirements

Place the printer near the access point and computer for setup.

Included Items Overview

Lists and illustrates the items included in the printer package.

Initial Preparation Steps

Remove protective tape and orange tape before proceeding with setup.

Install Ink Cartridges

Open Output Trays

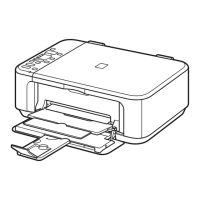
Open the paper output tray and cover to access cartridge area.

Lower Ink Cartridge Lock Lever

Lower the lock lever to enable ink cartridge installation.

Prepare and Unpack Ink Cartridge

Unpack the FINE cartridge and carefully remove protective tape.

Insert Ink Cartridge

Insert the FINE cartridge straight until it stops securely.

Secure Ink Cartridge

Lift the lock lever to secure the installed ink cartridge.

Install Second Ink Cartridge

Repeat previous steps to install the second ink cartridge.

Close Output Cover

Close the paper output cover after installing cartridges.

Wireless LAN Setup

Connect Using WPS Button

Use the WPS button on the access point to connect to wireless LAN.

Troubleshoot Wireless Connection Errors

Instructions for resolving E and numeric figure errors during connection.

Alternative Wireless Setup

Proceed with alternative setup if access point lacks WPS or is not used.

Wireless LAN Setup Using WPS Function

Detailed steps for setting up wireless LAN using the WPS function.

Loading Plain Paper

Prepare for Paper Loading

Ensure the paper output tray is closed and pull out the paper support.

Adjust Paper Guides

Slide the right paper guide to the end; the left guide moves simultaneously.

Insert Paper

Insert paper until it stops, ensuring it is aligned correctly.

Loading Photo Paper

Adjust Paper Guides and Tray

Adjust paper guides to fit paper size and extend the output tray.

Open Paper Output Tray and Support

Open the paper output tray and its support before printing.

Insert Photo Paper

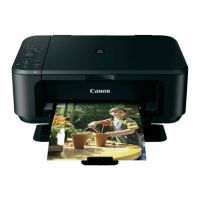
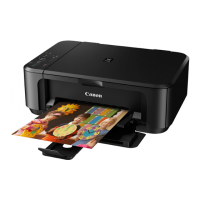
Insert photo paper printable side down until it stops.

Software Installation

Insert CD-ROM

Insert the CD-ROM into the computer's drive.

Follow On-Screen Instructions

Follow the on-screen instructions to install software, selecting language.

Manual CD-ROM Execution

Instructions for manual execution if CD-ROM does not autorun.

Ordering Information

Compatible Ink Cartridges

Lists compatible FINE ink cartridges and their order numbers.

Contact for Purchase

Information on contacting Canon for dealers or visiting the online store.

Related product manuals