Do you have a question about the Canon PIXMA TS7451i and is the answer not in the manual?
Read safety and important information before proceeding with setup.
Instructions for correctly holding the printer during setup or operation.
Guide for connecting the printer to computers and smartphones.
Details the items included in the printer's packaging.
Step-by-step instructions for removing protective materials and tape.
Procedure for powering on the printer and selecting the language.
Instructions for opening the scanner unit or cover of the printer.
Details on how to open and close the ink cartridge locking cover.
Guide to removing and installing the color FINE cartridge into its holder.
Procedure to install the black FINE cartridge on the right-hand side.
Instructions for closing the scanning unit or cover after cartridge installation.
Action to initiate the paper alignment process by pressing the OK button.
Guide to removing the cassette and adjusting paper guides.
Procedure for loading plain paper and reinserting the cassette.
Extending the output tray and confirming initial alignment.
Guide to accessing the Canon website for printer setup.
Inputting the printer model name and clicking 'Go' to proceed.
Downloading and running the printer software for installation.
Adhering to the on-screen prompts for successful printer installation.
Instructions to download and install the Canon PRINT app on a smartphone.
Connecting the printer to the smartphone using the Canon PRINT app.
Opening the rear tray and extending its support for photo paper.
Adjusting the paper guides in the feed slot for photo paper.
Placing photo paper into the rear tray with the print side upwards.
Turning on the printer and placing the document on the platen.
Choosing specific copy settings and confirming them.
Adjusting print options like color or paper type using navigation buttons.
Initiating the copying process by pressing the Start button.
| Print technology | Inkjet |
|---|---|
| Maximum resolution | 4800 x 1200 DPI |
| Borderless printing | Yes |
| Duplex printing mode | Auto |
| Print speed (ISO/IEC 24734) mono | 13 ipm |
| Print speed (ISO/IEC 24734) color | 6.8 ipm |
| Print speed (black, normal quality, A4/US Letter) | - ppm |
| Envelopes sizes | Com-10, DL |
| Photo paper sizes | 10x15, 13x18, 13x13, 20x25 cm |
| Maximum print size | 216 x 297 mm |
| Paper tray media types | Envelopes, Photo paper, Plain paper |
| Paper tray media weight | 64 - 105 g/m² |
| Non-ISO print media sizes | Legal (media size), Letter (media size) |
| ISO A-series sizes (A0...A9) | A4, A5 |
| ISO B-series sizes (B0...B9) | B5 |
| Borderless printing media sizes | 8.9x8.9, 10x15, 13x18, 13x13, 17.5x25, 20x25, A4, Letter |
| Maximum ISO A-series paper size | A4 |
| Scanner type | Flatbed & ADF scanner |
| Duplex scanning | - |
| Input color depth | 16 bit |
| Output color depth | 8 bit |
| Optical scanning resolution | 1200 x 2400 DPI |
| Copier resize | 25 - 400 % |
| Maximum copy resolution | - DPI |
| Maximum number of copies | 99 copies |
| N-in-1 copy function (N=) | 2 |
| Display | OLED |
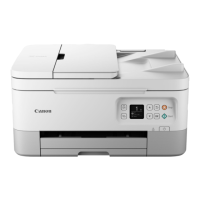
| Product color | White |
| Display diagonal | 1.44 \ |
| Market positioning | Home & office |
| Ethernet LAN | No |
| Wi-Fi standards | 802.11b, 802.11g, Wi-Fi 4 (802.11n) |
| Security algorithms | WEP, WPA-PSK, WPA2-PSK |
| Mobile printing technologies | Apple AirPrint, Mopria Print Service, PIXMA Cloud Link |
| Mac operating systems supported | Mac OS X 10.13 High Sierra, Mac OS X 10.14 Mojave, Mac OS X 10.15 Catalina, Mac OS X 10.15.3 Catalina, Mac OS X 10.2 Jaguar, Mac OS X 10.3 Panther, Mac OS X 10.4 Tiger, Mac OS X 10.5 Leopard, Mac OS X 10.6 Snow Leopard, Mac OS X 10.7 Lion, Mac OS X 10.7.5 Lion, Mac OS X 10.8 Mountain Lion, Mac OS X 10.9 Mavericks, Mac OS X 11.0 Big Sur, Mac OS X 12.0 Monterey, Mac OS X 13.0 Ventura |
| Mobile operating systems supported | Android, iOS |
| Windows operating systems supported | Windows 10, Windows 11, Windows 8.1 |
| Operating temperature (T-T) | 15 - 30 °C |
| Operating relative humidity (H-H) | 10 - 80 % |
| AC input voltage | 100 - 240 V |
| AC input frequency | 50 - 60 Hz |
| Power consumption (off) | 0.3 W |
| Power consumption (copying) | 14 W |
| USB connector | USB Type-B |
| Printing colors | Black, Cyan, Magenta, Yellow |
| Duplex functions | Copy, Print |
| Maximum duty cycle | - pages per month |
| Total input capacity | 100 sheets |
| Total output capacity | - sheets |
| Total number of input trays | 1 |
| Depth | 364 mm |
|---|---|
| Width | 403 mm |
| Height | 206 mm |


 Loading...