Do you have a question about the Canon Powershot S80 and is the answer not in the manual?
Explains the meaning of symbols used throughout the guide.
Defines key terms used in the software guide.
Lists operations possible when a camera is connected to the computer.
Describes displaying and browsing downloaded images.
Explains methods for organizing and managing image files.
Details supplementary functions like printing and editing.
Explains the purpose and features of the Camera Control Window.
Describes the primary window for displaying and organizing images.
Explains how to use the right mouse button for efficient operation.
Describes the six task buttons and their functions.
Details Acquire, View, Edit, Export, Print, and Internet functions.
Indicates the current step in a procedure.
Indicates selectable steps in a procedure.
Indicates steps that are currently unavailable.
Describes buttons like View Image, Properties, Slide Show, Search, Delete, Rotate.
Explains how to switch between Browser Area display modes.
Details buttons like Back, Forward, Up, and Advanced Select.
Controls display of info, zoom level, and pan/zoom buttons.
Adjusts display size and filters images by Star Rating.
Guide assumes software/drivers are installed; check installation if not.
Explains 'Auto Start' vs. 'Icon' methods for launching the software.
Details steps for connecting camera and setting Auto Start options.
Explains how to connect camera for subsequent auto downloads.
Method for downloading images using cameras with direct transfer.
Method for downloading from memory card via computer commands.
Selects the device and initiates the download process.
Steps to download images using computer commands.
Initiates the image download process from the camera.
Explains how to launch ZoomBrowser EX via desktop icon or menu.
Provides instructions on how to exit the software.
Mentions Easy-PhotoPrint integration and preference settings.
Details selecting images and initiating the print process.
Sets printer, paper size, orientation, trim, and color settings.
Starts the printing process after settings are configured.
Explains how to launch the Camera Control Window.
Provides instructions on how to exit the Camera Control Window.
Sets camera direct transfer and starts automatic downloading.
Modifies destination folder and new folder creation method.
Initiates auto download by clicking 'Starts to download images'.
Adjusts image type to download or destination folder.
Sets image type, destination folder, and subfolder creation.
Determines the action to take after images are downloaded.
Enables automatic download when camera is connected.
Completes the auto download settings procedure.
Allows selection of specific images from the camera.
Starts the download process after image selection.
Confirms and changes file destination and naming conventions.
Begins the download of selected images to the computer.
Selects images in the Camera Browser Window for deletion.
Confirms deletion and removes selected images from the camera.
Checks camera support for Sound Recorder and file deletion limits.
Starts the process of downloading sound files from the camera.
Allows selection of one or multiple sound files for download.
Initiates the download of selected sound files.
Confirms and changes file destination and naming for sound files.
Begins the transfer of sound files to the computer.
Explains how to select images within the browser window.
Allows changing the size of image thumbnails.
Controls visibility of image borders and file names.
Controls visibility of image information at the bottom right.
Lists four methods: Print All, Contact Sheet, DPOF, Select and Print.
General steps to initiate printing from the Camera Control Window.
Prints all images from the camera, one per page.
Prints based on DPOF settings configured on the camera.
Prints thumbnails and shooting info of all images on one page.
Prints images in an index format based on DPOF settings.
Selects specific images from the camera for printing.
Selects between Contact Sheet or One Photo Per Page prints.
Check camera model for support of My Camera function.
Defines My Camera Settings like startup image and sounds.
Shows how to access the My Camera window and its settings.
Navigates between 'Setup as a theme' and 'Set individually' tabs.
Switches options within the Data Type category.
Selects 'Setup as a theme' or 'Set individually' and chooses a setting.
Selects a file from My Computer and saves it to the camera.
Replaces camera settings with selected files and confirms the action.
Warns against interrupting communication during saving.
Selects tab and copies setting from Camera list to My Computer.
Assigns a name to the settings file and saves it to the computer.
Explains using My Camera Maker to create setting files.
Adding processed images/sounds as My Camera Settings files.
Details compression, sampling, and size requirements for images/sounds.
Creates an image/sound file and saves it as a setting.
Adds the created file to the My Camera window's list.
Connects camera and saves newly created settings.
Opens the Camera Settings window via the Camera Control Window.
Adjusts camera settings like owner's name and other parameters.
Ensures memory card is inserted when using a memory card reader.
Navigates to 'Set to Camera' and selects 'Uploads images'.
Selects files to copy and chooses resizing options.
Steps to connect camera and begin remote shooting.
Checks camera support, lens covers, PC standby, and operation limits.
Controls shutter release, image size, compression, and rotation.
Turns viewfinder on/off and controls camera zoom.
Refreshes exposure, focus, and white balance settings.
Accesses 'Field angle/flash' and 'Shooting settings' tabs.
Captures images at set intervals of time.
Records a single image after a set number of seconds.
Saves and recalls current zoom and shooting settings.
Views subject on camera LCD or connected TV during remote shooting.
Displays and adjusts default settings for remote shooting.
Sets image saving location, root file name, and sequence numbering.
Sets shutter release key and window 'Always On Top' option.
Explains the two tabs for organizing and viewing folders.
Clicking folders displays images in the Browser Area.
Adds folders to the Favorite Folders list for quick access.
Removes folders from the Favorite Folders list.
Introduces Zoom, Scroll, and Preview modes for the Browser Area.
Displays images as thumbnails for visual searching.
Convenient for checking images in multiple folders simultaneously.
Displays folders as icons, opening them by double-clicking.
Shows thumbnails at bottom, larger image and info panel above.
Zooms into folders by clicking icons or double-clicking.
Displays images and subfolders by clicking folder icons.
Opens folders and displays images/subfolders by double-clicking.
Uses the 'Up' button to navigate to a parent folder.
Skips intervening folders to zoom directly into the target folder.
Uses right-click menu to zoom into or out of folders.
Specifies image information displayed beneath thumbnails.
Limits displayed images to those with assigned Star Ratings.
Sets criteria for ordering thumbnails (name, date, rating, etc.).
Adjusts thumbnail size in Scroll Mode using a slider.
Changes display magnification using slider or zoom buttons.
Changes the displayed portion of the Browser Area via Pan button/Navigator.
Hides Task/Folder Areas to enlarge the Browser Area.
Hides only the Task Area to enlarge the Folder Area.
Displays folder name and first four images when hovering.
Displays enlarged thumbnail and file name when hovering.
Double-clicks an image in Browser Area to open in Viewer Window.
Selects multiple images and opens them at once.
Moves between images using Previous/Next buttons.
Adjusts image magnification using slider or 'Fit to Window'.
Displays image at full screen size for better viewing.
Compares two to four images at once using Split Screen button.
Sets display magnification and position identically for all images.
Shows shooting details for images when clicking 'Show Shooting Information'.
Shows the focus position at shooting time using 'Show Auto Focus Points'.
Displays a convertible version of RAW images.
Displays and controls movie playback, allows extracting still images.
Plays sound files recorded with the camera's Sound Recorder.
Prints the currently displayed image using the Print button.
Provides instructions on how to exit the Viewer Window.
Clicks an image to select it; selected image background changes to blue.
Uses Ctrl/Shift keys with clicks to select multiple images.
Selects all images in a folder using Display Control Panel or Edit menu.
Clears all image selections using Display Control Panel or Edit menu.
Assigns one of three ratings to an image for searches.
Sets rating in Preview mode by checking Star Rating in information panel.
Uses Menu or Properties Window to change star ratings.
Sets star rating for an image displayed in the Viewer Window.
Sets star rating for displayed image during a slide show.
Defines keywords for image searches and provides examples.
Applies keywords to selected images via the View/Modify Keywords window.
Assigns keywords via Menu or Properties Window.
Manages keyword lists using the Manage Keywords window.
Starts process by clicking 'View & Classify' then 'Classify into Folder'.
Selects images and specifies folder structure and destination.
Renaming an image directly renames the actual file on PC.
Selects image, clicks File > Rename, types new name, clicks OK.
Changes image name directly in the information panel.
Renames multiple image files simultaneously.
Selects folder, clicks File > Rename, types new name, clicks OK.
Searches by Star Ratings, dates, comments, or keywords.
Clicks View & Classify > Search, selects region, specifies conditions.
Starts search, displays matching images in 'Search Results' folder.
Reviews search results and finishes the process.
Moving/copying affects the actual file location on PC.
Drags an image from Browsing Area to a new location.
Holds Ctrl key while dragging to copy an image.
Drags images from Browsing Area to Folder Area.
Drags image file icon from Windows Explorer to ZoomBrowser EX.
Selects multiple images and moves/copies them together.
Moves or copies an entire folder using drag-and-drop.
Uses Edit > Copy and Edit > Paste commands.
Selects an image, clicks Delete, and confirms deletion.
Explains how to restore accidentally deleted images from Recycle Bin.
Selects and deletes multiple images at once.
Selects a folder and deletes it, including its contents.
Selects image, clicks Rotate, sets direction/angle, clicks OK.
Selects multiple images and rotates them simultaneously.
Uses Edit > Rotate Image menu to select rotation direction.
Displays image details like file size, date, settings, etc.
Allows renaming, setting Star Ratings, keywords, and comments.
Displays image info, filename, ratings, keywords, comments in Preview mode.
Displays shooting information over the image in Viewer Window.
Selects a folder, clicks File > New Folder.
Types new folder name and clicks OK to create it.
Updates ZoomBrowser EX's view of folder contents after external changes.
Uses View > Refresh Current Folder to update folder information.
Lists available editing operations: Red Eye, Auto Adjust, Color/Brightness, Sharpness, Trim, Text.
Starts other image editing programs for selected images.
Automatically corrects red eyes by selecting Auto Mode.
Manually corrects red eyes by clicking on the red eye portion.
Selects Auto Adjust Image, then clicks OK to complete.
Undo All, Undo, Redo buttons and preview settings.
Adjusts brightness, saturation, and contrast.
Adjusts RGB channel intensity (red, green, blue).
Adjusts highlights, shadows, and mid-tones using histogram.
Adjusts brightness/color balance using a revisable tone curve graph.
Sets the magnitude of the sharpening effect.
Adjusts radius, threshold for sharpening.
Deletes unnecessary parts of an image by selecting a trim area.
Adds text by inputting it and setting font, size, color, attributes.
Saves edited image as a new file without altering original.
Saves edited image data over the original file.
Launches external editing programs for selected images.
Requires email program to be set up as a MAPI client.
Selects images, changes size/quality, and prepares email.
Chooses to create a new email or save images for later sending.
Completes email process, sending message or saving files.
Lists formats for still images, movies, shooting properties, screen savers, wallpaper, CDs.
Covers exporting movies and extracting frames from movies.
Exports images for use as screen savers or desktop wallpaper.
Click Export, select format, select images, specify settings.
Changes image size, type, adds prefix, sets destination folder.
Selects export categories for shooting information.
Exports images as screen saver files, optionally imbedding image.
Exports images as wallpaper files, selecting display method and destination.
Selects images, sets display method, and starts the slide show.
Explains buttons for Back, Pause, Next, Print, Select Images, Star Rating.
Selects image, clicks Edit > Add/Remove Sound, adds sound file.
Selects image with sound, clicks Edit > Play Sound.
Lists One Photo per Page, Index Print, and Layout Print.
Prints one image per page, like photo prints.
Prints multiple images in columns and rows in an index format.
Arranges images with text/decorations for fancy albums.
Clicks Print > Index Print in Main Window.
Confirms image selection and changes background to blue.
Sets printer, paper, copies, rows/columns, and print settings.
Starts the printing process after configuration.
Clicks Print > Layout Print in Main Window.
Confirms image selection and changes background to blue.
Checks information to print with images (multiple selection).
Starts PhotoRecord and displays the print image in the album window.
Chooses printer and album type (e.g., Free Form, Contact Sheet).
Explains various album types and their detailed parameters.
Chooses media type, paper size, and paper orientation.
Changes image background, frame, and other design elements.
Changes or adds titles and text to the image.
Moves images, text, clip art, and changes their size/rotation.
Confirms copies, other settings, and clicks Print to start.
Accesses Manage My Camera and opens My Camera Maker.
Selects image area, clicks Cut to create the startup image.
Warns about red display for exceeding time limit; suggests cut options.
Records and edits sounds using buttons for volume, type, cut.
Saves sound files to computer, specifying filename and destination.
Indicates images with attached sounds on thumbnails.
Double-clicks thumbnail to display and play sound in Viewer Window.
Movie icon shows on thumbnail; double-click to play movie.
Requires QuickTime for playing movies on older Windows systems.
Requires QuickTime program to edit movies.
Steps to edit movies: Add Images, Apply Effect, Set Audio, Save, Exit.
Shows thumbnails, changes order, deletes images, plays movie, shows transition effects.
Moves images, sets playback range, adjusts still image duration, rotates/flips.
Superimposes text, sets font/duration/position, applies transition effects, sepia/monochrome.
Links MP3/WAV files as background music or sound effects.
Specifies file name, destination folder, image type, quality, and advanced settings.
Clicks Export > Export Movies, selects movie, follows steps 2-4.
Selects the format to save the movie file and specifies rotation.
Changes movie size, selects zoom/size specification, sets image quality.
Sets file name (original or sequential) and destination folder.
Clicks Export > Extract frames from movie, selects movie.
Extracts all frames from the movie as still images.
Extracts frames from a range, interval, or specified number.
Extracts stills from specific scenes that catch attention.
Checks extracted stills, adds desired ones.
Specifies destination folder and file name for extracted stills.
Starts the process of extracting stills from the movie.
Check camera support; different software may launch for RAW conversion.
Explains need to convert RAW to standard files for editing.
Conducts conversion, switches between images, sets conversion settings.
Shows preview area and allows changing displayed area.
Adjusts brightness, contrast, coloration during RAW conversion.
Sets image quality, compression ratio, and resolution.
Sets image type, destination folder, and file name.
Sets white balance based on light source or color temperature.
Adjusts exposure compensation, photo effect, contrast, sharpness, saturation.
Adjusts RGB channel settings together or individually.
Sets color space for the output.
Requires two images; cannot be used with EOS Digital Camera.
Creates a scheme using two images and adds it to the system.
Applies registered My Color schemes to RAW images during conversion.
Opens converted images in other programs, displays histograms/shooting info.
Accesses PhotoStitch via Edit > Stitch Photos.
Selects images, decides order, performs stitching, and saves the panoramic image.
Requires Windows XP and a CD-R/RW drive.
Places disk, selects drive, inputs title, specifies backup settings, starts backup.
Lists common image formats like JPEG, RAW, BMP, TIFF, PCD.
Supports AVI, MOV (QuickTime), and ASF (MPEG4) movie files.
Sets thumbnail handling, zoom behavior, and monitor color profile.
Sets image selection methods and steps.
Rotates image data to vertical orientation during download.
Sets printing preferences, including Easy-PhotoPrint selection.
Sets display of image information, font type, and size.
Sets the color theme (background, selection colors) for the program.
Shows/hides menu options by clicking task buttons.
Troubleshoots missing Events dialog when connecting camera.
Addresses issues with camera detection and communication.
Ensures computer meets system requirements for ZoomBrowser EX.
Verifies correct attachment of camera via interface cable.
Confirms camera is on, in correct mode, and battery is charged.
Reinstalls driver if problem persists after checking other areas.
Accesses Help file via Help menu or Help button for program information.
Displays titles/comments from Ver. 2/3 in ZoomBrowser EX 5.
Copies image folders from Program Files to a higher directory.
Copies the folder itself, not just images, to a higher directory.
Information accuracy, liability, and rights reserved by Canon.
Lists trademarks of Adobe, Apple, Microsoft, and other companies.
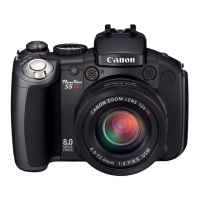
| Display diagonal | 2.5 \ |
|---|---|
| Display resolution (numeric) | 115.000 pixels |
| Megapixel | 8.3 MP |
| Sensor type | CCD |
| Image sensor size | 1/1.8 \ |
| Supported aspect ratios | 4:3 |
| Maximum image resolution | 3264 x 2448 pixels |
| Filter | Primary Colour |
| Digital zoom | 4 x |
| Optical zoom | 3.2 x |
| Focal length range | 5.8 - 20.7 mm |
| Interface | USB |
| Photo mode | Auto, Program AE, Shutter priority AE, Aperture priority AE, Manual, Custom, Stitch Assist, Movie |
| Built-in flash | Yes |
| Dimensions (WxDxH) | 104 x 57 x 38.8 mm |
| Camera shutter speed | 15 - 1/2000, 15 - 1/2000 s |
| Compatible operating systems | Windows 98SE / Me / 2000 SP4 / XP / XP SP1-2 OS X v10.2 - 10.3 |
| Focus | TTL |
| Viewfinder type | Optical |
| Internal memory | 32 MB |
| Compatible memory cards | mmc, sd |
| Maximum memory card size | 0.032 GB |
| I/O ports | USB 2.0 (Mini-B, PTP) A/V (PAL/NTSC) |
| Bundled software | ZoomBrowser EX (PhotoRecord) / ImageBrowser PhotoStitch, RemoteCapture TWAIN (Windows 98 / 2000), WIA (Windows Me) ArcSoft PhotoStudio |
| Self-timer delay | 2 s |
| Playback zoom (max) | 2 x |
| Material | Metal |
| Product color | Black, Silver |
| Battery type | NB-2LH/NB-2L |
| Operating relative humidity (H-H) | 10 - 90 % |
| Maximum operating temperature range (T-T) | 40 °C |
| Recommended operating temperature range (T-T) | 0 - 40 °C |
| Flash modes | Red-eye reduction |
| Weight | 225 g |
|---|