Do you have a question about the Canon Speedlite 600EX-RT and is the answer not in the manual?
Explains using the Speedlite with EOS digital cameras and EOS film cameras.
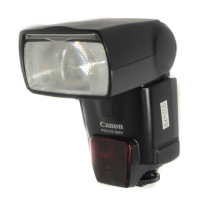
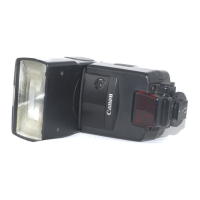
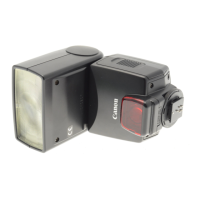
Identifies and describes the physical parts of the Speedlite.
Details the various buttons, dials, and indicators on the Speedlite.
Explains the symbols and functions displayed on the LCD panel.
Shows the LCD display for manual flash mode.
Shows the LCD display for stroboscopic flash mode.
Shows LCD displays for auto/manual external flash metering.
Explains LCD displays for master/slave units in radio transmission.
Shows the LCD display for linked shooting mode.
Lists and illustrates the accessories provided with the Speedlite.
Explains the meaning of icons used throughout the manual.
Outlines the fundamental assumptions made for operating the Speedlite.
Warns about overheating and damage from continuous flash use.
Step-by-step guide to inserting the batteries into the Speedlite.
Provides data on flash recycling times and flash count.
Instructions on how to mount and remove the Speedlite from the camera.
How to power the Speedlite on and check its readiness.
Explains the Quick Flash feature for faster recycling.
Details the automatic power-off function to save battery.
How to lock controls to prevent accidental changes.
Explains how the LCD panel illuminates and its behavior.
Instructs to set the flash mode to E-TTL for automatic shooting.
Explains how to focus the subject for automatic flash.
Details the final step of taking a picture in automatic mode.
How E-TTL works in Shutter-priority AE mode.
How E-TTL works in Aperture-priority AE mode.
How E-TTL works in Manual exposure mode.
Table showing sync speeds and apertures for camera modes.
Specifies camera modes needed for advanced functions.
Step to initiate flash exposure compensation.
How to adjust the compensation value.
Step to initiate FEB (Flash Exposure Bracketing).
How to adjust the FEB level.
Step to focus before performing FE Lock.
Step to perform FE Lock.
How to activate High-speed Sync.
How to activate Second-curtain Sync.
Instructions for angling the flash head for bounce.
How to use the catchlight panel for eye catchlights.
Special case of flash coverage for short distances.
Step to access flash coverage settings.
How to adjust the flash coverage.
How to use the built-in wide panel for ultra-wide angles.
Step to set the flash to Manual mode.
How to adjust flash output in Manual mode.
Using a gray card for manual flash exposure.
Step to set the flash to Stroboscopic mode.
How to select parameters for stroboscopic flash.
How to set the values for stroboscopic flash.
How to calculate shutter speed for stroboscopic effects.
Table showing continuous flash limits based on Hz and output.
How to set the flash to Auto External Metering.
How to set the flash to Manual External Metering.
How to activate modeling flash.
How to reset Speedlite settings to default.
Details the provided color filters and their application.
Using third-party color filters with the Speedlite.
Specifies camera modes needed for camera-based flash control.
Steps to access flash settings via the camera menu.
Illustrates flash settings on an EOS-1D X.
Illustrates flash settings on an EOS 60D.
Lists settings for newer EOS cameras.
Lists settings for older EOS cameras.
Setting to enable/disable flash firing and AF assist beam.
Options for E-TTL II metering.
Setting sync speed in Av mode.
Selecting flash modes like E-TTL II, Manual, MULTI.
Options for shutter sync (1st/2nd curtain, Hi-speed).
Setting exposure compensation via camera menu.
Setting FEB via camera menu.
Setting flash coverage via camera menu.
Configuring wireless shooting modes via camera menu.
Resetting Speedlite functions via camera menu.
Accessing and setting Custom Functions via camera menu.
Lists accessories needed for radio transmission.
Specifies camera modes for radio transmission.
Defines master and slave units in wireless setups.
How to set up autoflash with a single slave unit.
Visual guide to positioning and operating range for radio sync.
Overview of multi-group wireless flash.
Setting up autoflash with two slave groups.
Setting up autoflash with three slave groups.
Using various flash modes for different groups.
Compares radio and optical transmission features.
Lists restrictions based on camera model and age.
How to configure the master unit for wireless.
How to configure the slave unit for wireless.
Setting channel and ID to avoid interference.
Step-by-step guide for channel/ID setup.
How to scan channels when set to AUTO.
How to scan channels manually and set them.
Interpreting the LINK lamp colors and meanings.
Setting whether the master unit fires with the slaves.
Saving and loading wireless settings.
Step to configure the master unit for ETTL wireless.
Step to configure the slave unit for ETTL wireless.
Verifying channel and ID for ETTL wireless.
Positioning for ETTL wireless shooting.
Setting the ETTL mode on the master unit.
Verifying link and flash readiness.
Testing the wireless setup with a test flash.
The final step of shooting in ETTL wireless mode.
Expanding autoflash setup to multiple slave units.
Overview of features usable in fully auto wireless.
Considerations for using more than one master unit.
Configuring slave units into two groups.
Accessing menu for ratio settings.
Setting the flash ratio between groups A and B.
Adjusting the flash output ratio between groups.
Final step of shooting with flash ratios.
Adding a third slave group (C) for lighting control.
Adjusting exposure compensation for multiple groups.
Explains how groups are controlled and ratio equivalents.
Setting Manual mode for multi-flash.
Selecting groups (ALL, A/B, A/B/C) for manual multi-flash.
Choosing a group to set output for.
Adjusting manual flash output per group.
Final step for manual multi-flash shooting.
Setting different flash modes per group.
Assigning slave units to groups (A/B/C/D/E).
Configuring flash modes (ETTL, Manual, Ext.A) for selected groups.
Adjusting output/compensation for each group.
Accessing slave unit functions.
Performing a test flash from a slave unit.
Performing modeling flash from a slave unit.
Cameras that support remote release from slave unit.
Cameras requiring a special cable for remote release.
Accessing remote release function.
Executing remote release shooting.
Important notes on connecting cables, focus, and drive modes.
Explains the concept of linked shooting with radio transmission.
Lists equipment needed for linked shooting.
Initial step to set devices for linked shooting.
Activating the linked shooting mode.
Configuring channel and ID for linked shooting.
Adjusting camera settings for linked shooting.
Configuring all devices for linked shooting.
Preparing the slave cameras for linked shooting.
Executing the linked shooting process.
Important notes on focus, timing, exposure, and compatibility.
Lists accessories for optical wireless transmission.
Specifies camera modes for optical transmission.
Defines master and slave units for optical wireless.
How to set up autoflash with one slave via optical sync.
Visual guide to positioning and range for optical sync.
Overview of multi-group optical wireless flash.
Setting up autoflash with two slave groups via optical sync.
Setting up autoflash with three slave groups via optical sync.
How to configure the master unit for optical wireless.
How to configure the slave unit for optical wireless.
Setting the transmission channel for optical sync.
Setting master unit firing for optical sync.
Saving and loading optical wireless settings.
Step to configure the master unit for ETTL optical wireless.
Step to configure the slave unit for ETTL optical wireless.
Verifying channel for ETTL optical wireless.
Positioning for ETTL optical wireless shooting.
Setting the ETTL mode on master unit for optical wireless.
Verifying readiness for ETTL optical wireless.
Testing ETTL optical wireless setup.
Final step of shooting in ETTL optical wireless mode.
Expanding autoflash to multiple slaves via optical sync.
Features usable in auto optical wireless mode.
Using multiple masters in optical wireless.
Configuring slave units into two groups for optical sync.
Accessing menu for ratio settings in optical sync.
Setting flash ratio for optical sync.
Adjusting flash output ratio for optical sync.
Shooting with flash ratios via optical sync.
Adding a third slave group (C) for optical sync.
Adjusting exposure compensation for optical multi-group.
Group control and ratio equivalents for optical sync.
Setting Manual mode for optical multi-flash.
Selecting groups (ALL, A/B, A/B/C) for manual optical multi-flash.
Choosing a group to set manual output for.
Adjusting manual flash output per group.
Final step for manual multi-flash shooting via optical sync.
Initial step to set up the slave unit.
Setting slave to Manual flash mode.
Setting slave to Stroboscopic flash mode.
Introduction to customizing via Custom Functions.
Introduction to customizing via Personal Functions.
How to access the Custom Functions menu.
Navigating to select a Custom Function.
Modifying the selected Custom Function.
How to access the Personal Functions menu.
Setting a Personal Function.
Comprehensive list of Custom Functions and their pages.
Comprehensive list of Personal Functions and their pages.
Procedure to reset all C.Fn and P.Fn settings.
Setting the distance unit display (meters/feet).
Enabling/disabling auto power off.
Controlling modeling flash activation.
Setting FEB auto cancellation.
Changing the FEB shot order.
Selecting flash metering mode.
Enabling/disabling Quick Flash in continuous shooting.
Adjusting test flash output in autoflash.
Enabling/disabling AF-assist beam.
Auto-adjusting flash coverage based on sensor size.
Setting auto power off time for slave units.
Cancelling slave auto power off with master.
Using external power for faster recycle.
Setting flash exposure compensation via dial.
Enabling audible beep for flash readiness or warnings.
Adjusting flash coverage patterns (Standard, Guide, Even).
Controlling LCD panel illumination duration and state.
Disabling AF-assist beam blink on slave readiness.
Adjusting LCD panel contrast.
Setting LCD color for normal shooting.
Setting LCD color for master unit in wireless.
Setting LCD color for slave unit in wireless.
Enabling/disabling auto detection of color filters.
Changing the sequence of modes when pressing wireless button.
Controlling flash firing during linked shooting.
Diagram showing system components and connections.
Frequently Asked Questions section.
Specific guidance for Type-B cameras.
Diagram of radio transmission setup.
Diagram of optical transmission setup.
Details on accessories like color filters, transmitters, battery packs.
Explains warning icons and recycling times for overheating.
Guidelines for continuous flashes and necessary rest.
Solutions for power and flash firing problems.
Troubleshooting auto power off.
Solutions for incorrect exposure.
Troubleshooting dark lower part of image.
Troubleshooting dark edges of image.
Troubleshooting blurred images.
Solutions for automatic flash coverage issues.
Troubleshooting wireless shooting that does not work.
Solutions for slave units not firing.
Troubleshooting unexpected slave unit behavior.
Solutions for overexposed images in radio transmission.
Troubleshooting when the sync speed warning icon appears.
Solutions for remote release failures from slave units.
Troubleshooting exposure issues in linked shooting.
Troubleshooting optical wireless shooting issues.
When the master flash fires unintentionally in optical sync.
Solutions for overexposed images in optical transmission.
Details the Speedlite type and compatible camera systems.
Details on guide number, coverage, bounce, and color temp transmission.
Details on exposure systems, flash range, compensation, FEB, FE lock, sync.
Information on recycling times and ready lamp indicators.
Details on AF system compatibility and effective range.
Specs for radio transmission (frequency, channels, distance).
Specs for optical transmission (channels, distance, ratio).
Number of Custom and Personal Functions available.
Details on power sources, battery life, and shooting times.
Physical dimensions and weight of the Speedlite.
Guide number tables for normal and quick flash by coverage.
Guide number tables for manual flash by output and coverage.
Lists features that work with Type-B cameras.
Lists features that do not work with Type-B cameras.
| Zoom Range | 20-200mm |
|---|---|
| Wireless Radio Transmission | Yes |
| Wireless Optical Transmission | Yes |
| Flash Modes | E-TTL II, Manual, Multi |
| High-Speed Sync | Yes |
| Power Source | 4 x AA batteries |
| Auto Zoom Head | Yes |
| Color Temperature Information Transmission | Yes |
| Weather Sealing | Yes |
| Guide Number | 60 (at ISO 100, in meters) |
| Bounce Head | Yes, up to 90° |
| Swivel Head | Yes, 180° left and right |
| Weight | 425g (without batteries) |
| Compatible Cameras | Canon EOS cameras |