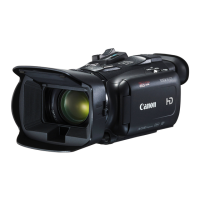
Do you have a question about the Canon VIXIA HF G20 and is the answer not in the manual?
Details the camcorder's HD recording capabilities, sensor, and processor.
Covers ease of use, manual controls, and touch operations for user convenience.
Highlights additional functionalities like audio optimization and Smart AUTO mode.
Explains how to connect to HDTVs, computers, and other devices for playback.
Details wireless upload via Eye-Fi and options for sharing content to the web.
Covers creating discs and converting files to standard definition for compatibility.
Provides information about the manual's content, purpose, and how to use it effectively.
Explains symbols, terms, and formatting used throughout the manual for clarity.
Lists and illustrates the accessories included with the camcorder, like cables and battery.
Identifies components located on the left side of the camcorder, such as terminals and buttons.
Step-by-step guide on how to charge the camcorder's battery pack using the adapter.
Instructions for attaching the lens hood to reduce stray light and protect the lens.
How to use the camcorder's viewfinder for shooting, especially in bright conditions.
Details compatible memory card types (SD, SDHC, SDXC) and speed classes.
Specific information and precautions for using SDXC memory cards with the device.
Notes on using Eye-Fi cards, including wireless transfer limitations and approvals.
Steps required before starting the recording process, like attaching battery and selecting memory.
How to use the automatic mode for simple recording without manual adjustments.
Guide to manual controls for adjusting exposure, focus, and white balance.
Instructions for manually adjusting focus using the focus ring and peaking assistance.
Explains different autofocus modes and settings for automatic focusing.
How the camcorder automatically detects and uses faces for focus and exposure optimization.
How to operate the zoom using the camcorder's lever or the wireless controller.
Details how to use zoom controls directly on the camcorder's touch screen interface.
Describes different modes for stabilizing video footage to reduce blur.
Explains how to enhance image stabilization using the Powered IS function for more stability.
How to control video noise by setting the AGC limit for gain adjustment.
Automatic adjustment of aperture and shutter for optimal exposure.
Setting shutter speed while aperture is automatically adjusted.
Setting aperture while shutter speed is automatically adjusted.
Step-by-step guide to manual exposure adjustments using aperture, shutter, and gain.
How to use the zebra pattern feature to identify and correct overexposed areas.
How to adjust exposure brightness for subjects, compensating for lighting conditions.
Explains automatic, preset, and custom white balance settings for accurate color reproduction.
Details various scene modes like Portrait, Sports, and Sunset for specific shooting conditions.
How to adjust color depth, sharpness, contrast, and brightness of the image.
Instructions for setting up and using the self-timer for delayed recording.
Choosing audio scenes to optimize sound based on the recording environment.
How to manually adjust audio input levels for the microphone.
Explains how to change the directionality of the built-in microphone for sound capture.
Adjusting sound levels for specific frequency ranges using the equalizer.
Reducing background wind noise during outdoor recording by activating the wind screen.
How to mix audio from built-in and external microphones for sound effects.
How to connect headphones and adjust volume levels for monitoring audio.
How to attach optional accessories like microphones using the shoe mount.
Using external microphones for enhanced audio capture, like surround or directional sound.
Details on using the WM-V1 wireless microphone for remote audio recording.
Information on connecting standard microphones with a 3.5mm plug.
How to attach and use optional video lights for recording in dark locations.
How to output color bars for calibration or audio reference signals for testing.
Using waveform monitors for exposure analysis and signal level checks.
Using edge monitors for focus assistance and sharpness checks.
How to capture short video clips as snapshots to create highlight reels.
Capturing footage automatically before pressing the record button to avoid missing moments.
How to turn onscreen displays and data codes on or off for a cleaner view.
How to add fade-in/out transitions to scenes for smooth video editing.
Assigning frequently used functions to custom buttons and dials for quick access.
How to assign functions to the camcorder's two assignable buttons for personalized shortcuts.
How to back up custom settings and configurations to a memory card.
How to restore saved custom settings from a memory card to the camcorder.
How to find and select scenes using the date index for playback.
Explains the on-screen controls for playing, pausing, and controlling video playback.
A visual method for browsing scenes grouped by date using a 3D layout.
Explains the difference between date-based and story-based playback modes.
How to remove individual video scenes from the camcorder's memory.
Removing multiple scenes from the date index screen efficiently.
Removing scenes based on rating or directly from a created story.
How to split scenes into smaller segments for easier editing or selection.
How to choose a specific starting point within a long scene using the timeline.
Creating short video clips from existing footage for highlight reels.
Taking still photos directly from video playback at specific frames.
Capturing multiple photos in sequence from video for a series of stills.
Step-by-step guide to creating narrative video stories using suggested themes and categories.
Adding footage to an existing story structure within the Story Creator function.
How to switch to CINEMA mode for cinematic effects and frame rate adjustments.
Using various cinema-look filters to create specific visual styles for recordings.
Adding graphical elements like stamps or drawings to scenes during recording.
Instructions for drawing and adding graphics using pens and stamps on the scene.
How to add animated graphics or stamps to scenes for decorative effects.
How to add text overlays like date, time, or titles to the video scenes.
Incorporating image frames or Chroma Key effects into the video.
Adding decorations to recorded scenes during playback mode.
How to browse and play back video stories from the gallery in storyline order.
Assigning ratings to scenes right after they are recorded for organization.
Rating scenes from the gallery list for selection and organization.
Rating scenes while they are being played back for easy sorting.
Adding background music from the camcorder's library to slideshows or videos.
Using external devices for background music playback with videos.
Managing scenes by copying or moving them within the gallery for organization.
Setting a custom image to represent a story in the gallery for better identification.
How to rename stories for better organization and identification.
Identifies all external connection ports on the camcorder for various peripherals.
Illustrates how to connect via HDMI for high-definition output to TVs.
Shows how to connect using component video cables for high-definition output.
Steps for connecting the camcorder to a TV and viewing recordings.
How to find and view still photos using the index screen.
Explains controls for viewing photos individually and browsing.
Quickly navigating through a large number of photos using the scroll bar feature.
Creating and customizing photo slideshows, including options for music.
How to remove individual still photos from the camcorder's memory.
Removing multiple photos from the index screen efficiently.
Transferring scenes and photos from internal memory or card to another memory card.
Transferring movie files to a computer using the supplied VideoBrowser software.
Transferring photo files to a computer using ImageBrowser EX software.
Transferring recordings to external HD devices via USB for high-definition copies.
Transferring recordings to standard definition devices via analog connections.
Preparing high-definition scenes for web sharing by converting them to standard definition.
Automatically uploading videos to web services using an Eye-Fi card's wireless capabilities.
Lists FUNC. panel options available in different recording modes for quick reference.
Lists Edit panel options available in different camcorder modes for managing content.
Details the options available in the camcorder's setup menus for configuration.
Explains the meaning of icons displayed during movie recording operations.
Explains the meaning of icons displayed during playback of movies and photos.
Provides initial checks to perform before detailed troubleshooting for common problems.
Troubleshooting steps for power and battery-related problems like no power or quick drain.
Solutions for problems encountered during recording, such as memory errors or focus issues.
General safety and care instructions for operating and handling the camcorder.
Instructions for cleaning the camcorder body, lens, and touch screen properly.
How to prevent and handle condensation inside the camcorder due to temperature changes.
Information on using the camcorder's power adapter internationally with voltage converters.
Regions where the NTSC TV system is used, relevant for TV playback.
Lists various optional accessories available for enhancing the camcorder's functionality.
Technical details of the camcorder's system, recording formats, and media.
Details about the image sensor, LCD screen resolution, and viewfinder specifications.
Information on the camcorder's lens optics, zoom range, and autofocus system capabilities.
Outlines the limited warranty coverage and terms for customers in the United States.
Outlines the limited warranty coverage and terms for customers in Canada.
Provides contact details for Canon support centers in various regions globally.
How to save, manage, and organize AVCHD movies on a computer using the software.
Features for editing video files and converting them for portable media players.
Instructions for sharing videos to YouTube and Facebook directly from the software.
| Sensor type | CMOS |
|---|---|
| Total megapixels | 2.37 MP |
| Optical sensor size | 1/3 \ |
| Effective megapixels (image) | 2.07 MP |
| Filter size | 58 mm |
| Digital zoom | 200 x |
| Optical zoom | 10 x |
| Image stabilizer | No |
| Focal length range | 4.25 - 42.5 mm |
| Maximum aperture number | 2.8 |
| Minimum aperture number | 1.8 |
| Focal length (35mm film equivalent) | 30.4 - 304 mm |
| Flash memory | 32 GB |
| Memory slots | 2 |
| Camcorder media type | Memory card |
| Compatible memory cards | SD, SDHC, SDXC |
| Internal storage capacity | - GB |
| Focus adjustment | Auto |
| Normal focusing range | 0.2 - 0.6 m |
| Scene modes | Beach, Fireworks, Night, Portrait, Spotlight, Sunset |
| Light exposure modes | Manual |
| Camera shutter type | Electronic |
| Built-in display | Yes |
| Display diagonal | 3.5 \ |
| Display resolution (numeric) | 922000 pixels |
| Viewfinder type | - |
| Viewfinder resolution | 260000 pixels |
| Viewfinder screen size | 0.24 \ |
| Camcorder type | Shoulder camcorder |
| Minimum illumination | 0.1 lx |
| Product color | Black |
| Maximum video resolution | 1920 x 1080 pixels |
| Analog signal format system | NTSC |
| Audio system | Dolby Digital 2.0 |
| Microphone connectivity | 3.5 mm |
| USB 2.0 ports quantity | 0 |
| Component video (YPbPr/YCbCr) out | 1 |
| Battery capacity | - mAh |
| Battery life (max) | - h |
| Video recording time | 12.4 h |
| Depth | 161 mm |
|---|---|
| Width | 77 mm |
| Height | 78 mm |
| Weight | 620 g |