EasyManua.ls Logo

Canon Vixia HF S21 User Manual

Canon Vixia HF S21
10 pages
To Next Page IconTo Next Page
Page #1 background imageLoading...
Page #1 background image
1
Vixia HF S21
WORKSHOP NOTES
CONTENTS
Introduction 1
Parts and Functions 2
Precautions 3
Setup & Operation 4
- Modes, Menus 4
- Setting Up: A) White Balance 5
B) Storage Media 5
C) Recording Mode 5
D) Frame Rate 6.
E) Zebra Striping 6.
E) Lens Functions 6.i
E) Focusing 6.ii
D) Image Stabilization 7.iii
E) Viewfinder 7.iv
F) Audio Levels 7,8
Miscellaneous Features 9
Ingesting/Importing Foot 9
Quick Start Guide 10
Introduction
The HF S21 is a dual flash-memory camcorder, with a 64GB internal flash drive
and two SD memory card slots, allowing for continuous “Relay Recording.” This
means a very extended record time is possible. As well as a viewfinder, it features
a sharp 3.5” LCD touch screen where all menu selections and functions can be
adjusted.
Features like Touch & Track allow you to achieve sharp focus and precise exposure
for any subject, simply by touching the image of the subject on the LCD screen.
The camcorder has a max. resolution of 1920x1080 and can shoot multiple frame
rates including 60i, 30p, & 24p. The lens has a focal length of 6.4mm – 64mm and
a 4X optical zoom with a 200X digital zoom.
The touch screen menus allow users to setup manual focus, aperture, exposure,
and many other features. A user-assignable knob (see item 7 on page 2) allows
for manual adjustment of focus, exposure, mic level, and aperture.
Look for the asterisks * in the notes. These point out questions that will be
on the test.
Note: The camera has physical buttons and touch screen buttons. In the following notes,
words in brackets [SAMPLE BUTTON] refer to these buttons; the text indicates
whether you would “press” a physical button, or “touch” a button on the screen.
Question and Answer IconNeed help?

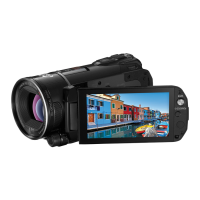
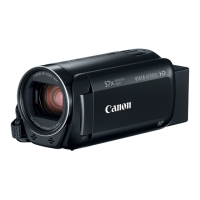
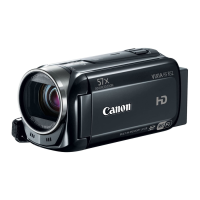
Do you have a question about the Canon Vixia HF S21 and is the answer not in the manual?

Canon Vixia HF S21 Specifications

General IconGeneral
Filter size58 mm
Digital zoom200 x
Optical zoom10 x
Image stabilizerYes
Focal length range6.4 - 64 mm
Focal length (35mm film equivalent)43.5 - 435 mm
Sensor typeCMOS
Total megapixels8.59 MP
Optical sensor size1/2.6 \
FocusTTL
InterfaceUSB 2.0
Aperture range (F-F)1.8 - 3
Display diagonal3.5 \
Maximum frame rate30 fps
Video formats supportedH.264
Analog signal format systemNTSC
Minimum illumination0.3 lx
Shutter speed (photo)1/500 s
Shutter speed (video)1/2000 s
USB 2.0 ports quantity1
Compatible memory cardsSD, SDHC
Maximum memory card size32 GB
Battery typeBP-808
Weight and Dimensions IconWeight and Dimensions
Depth140 mm
Width75 mm
Height74 mm
Weight460 g

Summary

Introduction

Parts and Functions

Precautions

Care & Handling

Guidelines for handling and maintaining the camcorder to prevent damage.

Memory Precautions

Important notes regarding SD card insertion, removal, and recognition.

Power Precautions

Safety guidelines for connecting and disconnecting batteries and power.

Setup & Operation

Modes

Explanation of the two camcorder operation modes: Dual Shot and Movie Mode.

Menu Navigation

How to access and exit different menus for camera settings and functions.

Setting up for a Shoot

White Balance Setup

Instructions for setting manual or automatic white balance for accurate color.

Selecting Recording Media

Guidance on choosing between internal memory and SD cards for recording.

Recording Mode Quality

Details on different recording modes (MXP, FXP, etc.) and their impact on quality.

Frame Rate Settings

How to set the frame rate for different project looks and editing software.

Lens Functions and Focus

Controlling lens parameters like AE programs, manual focus, and peaking.

Image Stabilization

How to use and adjust the camcorder's image stabilizer for steady shots.

Viewfinder Operation

Using the viewfinder for magnification and extended battery life.

Audio Levels Setup

Setting input levels for internal or external microphones for optimal sound.

Miscellaneous Features

Color Bars and Test Tone

Using built-in test patterns for video calibration and setup.

Video Light Usage

Activating and using the onboard video light for quick illumination.

HDMI Output

Connecting to an HDTV via HDMI for viewing footage.

Importing Footage

Steps for transferring recorded video files to a computer for editing.

Related product manuals