Do you have a question about the Canon VIXIA HF100 and is the answer not in the manual?
Covers warnings about electrical shock, moisture, accessory use, and copyright.
Covers reading/retaining instructions, handling, cleaning, and environmental factors.
Guidelines for power sources, polarized plugs, power cord protection, and antenna grounding.
Explains high-definition video, resolution, and comparison to standard definition.
Explains using Cinema Mode for a cinematic look with 24 fps.
Explains manual conventions, icons, and terms used within the document.
Details icons, notes, points to check, and reference page indicators used.
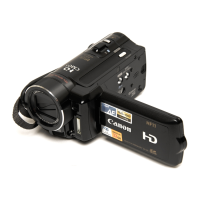
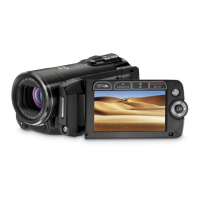
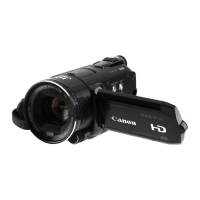
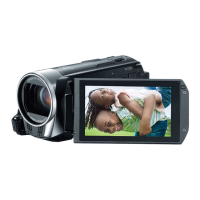
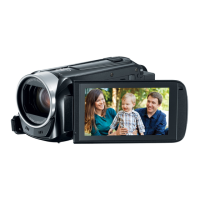
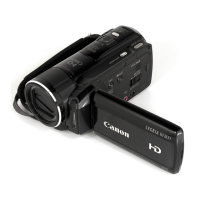
Identifies components on the left, right, front, back, LCD, and top views.
Identifies and describes components located on the bottom of the camcorder.
Details the buttons and functions of the wireless remote controller.
Details icons and information displayed on the screen while recording movies.
Details icons and information displayed on the screen during playback.
Details icons and information displayed on the screen while recording still images.
Details icons and information displayed on the screen while viewing still images.
Overview of basic operations and initial setup steps.
Instructions for charging the camcorder's battery pack using the compact power adapter.
Instructions for inserting the battery into the wireless controller.
Instructions for attaching and removing the grip belt and wrist strap.
Instructions for attaching a shoulder strap to the camcorder.
Steps to reattach the grip belt after it has been removed.
Guide to rotating the LCD panel and adjusting screen brightness.
Explains the EASY mode for beginners and the Flexible mode for advanced settings.
How to use the joystick for menu navigation and additional functions.
How to access and adjust functions using the FUNC. button and menus.
Step-by-step guide to selecting and saving options from the FUNC. menu.
Guide to navigating and selecting options within the camcorder's setup menus.
Instructions for setting the camcorder's date and time upon first use.
Procedure for changing the camcorder's display language.
Instructions for setting the camcorder's local time zone.
Recommendations for SDHC and SD memory cards, including Speed Class requirements.
Step-by-step guide for inserting and removing SD/SDHC memory cards.
How to choose between built-in memory and memory card for recording movies and images.
Procedure for initializing memory cards or built-in memory to erase data and improve performance.
Step-by-step guide to turning on the camcorder and starting video recording.
Table showing approximate recording times for different modes and memory capacities.
How to use the zoom lever and set zoom speed for optical and digital zoom.
Enables the camcorder to enter standby mode quickly and resume recording in approximately 1 second.
How to play back and check the most recently recorded video scene.
Procedure for deleting the last recorded video scene.
Step-by-step guide to selecting and playing back recorded video scenes.
How to switch between original movies and playlists, and select media source.
How to adjust the volume of playback using the joystick or menu.
Search for recorded scenes by date using the calendar or list view.
How to delete unwanted scenes to free up memory space.
Procedure to delete specific scenes or all scenes recorded on a selected date.
Using Cinema Mode and 24 fps progressive frame rate for a cinematic look.
Using pre-set recording programs for specific shooting conditions like bright scenery or fireworks.
Instructions for using the self timer for recording movies or still images.
How to use the BLC button to automatically correct backlight issues.
Step-by-step guide to manually adjust image brightness using the exposure indicator.
How to manually focus the camcorder when autofocus is insufficient.
How to set focus for faraway subjects like mountains or fireworks.
How to adjust white balance to reproduce colors accurately under different lighting conditions.
Details various digital effects like fades, black and white, sepia, and art filters.
How to activate faders to fade video in or out during recording.
How to activate digital effects during recording or pause mode.
Information about data codes, on-screen displays, and how to toggle them on/off.
How to manually adjust audio recording levels for built-in or external microphones.
How to connect and use headphones for playback or to check audio levels.
Instructions for connecting and using external microphones with the camcorder.
How to adjust headphone volume via the [PHONES VOL.] setting or speaker volume controls.
Information on the directional stereo microphone for enhanced audio capture.
How to connect external microphones to the MIC terminal.
How to create a playlist of selected scenes for custom playback order.
How to delete individual scenes from a created playlist.
Procedure for deleting all scenes from a playlist.
How to rearrange the order of scenes within a playlist.
Options for copying all scenes, scenes by date, or a single scene.
Step-by-step guide to setting the mode dial and taking still photos.
How to choose image size and quality for still photos, affecting quality and file size.
Instructions for viewing still images and navigating between them.
How to erase the last recorded still image immediately after capture.
How to play back still images as a slideshow.
How to browse and select still images using the index screen.
How to switch between built-in memory and memory card for image playback.
How to zoom in and out on still images during playback for detailed viewing.
How to erase unwanted still images from the camcorder.
Procedure to erase one specific still image or all images from memory.
How to use the flash for low-light photos, including flash modes and red-eye reduction.
How to capture multiple shots or bracket exposures for better photo results.
Information on the maximum number of shots per second in different drive modes.
How to capture still images while recording video.
How to adjust light metering settings (Evaluative, Center-weighted, Spot) for optimal exposure.
How to display and interpret histograms to verify correct exposure of still images.
How to capture still images from recorded video scenes.
How to protect still images from accidental erasure.
How to copy still images between built-in memory and memory card.
Procedure for copying one or multiple selected still images.
How to copy images by selecting them from the index screen.
How to connect the camcorder to a PictBridge printer for direct photo printing.
Information about Canon printers compatible with the PictBridge direct printing standard.
Step-by-step guide for connecting the camcorder to a PictBridge printer via USB.
How to initiate printing by simply pressing the Print/Share button.
How to choose print options like paper size, type, layout, date, and print effect.
How to adjust print settings and start printing.
Guidance on printing multiple images (2-UP, 4-UP) on a single sheet of paper.
Troubleshooting common printing errors and messages that may appear.
How to crop or adjust the print area of an image before printing.
How to print images that have been marked with print orders.
Procedure for clearing all marked transfer orders.
Identifies and describes the various input/output terminals on the camcorder.
Illustrates connections to TVs, computers, and DVD burners via HDMI, Component, AV, and USB.
How to connect the camcorder to a TV for playback of recordings.
Details the HDMI connection for high-quality digital audio and video output.
Instructions for backing up movies to a computer using PIXELA ImageMixer 3 SE software.
Options for saving recordings using a DVD burner or external recording device.
Creating AVCHD discs or Photo DVDs using the optional DW-100 DVD Burner.
Guide to installing the PIXELA ImageMixer 3 SE software on your computer.
Steps for connecting the camcorder via USB after software installation.
Options for transferring all images or new images automatically.
How to select specific images for transfer or set one as desktop wallpaper.
How to mark images in advance for transfer to the computer as transfer orders.
Procedure to select and mark still images with transfer orders.
How to transfer still images that have been marked with transfer orders.
Procedure for clearing all marked transfer orders.
Lists menu items, setting options, and reference pages for camcorder functions.
Configure digital zoom, autofocus modes, AF assist, and image stabilization.
Adjust frame rate, auto slow shutter, wind screen, and review settings.
View memory status and select media for movies and images.
How to delete movies, playlists, and all images from memory.
Procedure for initializing memory cards or built-in memory.
Adjust LCD brightness and choose to display audio level indicator.
Configure TV output, display data codes, and use screen markers for framing.
Change display language and set the starting day for the calendar display.
Check battery status, configure wireless remote, and adjust beep sound.
Configure power saving, quick start, and AV/headphone output settings.
Adjust speaker/headphone volume, set image numbering, and select image quality.
Configure TV connection type, output signals, USB protocol, and disc authoring options.
Configure USB connection protocol and check camcorder firmware version.
Set time zone, date, time, and date format for display and printing.
Initial troubleshooting steps for common issues before proceeding to detailed solutions.
Troubleshooting for camcorder not turning on, battery issues, or overheating.
Troubleshooting for recording failures, focus problems, or bent images.
Addresses problems like recording not starting, focus failures, and slow operations.
Addresses issues with adding scenes to playlists, deleting scenes, and erasing images.
Explains indicator lights and onscreen messages and their troubleshooting.
Addresses issues with screen display, abnormal characters, video noise, and sound.
Addresses problems with inserting/using memory cards, wireless controllers, and accessories.
Addresses issues with video noise on TV, or no image/sound when connected to external devices.
Covers backup, temperature, humidity, electromagnetic fields, and physical handling.
Advice on tripod mounting and techniques for stable video footage.
Instructions for storing the camcorder and battery packs properly during long periods of non-use.
Important safety and care instructions for handling and using battery packs.
Guidelines for handling memory cards to prevent data corruption or loss.
Safety warnings and handling instructions for the CR2025 button battery.
Information about the camcorder's internal battery and how to recharge it.
Advice on safely disposing of the camcorder or memory card, including data deletion.
Instructions for cleaning the camcorder body, lens, sensor, and LCD screen.
How to prevent and what to do if condensation forms inside the camcorder.
Information on power sources and TV system compatibility for international use.
Information on purchasing genuine Canon accessories like battery packs and chargers.
Details on compatible battery pack models (BP-808/809/819) and the CG-800 charger.
Approximate recording and playback times using different battery packs and memory cards.
Information on the tele-converter lens, its focal length increase, and compatibility notes.
Details on the wide-converter lens for wider perspective and potential effects.
Information on neutral density and MC protector filters for lighting control.
Description of the HDMI cable for high-quality digital audio/video connection.
Information on the directional stereo microphone for enhanced audio capture.
How to attach a shoulder strap for security and portability.
Description of the soft carrying case for camcorder and accessories.
List of product codes for provided and optional accessories.
Details on recording system, video/image compression, and media.
Resolution, pixel counts, and recording media details.
Approximate recording times and image sensor details.
Specifications for LCD screen, microphone, lens configuration, and autofocus system.
Technical details for AV OUT/O, USB, COMPONENT OUT, and HDMI OUT terminals.
Details on power supply, consumption, operating temperature, dimensions, and weight.
Technical details for the compact power adapter's power supply, consumption, and dimensions.
Guide for installing the CameraWindow software for transferring and managing images.
Guide for installing the ZoomBrowser EX software for viewing and editing images.
Lists compatible operating systems like Windows XP and Vista.
Details required system configurations for saving, playback, editing, and disc authoring.
Ensuring internet connection and verifying computer status for software activation.
Accepting the license agreement and choosing the installation directory.
Selecting language, video system, and entering camcorder serial number.