P
portersoniaAug 20, 2025
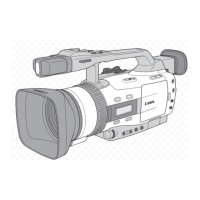
Why my Canon XL2 Camcorder will not turn on?
- Jjoseph88Aug 20, 2025
If your Canon Camcorder isn't turning on, ensure the battery pack is correctly attached. If it is not, attach the battery pack correctly.
Why my Canon XL2 Camcorder will not turn on?
If your Canon Camcorder isn't turning on, ensure the battery pack is correctly attached. If it is not, attach the battery pack correctly.
What to do if pressing the start/stop button will not start recording on my Canon XL2?
If pressing the start/stop button on your Canon Camcorder doesn't start recording, consider these possible causes: 1. A cassette might not be loaded. If this is the case, load a cassette. 2. The POWER dial might not be set to a recording program. If so, set the POWER dial to a recording program. 3. The lock lever on the carrying handle might be activated. Deactivate it by sliding the lock lever to the left.
What to do if my Canon XL2 will not focus?
If your Canon Camcorder won't focus, here are a few things to check: 1. The autofocus may not work on the specific subject. If this is the case, focus manually. 2. The viewfinder might not be adjusted correctly. Adjust the viewfinder with the dioptric adjustment lever. 3. The lens could be dirty. Clean the lens.
Why is the viewfinder picture blurred on my Canon Camcorder?
If the viewfinder picture on your Canon Camcorder is blurred, the viewfinder might not be adjusted properly. Try adjusting it using the dioptric adjustment lever.
What to do if the image will not appear on the screen of my Canon XL2 Camcorder?
If the image does not appear on the screen of your Canon Camcorder, make sure the POWER dial is set to a recording program. Set the POWER dial to a recording program.
What to do if tape is running, but image will not appear on the TV screen from my Canon XL2 Camcorder?
If the tape is running, but no image appears on the TV screen from your Canon Camcorder, the video heads may be dirty. Clean the video heads.
What to do if the viewfinder switches on and off on my Canon Camcorder?
If the viewfinder on your Canon Camcorder switches on and off, the battery pack may be exhausted. Replace or charge the battery pack.
Why is audio not recorded on my Canon XL2 Camcorder?
If audio is not being recorded on your Canon Camcorder, check the following: * The INPUT SELECT switch may not be in the correct position. If this is the case, set the INPUT SELECT switch to the correct position. * If the REC LEVEL switch is set to M, the recording level might be too low. Adjust the audio level correctly.
How to fix the issue when pressing the playback button does not start playback on my Canon XL2 Camcorder?
If pressing the playback button doesn't start playback on your Canon Camcorder: * Ensure the camcorder is turned on and set to VCR mode. * Make sure a cassette is loaded.
Why is audio recorded in a very low level on my Canon XL2?
If the audio is recorded at a very low level on your Canon Camcorder, check these settings: * If you're using a microphone connected to the XLR terminal, it might need phantom power. Set the +48V switch to ON. * The microphone attenuator may be turned on. Set the MIC ATT. switch to OFF.
Important warnings and cautions to reduce risks of fire, electric shock, and interference.
Essential steps like reading, retaining, heeding warnings, and following instructions.
Guidance on cleaning, accessories, environmental conditions, and safe placement.
Details conditions requiring service and procedures for part replacement.
Step-by-step instructions for charging the camcorder's battery pack.
Step-by-step guide for inserting and removing MiniDV cassettes from the camcorder.
Guide to setting the camcorder's time zone and daylight saving time.
Instructions for setting the camcorder's current date and time.
Pre-recording steps including test recording and head cleaning.
Step-by-step guide to begin, pause, and stop the recording process.
Procedures to follow after completing a recording session.
Explains operating zoom via side grip, carrying handle, lens ring, or remote buttons.
Explains TTL autofocus system and its limitations.
Steps for setting focus manually using the focus ring and selector.
Explains 60i, 30p, and 24p modes, including pulldown conversions.
Explains drop frame vs. non-drop frame time code options.
Details record run, preset, and free-run time code options and their settings.
Explains 16-bit and 12-bit audio modes and their sampling frequencies.
Details selecting audio input from front mic, AUDIO1 (RCA), or REAR (XLR) for channels 1/2.
Details selecting audio input from SHOE, AUDIO2 (RCA), or REAR (XLR) for channels 3/4.
How to manually adjust audio levels using REC LEVEL switch and dials.
How to select exposure modes like Auto, Tv, and Av.
Provides creative freedom with manual control over shutter speed and aperture.
Steps to set the POWER dial to Tv and select shutter speed.
Steps to set the POWER dial to Av and select aperture with the IRIS dial.
Steps to set exposure using shutter speed and aperture.
Lists available shutter speeds and aperture values for manual mode.
Locks exposure settings (aperture, shutter speed) to maintain consistent exposure.
How to adjust aperture and shutter speed while exposure lock is active.
How to adjust gain levels while exposure lock is active.
Manually overrides automatic exposure to darken or lighten the image.
Adjusts video signal based on lighting; offers auto and preset levels.
Lists gain levels from -3 dB to +18 dB for different lighting conditions.
Explains auto, indoor, and outdoor automated white balance modes.
Steps to select automated white balance settings (A, U, T).
Instructions for setting a custom white balance using a white reference object.
Establishes preset registrations for 15 camera features like gamma, knee, etc.
Steps to select, change, and save custom preset files.
Assigns frequently used functions to custom keys for quick access.
Records images at selected intervals for time-lapse photography.
How to set the interval and duration for interval timer recordings.
Steps to rewind, play, and stop playback of a recorded tape.
How to connect the camcorder to a TV using S-video terminals.
How to connect the camcorder to a TV using RCA audio/video terminals.
How to select the audio output source from RCA terminals.
How to connect the camcorder to a VCR or digital video device.
Steps to copy recordings to a VCR or digital video device.
How to connect to analog devices like VCRs, TVs, or camcorders.
Steps to record video and audio from analog sources.
How to connect to digital video devices via DV terminal.
Steps for recording from digital devices to the camcorder.
How to connect devices for analog-to-digital signal conversion.
Steps to connect the camcorder to a computer via IEEE1394 (DV) cable.
Lists common messages with their explanations and solutions.
Guidelines for safely handling the camcorder to prevent damage.
How to clean the camcorder body, lens, and LCD screen.
When and how to clean the camcorder's video heads.
How to avoid and what to do if condensation forms inside the camcorder.
Steps to take when condensation is detected and how to resume use.
Safety and care instructions for handling the camcorder's battery pack.
Solutions for problems related to camcorder power and battery.
Solutions for common problems during recording and playback.
Solutions for issues like no image, failed recording start, or focus problems.
Solutions for vertical light bars, blurred viewfinder, and audio level issues.
Solutions for playback not starting or no image on TV screen.
Details system components like recording system, sensor, and tape format.
Details power requirements, consumption, dimensions, and weight.
| Filter size | 72 mm |
|---|---|
| Optical zoom | 20 x |
| Image stabilizer | Yes |
| Focal length range | 5.4 - 108 mm |
| Sensor type | CMOS |
| Total megapixels | 0.8 MP |
| Optical sensor size | 1/3 \ |
| Focus | Auto/Manual |
| I/O ports | Headphone 2x Phantom Powered XLR Analogue-in AV LANC |
| Display diagonal | 2 \ |
| Display resolution | 200000 pixels |
| Camera shutter speed | 1/16000 - 1/6 s |
| Battery type | BP-930, BP-945 |
| Battery life (max) | 3.83 h |
| Minimum illumination | 0.8 lx |
| PictBridge | No |
| Camcorder tape type | Mini-DV |
| Compatible memory cards | Not supported |
| Depth | 496 mm |
|---|---|
| Width | 225 mm |
| Height | 220 mm |
| Weight | 2410 g |