Do you have a question about the Canon ZR20 and is the answer not in the manual?
Warning about unauthorized recording of copyrighted materials.
Warnings about exposing the product to rain or moisture, and using recommended accessories.
Instructions to prevent electric shock by matching plug blades to slots.
Explains the meaning of lightning flash and exclamation point symbols.
Instructions for safe operation, handling, and environmental precautions.
Guidance on power sources, polarization, and cord protection.
Information on grounding antennas for surge protection.
Warnings about lightning, power lines, overloading, and object entry.
Instructions regarding servicing, replacement parts, and safety checks.
Lists the accessories provided with the camcorder.
Explains symbols and how to use the manual for quick reference.
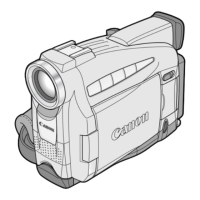
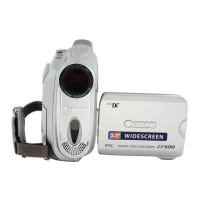
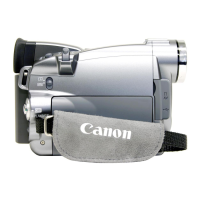
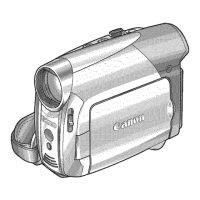
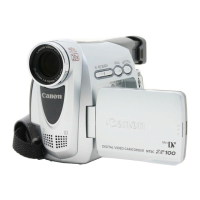
Describes the camcorder's compact and stylish design for easy handling.
Details the 10x optical and 40x/200x digital zoom features.
Explains the IEEE 1394 DV terminal for PC connection.
Highlights digital effects, still photos, audio dubbing, LCD screen, image stabilizer.
Identifies buttons and dials on the top and rear of the camcorder.
Locates terminals, switches, and indicator lights on the bottom and side.
Details the viewfinder and accessory shoe locations.
Locates speaker, power switch, and strap attachment points.
Identifies the cassette compartment and its cover.
Identifies buttons on the WL-D74 wireless controller and their functions.
Details AV, MIC, S-video, and DV terminals on the camcorder.
Step-by-step guide to powering the camcorder using the AC adapter.
Instructions for attaching the battery pack to the camcorder.
Details the process of charging the battery pack using the power adapter.
Steps for disconnecting the adapter and removing the battery pack.
Technical specifications for the CA-560 power adapter.
Using the CR-560 kit to charge batteries from a car's cigarette lighter.
Table showing time required for full charge from car or household outlet.
Using the CR-560 kit to power the camcorder from a car battery.
Using the CR-560 kit and CA-560 adapter to charge batteries from AC.
Step-by-step guide for inserting and removing a cassette.
How to use the SAVE/ERASE tab to protect recordings.
Best practices for handling, storing, and cleaning cassettes.
Notes that this camcorder does not support cassette memory.
Checklist before starting recording, including power and display settings.
Steps to turn on the camcorder and begin recording.
How to select programs and use the start/stop button for recording.
Steps to take after completing recording, including powering off.
Explains standard play (SP) and long play (LP) modes and their limitations.
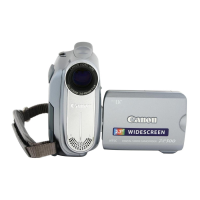
How to set the camcorder for 16:9 widescreen video output.
How to turn confirmation and warning beeps on or off.
How to use the 10x optical zoom control for framing shots.
How to adjust and enable the 40x/200x digital zoom feature.
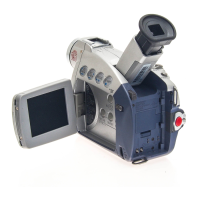
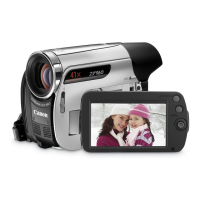
How to open, close, and switch between LCD and viewfinder.
How to rotate the LCD screen for comfortable viewing.
How to change the brightness level of the LCD screen.
Information on the precision of the LCD and normal pixel variations.
How to use the LCD panel to let subjects monitor their own recording.
Steps to play back recordings using the LCD screen or viewfinder.
Using pause, fast forward, and rewind during playback.
How to use frame advance, reverse, and slow playback.
Details on slow reverse, reverse, and x2 playback modes.
How to adjust speaker volume and its limitations.
Connecting and using headphones for audio monitoring.
How to switch the terminal for AV or headphone output.
Steps to use headphones for monitoring audio during playback.
How to connect to a TV/VCR using S-video for improved picture quality.
How to connect using standard AV cables for audio and video playback.
Techniques for holding the camcorder for maximum stability.
Guidelines for mounting and using a tripod with the camcorder.
Advice on framing subjects and avoiding distracting elements.
Using long, medium, and close-up shots effectively.
How to use panning and tilting for dynamic shots.
How to turn off the image stabilizer for specific situations.
Overview of the CAM. MENU and VCR MENU.
Details on shutter speed, digital zoom, image stabilizer, etc.
Details on record mode, wind screen, audio mode, etc.
Settings for brightness, mirror mode, TV screen, and date/time display.
Options for wireless controller, beep, time zone, and date/time.
Further options within VCR setup like output channel and audio mode.
How to open, navigate, and select options within the camcorder menus.
How to set functions, return to submenus, and close menus.
How to properly insert batteries into the wireless controller.
Tips on effective range, close range issues, and environmental factors.
How to set remote sensor modes for compatibility or turn it off.
Steps to resolve problems with the wireless controller not working.
How to select the correct time zone and DST for accurate date/time recording.
List of time zones and corresponding numbers for camcorder settings.
Step-by-step guide to setting the camcorder's internal clock.
How to enable or disable the date and time display during recording.
How to take still pictures while actively recording video.
How to take still pictures when the camcorder is in record pause mode.
Notes on focus lock, manual focus, and exposure for still pictures.
How to connect and use the FR-100 to save still images to floppy disk.
How to find points on tape to resume recording or add scenes.
How to quickly review the last few seconds of recording before continuing.
Explains the 7 available recording programs and their uses.
Chart showing which functions are available in each program mode.
How to choose and activate specific automatic exposure (AE) programs.
Simple point-and-shoot operation mode.
Using Auto mode and the Sports program for specific conditions.
Using Portrait mode for softened backgrounds and close-ups.
Using Spotlight for stage scenes and Sand & Snow for bright backgrounds.
Using Low Light mode for dim environments and its limitations.
Introduces faders and other effects for enhancing productions.
Chart showing where faders and effects can be used.
How to use Fade Trigger, Vertical Wipe, and Horizontal Wipe effects.
Using the Mosaic Fade effect for blurring images.
Applying Art, Sepia, and Black & White image filters.
Using the Mosaic effect to blur images.
Steps to select and apply fader effects like Fade-T, WIPE.
How to turn faders on or off using the ON/OFF button.
Steps to select and apply effects like ART, SEPIA, MOSAIC.
How to fade in/out scenes when using effects in CAMERA or PLAY mode.
Choosing between 16-bit and 12-bit audio modes for recording.
How to connect an external microphone for enhanced audio input.
How to turn the wind screen on/off to reduce wind noise.
How to use the self-timer for recording video with yourself in the shot.
How to use the self-timer when taking still pictures.
How to cancel the self-timer before or after countdown begins.
How to use AE Shift to lighten or darken the image.
How to manually set shutter speed for clear shots of moving subjects.
Warnings about shooting the sun with high shutter speeds.
Suggestions for shutter speeds based on shooting scenarios.
How to turn off autofocus and lock focus at a specific point.
How to manually adjust focus using the selector dial.
How to use auto, indoor, and outdoor presets for white balance.
How to manually set white balance using a white reference object.
Situations where manual white balance yields better results.
Tips on setting white balance and its behavior.
How to display or hide data codes containing recording information.
Choosing whether to show date, time, or both in the data code.
Choosing data code types: date/time, camera data, or both.
Explains situations where data codes may not display correctly.
How to activate the automatic date marker for day changes.
How to quickly search for still pictures or specific recording dates.
Important notes and limitations regarding photo/date search.
How to mark a point and return to it later during playback or recording.
Steps to connect and prepare the camcorder and VCR for editing.
How to copy scenes from the camcorder to a VCR.
Details about the LANC terminal for connecting editing equipment.
Steps for connecting camcorder and digital device for dubbing.
How to copy recordings digitally between devices.
Information on copyright protection and its effects on playback/dubbing.
Steps to connect camcorder to VCR/TV for analog recording.
How to copy recordings via analog line-in.
How to insert new scenes into pre-recorded tapes.
Guidelines for tape compatibility (SP mode, no gaps) for AV insert.
Specific steps for recording from a VCR for AV insert.
Detailed steps for inserting scenes using the AV INSERT button.
How to connect external audio devices for dubbing.
Important notes regarding video terminals and sound monitoring.
Steps to prepare the camcorder for audio dubbing.
How to select audio input and start the dubbing process.
How to stop audio dubbing and manage zero set memory.
Notes on DV terminal usage, audio mix, and sound quality.
How to set audio output to STEREO1, STEREO2, MIX/FIXED, or MIX/VARI.
How to select output channels for tapes with multiple audio tracks.
How to connect the camcorder to a PC using a DV cable for image transfer.
How to adjust the viewfinder for comfortable viewing.
How to attach the lens cap cord and grip belt.
How to adjust the grip belt for comfortable handling.
How to attach and adjust the shoulder strap for portability.
Times for recharge and max recording for battery packs.
Estimates for playback time using the LCD with charged batteries.
How to interpret the battery indicator and low battery warnings.
Notes on recharging convenience and battery terminal care.
How to insert the CR2025 backup battery for memory settings.
Critical safety warnings regarding battery handling, heat, and disposal.
Warnings about temperature, humidity, and light sources.
Precautions regarding magnetic fields, water, lens care, and disassembly.
Guidelines for storing the camcorder in a dust-free, dry environment.
Instructions for cleaning the viewfinder, LCD screen, and body/lens.
How to clean video heads to resolve playback issues like noise.
Info on power sources and NTSC TV system compatibility for international use.
Explains how condensation forms and its potential problems.
Steps to take before moving the camcorder to warm/humid environments.
What to do when the camcorder detects condensation.
Checklist for common problems like no power, auto shut-off, or button issues.
Solutions for display issues (no picture, blue screen) and focus problems.
Tips for when digital effects don't work or the play button is unresponsive.
Solutions for screen stripes, rough playback, and no TV picture.
Troubleshooting for wireless controller and power indicator problems.
Solutions for general malfunctions, DV cable issues, and heat.
Solutions for no sound from the speaker during playback.
Diagram showing camcorder, battery packs, power adapter, controller, and cassette.
Diagram showing connections to TV, VCR, PC, and external devices.
Information on BP-500 series battery packs for extended use.
Details on the CR-560 kit for car power and charging.
Information on TL-30.5 Tele-converter and WD-30.5 Wide-converter lenses.
Details on FS-30.5U filter set and VL-10Li video light.
Information on the Zoom Remote Controller and Wrist Strap.
Descriptions of SC-1000 and SC-A50 soft carrying cases.
Details on the FR-100 for saving still images to floppy disk.
Info on the Canon Genuine Video Accessories mark and accessory part numbers.
How to use the TV SCREEN button or menu to display info on TV.
How to disable on-screen displays for a clear playback screen.
Explains how time code records counter information on tape.
Explains the camcorder's countdown and shot length recommendations.
Explains common caution phrases like "REMOVE THE CASSETTE" or "COPYRIGHT PROTECTED".
Explains the "HEADS DIRTY" warning and the need for cleaning.
Detailed technical specs for the ZR20 camcorder.
Technical specifications for the BP-512 battery pack.
Details the warranty period, what's covered, and exclusions.
Instructions on how to contact Canon and submit for service.
Warranty coverage and limitations for Canon equipment purchased in Canada.
Instructions for obtaining warranty service in Canada.
| Type | MiniDV |
|---|---|
| Recording Media | MiniDV tape |
| Optical Zoom | 20x |
| Digital Zoom | 400x |
| LCD Screen Size | 2.5 inches |
| Image Sensor Size | 1/6 inch |
| Image Sensor | CCD |
| Viewfinder | Color |
| Focus System | Auto/Manual |
| Exposure Control | Automatic |
| Microphone | Stereo |
| Battery | Lithium-ion |
| White Balance | Automatic |
| Video Recording Format | DV |
| Interface | USB, FireWire |
| Video Resolution | 720x480 (NTSC) |