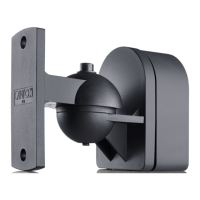
Installation instructions Cantomount U
85
1
2
3
4
5
6
6
7
7
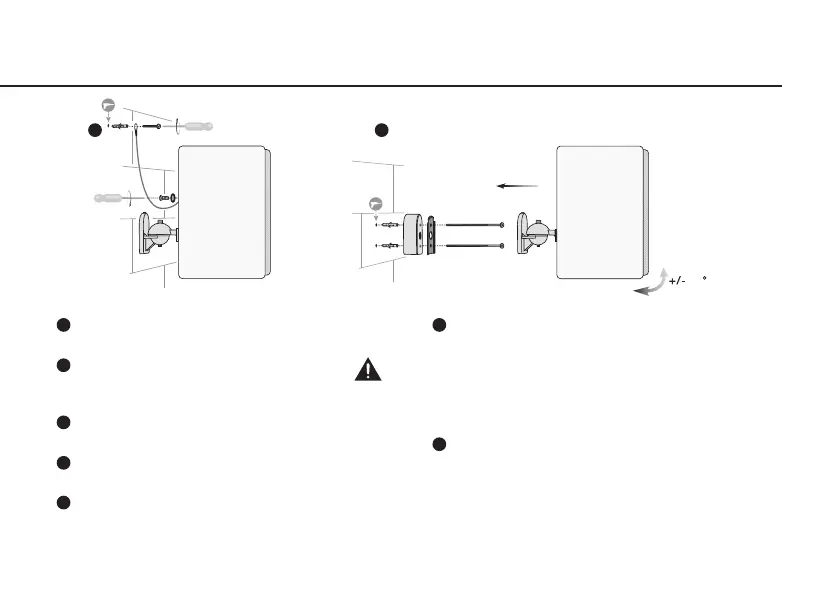
Undo the safety screw and slide the metal plate out of the
wall mount.
Use screws (4.5 x 30) and dowels to mount
the metal plate in the desired place on the wall
or ceiling.
Screw the wall mount into the thread holes in the
loudspeaker using the two screws (M6 x 10).
Slide the wall mount back onto the metal plate that is now
fastened to the wall and secure with the safety screw.
Use a hexagonal key to loosen the screw on the ball joint,
position the loudspeaker, then tighten up the screw again.
At the same time, permanently support the speaker by hand.
Safety bond (optional): To secure the safety bond supplied
first fasten a screw (4.5 x 30) with dowel into the wall.
Then bold a screw (M6 x 10) with washer onto the
threaded hole in the loudspeaker. The safety bond must be
attached in such a way that it allows no fall at all or that the
falling distance is as short as possible. Be careful to ensure
that the safety bond is securely attached at both ends.
Adapter (optional): If the installation angle of the speaker
exceeds +/- 45 degrees you will need to insert an adapter.
For this you will need to use the extralong fastening
screws (4.5 x 55) with dowels.
 Loading...