This document is a Quick Start Guide for the Canyon Commuter:ON U029 and U030 e-bikes, providing essential information for initial setup, usage, and maintenance. It emphasizes the importance of reading the full Canyon User Manual for comprehensive details and safety information.
Function Description
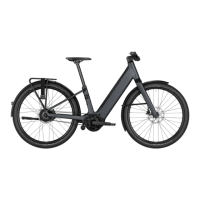
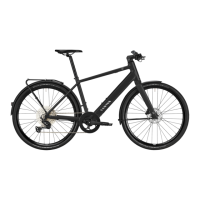
The Canyon Commuter:ON U029 and U030 are high-performance urban, city, and trekking e-bikes designed with a professional-level lightweight construction. They feature an electric assist system, indicated by the "E-BIKE MANUAL" and "FAZUA" branding, suggesting the use of a Fazua motor system. The bikes are intended for commuting, city riding, and trekking, offering adjustable support levels for the electric motor.
Important Technical Specifications
- Models Covered: Commuter:ON U029 and U030.
- Weight Capacity: Maximum rider weight and cargo combined is 130 kg.
- Pannier Rack Capacity: Maximum 7.5 kg per side on the rear pannier rack.
- Battery: Removable and rechargeable. Charging time is approximately 3.5 hours for a full charge (100%).
- Tire Pressure: Indicated as "XX-XX PSI" on the tire, requiring specific pressure settings.
- Torque Settings: Various components require specific torque settings (e.g., handlebar, seatpost, pedals, headset, drivetrain components) to ensure safe and proper assembly and maintenance. These are indicated by "Nm" values throughout the guide.
- Bike Category: 2e, indicating compliance with safety standards DIN EN ISO 4210 and DIN EN 15194. This classification implies the bike is suitable for paved roads, cycle paths, and unpaved roads with a smooth surface, but not for off-road or aggressive riding.
Usage Features
- Unpacking and Initial Assembly: The guide provides step-by-step instructions for unpacking the bike, removing protective packaging, and initial assembly steps like installing the front wheel. It highlights the use of grease for certain components and keeping the brake system clean.
- Battery Management: Instructions are provided for removing and charging the battery, emphasizing careful handling of the key and the battery itself. Battery installation is also detailed, with a "CLICK" sound indicating proper seating.
- Power On/Off: The bike is switched on by pressing a button for 2 seconds.
- Support Level Adjustment: The e-bike offers different support levels: ROCKET, RIVER, BREEZE, and OFF. These can be increased or decreased using controls on the handlebar.
- Boost Function: A boost function is available, also activated by pressing a button for 2 seconds, but only when the system is switched on.
- Lighting: The guide indicates a function to turn the light on/off.
- USB-C Connector: The bike is equipped with a USB-C connector, likely for charging devices or connecting accessories.
- Fazua App Integration: The guide mentions a "FAZUA APP" and provides QR codes for downloading it from Google Playstore and Apple App Store, suggesting smart connectivity features for the e-bike system.
- Safety Warnings: Crucial safety warnings include always removing the battery before working on the bike, checking the manual for maximum weight limits, and ensuring the bike is equipped according to local legal requirements for public roads.
Maintenance Features
The guide outlines a comprehensive maintenance schedule:
- Before Every Ride (Checklist):
- Check and/or retighten wheel fastening system, pedals, bolts, and nuts.
- Check the bike for proper functionality.
- Check the bike, tires, and all components for damage, wear, and material fatigue.
- Test the brake system, being aware of dirtiness, especially lubrication or grease residuals. Hot disks after usage are noted.
- Check wear of brake pads.
- Check tire pressure and alignment of valve stems.
- Check the bike's category and intended purposes in the Canyon User Manual.
- Check and/or lubricate the chain.
- Wear tight clothes to avoid entanglement in the chain or chainrings.
- Always remove the battery before working on the bike.
- General Maintenance Activities:
- Inspect: Visual check of components.
- Wet Clean/Dry Clean: Instructions for cleaning the bike.
- Seal/Polish Surface: For surface care.
- Check Measurements: Verify dimensions.
- Grease Component: Apply grease to specific parts (e.g., pedals).
- Adjust Component: Make necessary adjustments.
- Lubricate Component: Apply lubricant to moving parts.
- Check Bearing Clearance: Inspect play in bearings.
- Use Bike Cleaner: Utilize appropriate cleaning products.
- Retighten Screws, Bolts & Nuts: Ensure all fasteners are at the correct torque.
- Check for Cracks: Inspect components for structural damage.
- Consult Manufacturer Manual: Emphasizes referring to the detailed manual.
- Always Use Correct Torque: Critical for safety and component longevity.
- Don't Use High-Pressure Cleaner: Warns against using high-pressure washing, which can damage components.
- See a Mechanic if Necessary: Advises seeking professional help for complex issues.
- After Every Ride:
- Complete bike cleaning (wet clean, dry clean).
- Drivetrain cleaning.
- After Every 2 Weeks:
- Drivetrain components inspection and torque check.
- After Every Month:
- Spokes & Hubs inspection and bearing clearance check.
- Headset Bearing inspection, greasing, and torque check.
- Pedals, Crank & Bottom Bracket inspection, greasing, and torque check.
- Tires & Rims inspection and measurement.
- After Every 6 Months:
- Chain wear check.
- Cables inspection.
- Surfaces cleaning.
- After Every Year:
- Seat Post inspection and assembly paste application.
- Cockpit inspection and torque check.
- Attached Parts inspection and torque check.
The guide concludes with an "EXPLOSION DRAWING & SPARE PART LIST" section, providing a visual breakdown of the bike's components and a QR code for exploded-view drawings, likely for identifying and ordering spare parts.