INSTALLATION INSTRUCTIONS
BEFORE TURNING THE WINE CELLAR ON ENSURE IT IS PERFECTLY LEVEL. This
should minimize any vibrations.
Your cabinet is equipped with 4 adjustable feet. However, we recommend that you tighten the
back feet to the maximum and then use the front feet to level the cabinet.
IMPORTANT: WAIT 2 HOURS BEFORE TURNING THE WINE CELLAR ON FOR THE FIRST
TIME.
Safety Instructions
• The Wi3113&Wi6222 is provided with a fan to evacuate heat via the bottom vents.
• It must be installed well away from any heat source.
• It must not be placed in direct sun light.
• It must not be in a damp location (laundry, pantry, bathroom, etc)
• It must be perfectly level.
• It must have a correctly installed and reliable electricity supply correctly earthed.
• Use of a multi-socket or extension lead is not recommended..
• This wine cellar must be earthed to provide protection in the event of an electrical
short circuit.
• It is fitted with a power cord having an earth wire terminating in a 13amp plug.
• Consult a qualified electrician or service engineer if the earthing instructions are not
completely understood.
WARNING: INCORRECT EARTHING CAN RESULT IN THE RISK OF ELECTRIC SHOCK.
Door reversal
WE RECOMMEND THAT SOMEONE ASSISTS YOU DURING THIS PROCESS. TOOLS
REQUIRED: - PHILIPS SCREWDRIVER. (A BOTTOM LEFT HAND HINGE IS SUPPLIED
WITH WINE CELLAR.
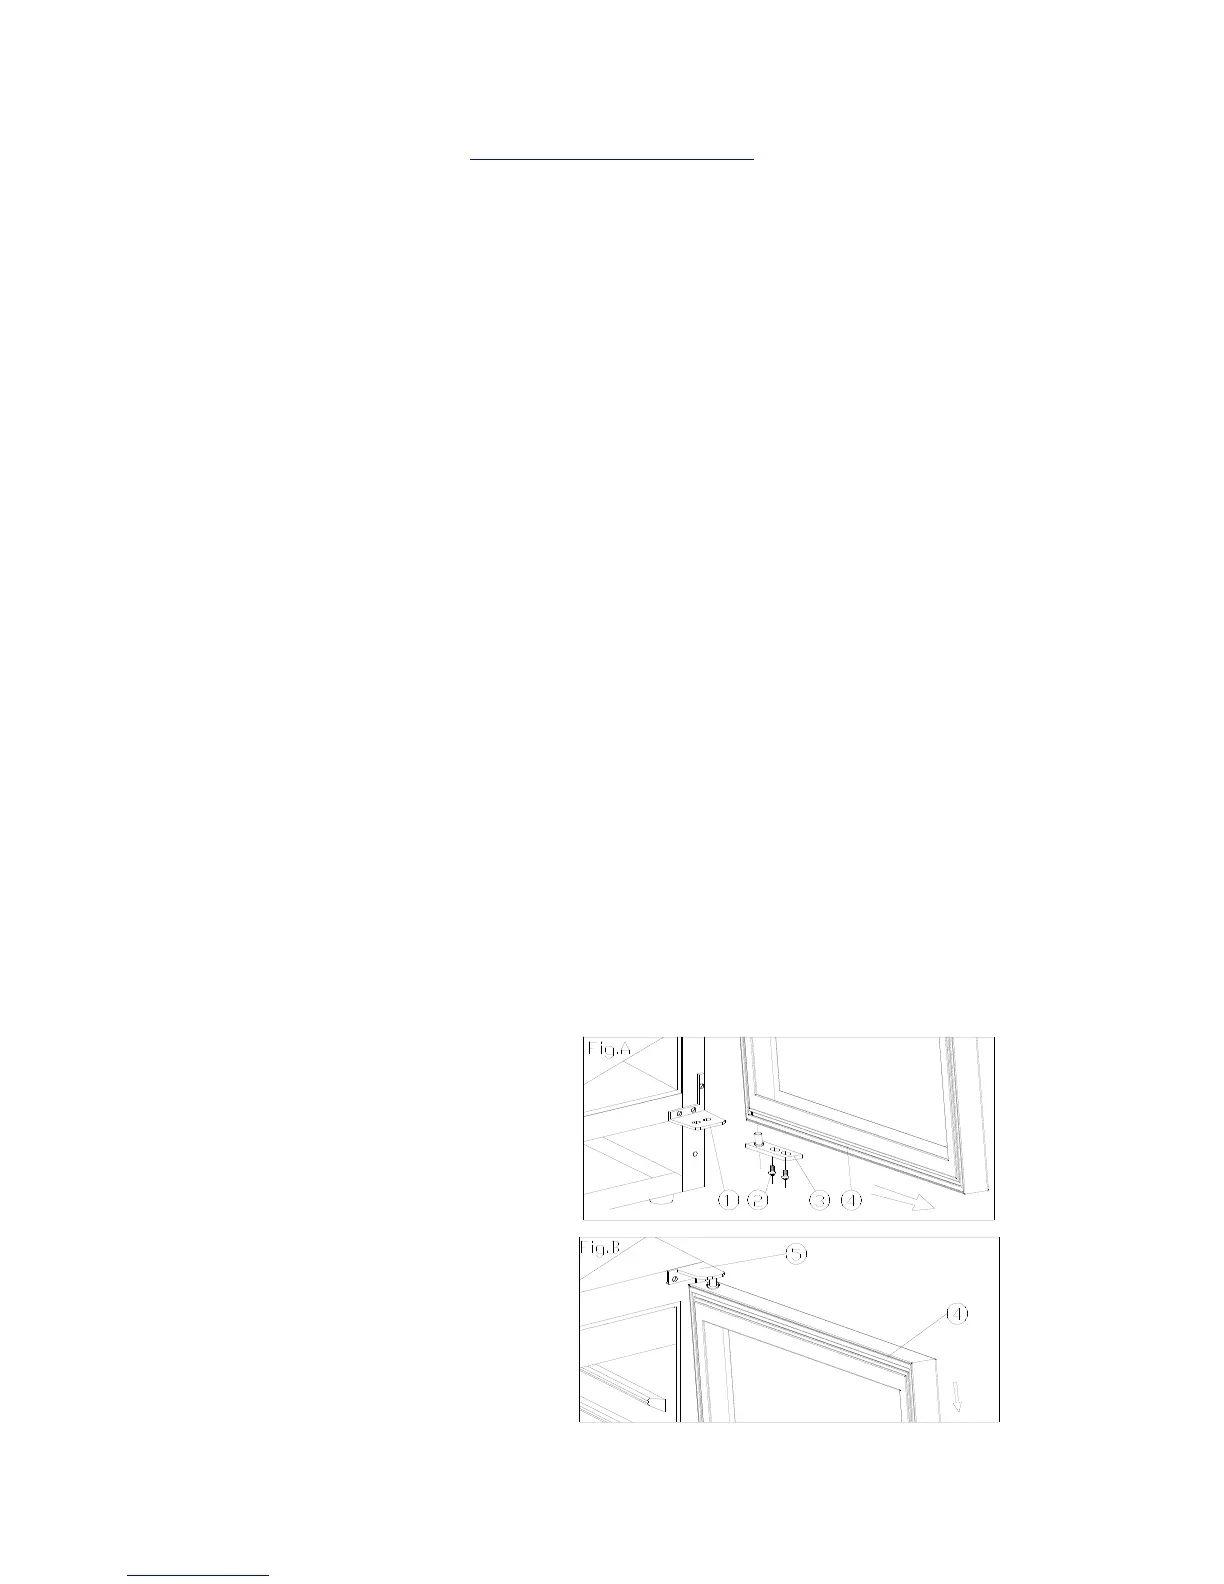
① Bottom hinge (Right) ② Screws ③ Door axis
④ Door ⑤ Top hinge(Right) ⑥ Lock screws
⑦ Top hinge(Left) ⑧ Bottom(Left)
1. Remove 2 screws ②, then pull
door④ As per arrowhead direction, you
will remove the door. Please remove
bottom hinge②as well for the coming
assembly. (Fig.A & Fig.B)