EasyManua.ls Logo

CaptiveAire DI-PSP - User Manual

CaptiveAire DI-PSP
2 pages
Print Icon
To Next Page IconTo Next Page
Loading...
DROP-IN DIFFUSER & RETURN
MODELS: DI-PSP
DI-FUSE
DI-RETURN
4. ATTACH SUPPLY DUCT TO PLENUM NECK
USING A STEEL CLAMP OR 16 SWG MINIMUM
STEEL WIRE. THE DUCT CONNECTION MUST
NOT INTERFERE WITH DAMPER OPERATION.
INSTALLATION
1. ATTACH SLIDING RADIAL DAMPER
TO TOP SIDE OF NECK (NOT USED
FOR DI-RETURN).
2. PLACE THE PLENUM IN THE DESIRED LOCATION
OF THE 24” X 24” T-BAR CEILING GRID.
3. USE MINIMUM 12 SWG STEEL WIRE TO
SUPPORT THE CORNERS OF THE DIFFUSER.
MINIMUM OF TWO DIAGONAL CORNERS
MUST BE SUPPORTED BY CEILING JOISTS.

Other manuals for CaptiveAire DI-PSP

Question and Answer IconNeed help?

Do you have a question about the CaptiveAire DI-PSP and is the answer not in the manual?

Summary

INSTALLATION

Attach Sliding Radial Damper

Connect the radial damper to the top side of the neck, excluding DI-RETURN models.

Position Plenum in Ceiling Grid

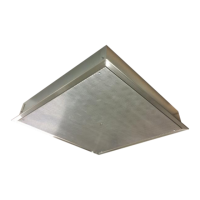
Place the plenum into the desired location within the 24" x 24" T-bar ceiling grid.

Support Diffuser Corners

Use 12 SWG steel wire to support diffuser corners, with two diagonal corners supported by ceiling joists.

Connect Supply Duct to Plenum

Attach supply duct using a steel clamp or 16 SWG wire, ensuring no interference with damper operation.

OPERATION

Adjusting the Radial Damper

Access and adjust the sliding radial damper via the bottom perforated panel using a screwdriver or socket.

GENERAL MAINTENANCE

Cleaning the Diffuser Plenum

Regularly clean the plenum and perforated face with a damp cloth, removing screws for face cleaning.

REPLACEMENT PARTS

CaptiveAire DI-PSP Specifications

General IconGeneral
ModelDI-PSP
CategoryFan
AirflowVaries based on configuration
Static PressureVaries with model size, see performance data
HorsepowerVaries with model size
ConstructionGalvanized steel housing

Related product manuals