More information https://www.caravansplus.com.au
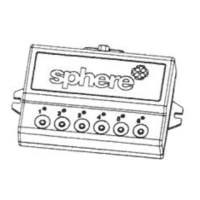
SPHERE 6
Channel Receiver Module
SELF
TEST
The
SPHERE
6
Channel receiver module can be
pragrammed
to
control
up
to 6
different zones.
@ Install the receiver as far
away
from metal
objects
as
possible,
metal
effects the remote
range.
@
Do not install the receiver
directly
above
any
heat
source.
@
Make sure all
terminations are
properly
crimped
or soldered and are
fully
insulated.
CONTENTS|
1.
Receiver module
(black)
x 1
pc
2.
Wiring
Loom
x 1
pc
3. Screws x
2
pcs
Fig.2
Receiver
Working Voltage:
9~15V DC
Working Frequency
:
433.92 Mhz.
Transmission
Range
: 30
meters
depending
on
atmospheric
conditions.
Working
Temperature
: -20C-+60°C.
Certification
:
CE
approved.
Program
ining
cn 1.Ch6
Fig.3
Chit
-
Che
Pin
Ouput
Fig.4
Pin
output
Channel
Wire
color
Pin#1
Ch.4
Relay Output,
Maximum
2Amps
Orange/btack
Pin#2
Ch.3
Relay Output.
Maximum
2Amps
Yellow/black
Pin#3
Power in
+112V
Red
Pin#4
Power
in
+12V
Red
PintS
Ch.2
Relay Output,
Maximum
5Amps
Green/black
Pin#6
Ch.5
Relay Output,
Maximum
2Amps
Red/olack
Pin#7
Ch.6
Relay
Output,
Maximum
2Amps
Brown/black
Pin#8
Ground
Black
Blue/black
Pin#10
Ch.1
Relay Output,
Maximum
2Amps
Note:
Total
output
current must not exceed
15Amps,
each channel
output
can
handie 5
Amps.
It is
recommended
that
Channel
2 is used
for the
output
with
highest
current
requirement,
maximum
5
Amps.
After the receiver has been
powered up,
and alf channels connected to the
light
fixtures.
a self test function can be
performed
to confirm that the receiver is
working
correctly
and
wiring
lo the
light
fixture is correct.
Press the
programming
swilch
corresponding
to the channel
you
wish
to test 2 times.
if
the
light
fixtures connected turns "ON"
wiring
is correct. If the
light
fixtures does not
turn
"ON".
please
recheck
wiring.
PROGRAMMING
Fig
.1
The
wireless
remote switches can be
programmed
to
single
or
multiple
channels.
Once the receiver madule is
powered
and all channels are connected as
per
installation
instructions,the
remote switches can be
programmed using
the
following
procedure.
A.
he
programming
switch on the receiver
module
Note: If the LED
corresponding
ta the Channel
being
programmed
flashes
green.
there is
still sufficient
memory
to
program
extra wall
switches,
if
the
LED
flashes
red,
then the
memory
is
full,
each channel!
(1
to
6)
will
accept
up
to 20 codes.
a)
Press the
programming
switch on the receiver module
corresponding
to
the channel
you
wish to
program
for 5 seconds . until the LED on the
corresponding
channel flashes
green.
release
the
programming
switch,
the
corresponding
channel is now in
learning
mode.
b).
Press the remote switch button that
you
wish
to
program
to the receiver.
1Y
@
3
c).
When the receiver modute receives the wireless switch
signal.
the LED
corresponding
to the
programmed
channel will flash
orange.
The wireless switch is now
programmed
to
the
corresponding
channel.
If
more than one wireless switch needs to be
programmed
to the
same channel
(Maximum
20)
repeat
steps
a to c.
When the second wireless switch is
pressed
the
orange
LED with flash twice. if a third wireless
switch is
pressed
the
orange
LED will
flash three
times,
etc.
t
**Note:
@
Each channel can
accept up
to 20 codes.
@
To leave
programming
mode,
press
the
programming
switch on the receiver
module
corresponding
to the channel
being programmed.
@
When
you
have entered
programming
mode.
if
you
do not
press any
button on
the wireless switch
within 15 seconds. the
system
will leave
programming
mode
automatically.
B.
Using
the
existing pre-programmed
wireless switch
to
program
extra
wireless switches
[WIRING
1).
Press and hold the button on the
existing pre-programmed
wireless switch for 10 seconds until
the LED on the
pre-programmed
switch starts to flash.
2).Release
the button and within 3 seconds
re-press
the button on the
existing
wireless switch
and the LED
on
the
corresponding
channel will start to flash
green.
the
particular
channel is now
in
programming
mode.
LEO
3).
Press
the
button on the wireless switch and the LED on the
corresponding
channel on the receiver
will flash
orange.
The
wireless
switch
is
now
programmed
to the
particular
channel.
tf
more than one
wireless
switch needs to
be
programmed
(Maximum
20)
repeat steps
1
to 3.
@
To delete
single memory
from the receiver
a).Press
the
programming
switch on the receiver for 5
seconds
corresponding
to the channel
you
wish to delete the
memory
until the LED on receiver flashes
green,
release the
programming
button.
the
corresponding
channel on the receiver is now
in
Programming 'Single Memory
Delete
Mode.
DELETE
MEMORY
b).
Press the remote switch button that
you
wish
to
DELETE from the receiver
c).
LED on the receiver module
corresponding
to the channel
you
wish to delete will
flash RED. The
switch is now DELETED from the
receiver.
If
more than one switch needs to be deleted to the receiver.
repeat steps
a to c.
@
To delete ail the
memory
from the receiver
Press and hold the
programming
switch
corresponding
to the channet
you
wish to delete all
the
memory
for 20 seconds unti LED flashes red.
When
LED
flashes red ali the
memory
on the
corresponding
channel! is deleted. To delete the
memory
on the other
channels
repeat
the above
for the
corresponding
channels.
**Note: When
you press
and hold the
programming
switch,
the LED will flash
green
after
5 seconds.
continue
to hold
the
programming
switch
for 20 seconds until
it
flashes red
Pin#9
Power in +12V
Red
1.
Press the remote
light
switch,
if
LED flashes
quickly
rather that
single
flash, batteries need
replacing.