EasyManua.ls Logo

Carbine 46CR - User Manual

Carbine 46CR
16 pages
Print Icon
To Next Page IconTo Next Page
Loading...
1
OWNER S MANUAL
®
Question and Answer IconNeed help?

Do you have a question about the Carbine 46CR and is the answer not in the manual?

Summary

Congratulations

Replacement Remote Controls

Remote Control Functions

4-Button Functions

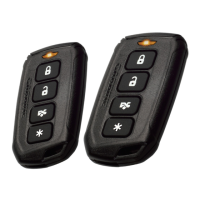
Details the functions assigned to each button on the 4-button remote control.

Default Configuration

Explains the default actions for lock, unlock, and timer start modes.

Panic Mode

Instructions for activating and deactivating the panic alarm feature.

Trunk Release

How to use the remote to release the trunk or hatch lid.

Silent Mode

Steps to perform silent locking and unlocking operations.

Car Finder

How to activate the car finder feature using the remote.

Star Button Operation

Remote Start Sequence

How to initiate and stop the remote start sequence using the star button.

Garage Mode

Garage Mode Operation

Step-by-step guide to activate and deactivate Garage Mode for service or storage.

Remote Starting the Vehicle

Safe Remote Start Procedure

Essential safety warnings and steps for remote starting the vehicle.

Key Takeover

Driving After Remote Start

Procedure for transferring control from remote start to driving.

Quick Stop Mode

Enable Quick Stop Mode

How to keep the engine running during short trips away from the vehicle.

Disable Remote Start System

Method to disable the remote start system using Garage Mode.

Pairing a Replacement Remote Control

Remote Pairing Procedure

Detailed steps to program new remote controls to the system.

Safety Features

Replacing the Remote Controller Battery

Battery Replacement Procedure

Step-by-step instructions for replacing the remote control battery.

Overview

This document is the owner's manual for the CARBINE 46CR Remote Start with Keyless Entry System. It provides comprehensive instructions and information for users to understand and operate their new system effectively.

The manual begins by congratulating the user on their purchase and encourages them to read through the guide to familiarize themselves with the system's features. It also provides contact information for support, including the website www.carbine.com and a phone number (310-735-2000), should any issues or questions arise.

Replacement Remote Controls:

For users needing to purchase replacement remote controls, the manual directs them to an authorized dealer/installer or to the www.carbine.com website. It also notes that remote part numbers can be found on the back of the remote control itself.

Remote Control Functions:

The manual details the functions of the 4-button remote control, which include:

  • Lock the doors: Press and release the lock button.
  • Panic Mode: Press and hold the lock button for 1.5 seconds to activate the panic mode, which sounds the horn/siren and flashes parking lights for 30 seconds. To stop, press and release either the lock or unlock button.
  • Silent Mode Lock: Press the trunk/hatch release button first, then the lock button for silent locking without sound indication.
  • Unlock the Doors: Press and release the unlock button.
  • Stop the Panic Mode: Press and release the unlock button.
  • Silent Unlock: Press the trunk/hatch release button first, then the unlock button for silent unlocking.
  • Car Finder: Press the trunk/hatch release and star buttons together and release. The parking lights will flash slowly five times. This feature works whether the vehicle is locked or not.
  • Trunk/Hatch Release: Press and hold the trunk/hatch release button for 1.2 seconds. This requires electronic trunk control and the trunk release control option to be installed.
  • Initiate Remote Start Sequence: Press and release the star button.
  • Initiate Timer Start Mode: Press both the lock and unlock buttons at the same time. The parking lights will flash four times, and the engine will start after a one-second delay. Press the star button to turn off the engine without exiting timer start mode.
  • Defrost Output Activation: After remote start, press the lock and trunk/hatch release buttons at the same time.

Default Configuration (4 Button Remote):

  • Lock Button: Pressing and releasing the lock button locks the doors, and the parking lights flash once. (Door lock control must be installed).
  • Unlock Button: Pressing and releasing the unlock button unlocks the doors, and the parking lights flash twice. (Door lock control must be installed).
  • Timer Start Mode: Activating this mode by pressing both lock and unlock buttons simultaneously causes the parking lights to flash four times. After a one-second delay, the engine starts. The star button can be used to turn off the engine without exiting timer start mode. When active, the engine will auto-start every three hours for a maximum of six cycles. Turning the ignition key ON or pressing the brake will shut off timer start mode, indicated by four flashes of the parking lights.

Rear Defrost Activation:

To activate the rear defrost, the vehicle must first be remote started. Then, press the lock, trunk/hatch release, and star buttons simultaneously. Parking lights will flash three times when activated and two times when de-activated. This feature is optional and must be installed for proper operation, and it can only be initiated when the vehicle is running via remote start.

Star Button:

Pressing and releasing the star button initiates the remote start sequence. If the engine is already running, pressing and releasing the star button again will stop the remote start operation. The default setting for the star button is one press, but it can be re-programmed by the installer to require up to three presses.

Garage Mode:

This is a safety feature that disables the remote start function. It's intended for situations where the vehicle is parked in a garage for an extended period or is being serviced. When active, any attempt to start the engine via remote control, timer start, or Quick Stop mode will be denied.

  • Operation:
    1. Turn the ignition key ON then OFF.
    2. Press and release the RCC button once. The RCC LED will turn ON.
    3. The parking lights will flash quickly nine times to indicate Garage Mode is Active, or slowly nine times to indicate Garage Mode is Off.
    4. Repeat steps 1 and 2 to turn Garage Mode off.

Remote Starting the Vehicle:

The manual provides important warnings: never remote start with keys in the ignition, ensure the transmission is in PARK or NEUTRAL, and avoid starting the vehicle in enclosed spaces with minimal ventilation.

  • Procedure:
    1. Ensure the parking brake is ON.
    2. Press and release the star button once (or the programmed number of times).
    3. The parking lights will flash once to confirm the vehicle will attempt to start. Gasoline vehicles begin starting after a 4-second delay, while diesel vehicles wait for the "Wait to Start" timer or a pre-set delay.
    4. Once started, the engine will run for a pre-programmed period (12, 24, or 60 minutes).

Key Takeover:

This section explains how to take control of the vehicle after a remote start.

  • Procedure:
    1. Unlock the door using the CARBINE remote.
    2. Enter the vehicle without stepping on the foot brake.
    3. Insert the ignition key and turn it to the RUN position.
    4. Step on the foot brake. The remote starter will shut off, and parking lights will turn off.
    5. Disengage the parking brake and drive.
  • Notes: If the foot brake is pressed before the ignition key is in the RUN position, the remote starter will disengage, requiring a normal start. For Smart Key or Push To Start (PTS) systems, step on the brake (engine stops) and press the star button to restart normally.

Quick Stop Mode:

This feature allows the engine to continue running for short stops away from the vehicle.

  • To Enable:
    1. Park in a well-ventilated area.
    2. With the engine running, set the transmission to park and engage the parking brake.
    3. Press and release the star button once (or the programmed number of times).
    4. Turn the ignition key OFF and remove it. The engine will continue to run.
    • Note: For Smart Key/PTS systems, press the start button once; DO NOT press the foot brake.
    1. Exit and lock the doors using the CARBINE remote.
  • Note: This feature will not work if the foot brake is pressed at any time.

Disabling the Remote Start System:

To disable the remote start system, activate Garage Mode (as explained earlier). This is recommended when the vehicle is being serviced or driven by someone unfamiliar with remote start operation.

Pairing a Replacement Remote Control:

New or replacement remotes must be programmed (paired) to the control module. Users need to locate the "Receiver/Control Center (RCC)" for this procedure.

  • Procedure:
    1. Open the driver's door.
    2. Insert the ignition key and turn it ON.
    3. Press and release the valet button, then press and hold it for 1.5 seconds. The LED flashes, and the horn chirps. Release the valet button. The system stays in Pairing mode for 60 seconds.
    4. Press and hold the unlock button on the new remote.
    5. Press and release the star button five times. The remote's LED will flash steadily. Release all buttons. The LED will flash for 15 seconds.
    6. Press and release the lock button on the new transmitter. The horn/siren chirps, and the LED flashes pause, indicating successful programming.
    7. Turn the ignition key to the OFF position. A long chirp confirms pairing mode is off.
  • Note: The CARBINE system accepts codes from up to four transmitters.

Safety Features:

The manual lists several safety features that will disable the remote start system or prevent the engine from starting if not properly set:

  • Foot brake is depressed.
  • Hood is open.
  • System is in Valet Mode.
  • Pre-programmed run time (12, 24, or 60 minutes) has elapsed.
  • Remote start activation procedure is repeated.
  • Engine over-rev detection is activated (Wired Tach Detection Mode Only).

Replacing the Remote Controller Battery:

CARBINE remote controllers use a CR2032 Lithium battery. A weakening battery reduces operating range and dims the LED indicator.

  • Procedure:
    1. Use a dime or small flat blade screwdriver to separate the top and bottom cases of the transmitter at the built-in slot.
    2. Use a pencil to remove the old battery.
    3. Insert the new battery with the (+) pole facing up.
    4. Re-assemble the cases and snap them back together.
    5. Press buttons to ensure the LED indicator flashes.

Government Regulations:

The manual includes a section on Government Regulations, stating that the device complies with Part 15 of FCC rules. It outlines conditions for operation, potential for harmful interference, and measures to correct such interference (reorienting antenna, increasing separation, connecting to a different circuit, or consulting a technician). It also warns that unauthorized changes or modifications could void the user's authority to operate the device.

Finally, the manual includes copyright information for Magnadyne Corporation, stating that CARBINE is a registered trademark. It also provides the website and phone number for warranty information and the document's revision number (UM-46CR_Rev-B).

Carbine 46CR Specifications

General IconGeneral
RangeUp to 3000 feet
Remote RangeUp to 3000 feet
Engine StartYes
Engine StopYes
Trunk ReleaseYes
Door Lock/UnlockYes
InstallationProfessional installation recommended
Remote Type2-Way LCD

Related product manuals