Battery Operation
Unplugging the pump from the AC line will automatically put the pump on battery power.
To recharge the battery, plug the pump into an AC wall outlet. Pump will automatically begin charging.
General Instructions
1. Fill or spike feeding container prior to setting up pump.
2. Turn pump on - Press Power button in lower right-hand corner.
3. In order to achieve proper accuracy, the bottom of the feeding set bag must be 18 inches above the
top of the feeding pump.
4. Select u "Keep Settings" or u "Clear Settings" (for day to day use with the same feeding regimen
the u "Keep Settings” option should be selected).
5. Load the set per diagram. Do not overstretch tubing.
Priming the Pump
1. Press u "Prime Pump" to access the pump priming options.
2. Press u "Auto Prime" to automatically prime the pump set. The pump will quickly prime the feed line
and stop the formula before reaching the end of the feeding line.
3. Press the u "Hold To Prime Feed" menu selection to carry formula to end of tubing.
4. Press u "Done".
Setting the Feed Rate
1. Select u "Adjust Feed" then u "Feed Rate". Use the buttons on the left to program the pump from 1 to
400 in increments of 1 ml. Select u "Enter" when desired rate is set.
2. Select u “Run”. You will notice a small drop scroll down the screen when running.
Re-Priming the Pump After the Feed Bag Empties
1. A pump set bag that has been emptied will trigger the Feed Error screen. In this condition the pump
set bag can be relled to continue the feeding, but only after the pump set has been re-primed.
2. Disconnect the feeding line from the patient.
3. Rell the bag.
4. Press u "Continue" to begin the pump Running.
5. Press u "Hold", then press u "Adjust Settings", then press u "Prime Pump".
6. Press u "Hold To Prime" to prime the line. (Do Not Use Auto Prime).
7. Press u "Done", then select u "Run".
To Change Rate or Clear Volume
1. Select u "Hold".
2. Select u "Clear Vol" to clear the volume.
3. Select u "Adjust Settings" to adjust all settings.
4. Select u "Run" to return to normal operations.
Pump sets should not be reused after 24 hours of initial usage.
Listed below are some of the probable causes of alarm conditions and their corrections.
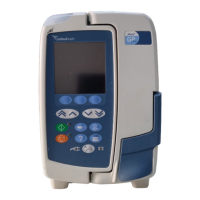
Menu Selections
Programming and Menu
Selection Buttons
Status LEDs
Red=Error
Yellow=Hold/Pause
Green=Normal Operation
Power Button
Troubleshooting Guide
Symptom Probable Cause Corrections
Hold Error
Pump in HOLDING mode for more
than 10 minutes.
Press u CONTINUE to return to HOLDING
screen, or press and hold the Power button
to turn o. Several options are available
from the HOLDING screen, such as RUN or
ADJUST SETTINGS.
Flow Error
Occlusion in pump-patient line.
(downstream occlusion)
Check for and correct the occlusion in the
line between pump and patient. Replace
Pump Set if error cannot be resolved.
Feed Error
Empty bag or occlusion in
bag-pump line.
(upstream occlusion)
Check for empty bag and rell, or check for
and correct the occlusion in the line between
the pump and feed bag. Replace Pump Set if
error cannot be resolved.
Flush Error Empty bag or occlusion in ush line.
Check for empty bag and rell, or check for
and correct the occlusion in the line between
the pump and ush bag. Replace Pump Set if
error cannot be resolved.
Flow Error
Use > 24 Hrs
Pump Set in use beyond
recommended length of time.
Informational warning message blinks on
upper left of screen. It is recommended that
the Pump Set be replaced.
Pump Set
Dislodged
Pump Set not properly loaded in pump.
Check black ring retainer (MISTIC) and
valve; reload Pump Set and restart pump to
continue. Replace Pump Set if error cannot
be resolved.
Battery Low Battery charge too low.
Immediately plug pump into A/C outlet to
recharge battery and to provide power for pump.
Rotor Error
Pump Set tubing not properly loaded
on rotor, or some other unusual rotor
operating condition.
Check that the tubing is loaded on the rotor
and that it is not damaged, torn, etc. Reload
tubing or replace Pump Set.
System Error
General error caused by many factors.
See Manual for error list.
Power down pump and attempt restart to
clear error. Call customer service with screen
code if error cannot be resolved.
EZ Mode Operation “Feed Only Set” Directions For Use
Enteral Feeding Pump
Kangaroo
TM
ePump
EZ Mode Operation
15 Hampshire Street Manseld, MA 02048
© 2018 Cardinal Health Canada. All Rights Reserved. CARDINAL HEALTH, the Cardinal Health LOGO, Kangaroo, and ESSENTIAL TO CARE are trademarks or registered
trademarks of Cardinal Health. All other marks are the property of their respective owners. CA Lit. No. CA-PMR-0128, 18-121-F (11/12/2018)