Standard air-conditioning units
Carel Cod. +030221421 – Rel. 1.2 – April, 11, 2003
4
Use of external terminal buttons:
Button Description
MENU
If pressed in any loop but the Manufacturer loop, returns to the Menu branch (M0) main screen
If pressed in the Manufacturer loop, returns to the manufacturer selection screen
In the Menu branch displays unit status and control probe readings
MAINT.
Goes to the first screen in the Maintenance loop (E0) first screen
The Maintenance loop is used to check the status of the devices and probes, carry out maintenance
and calibration operations, and start the manual procedure
PRINTER
Goes to the first screen in the Printer loop (B0)
The Printer loop is used to set cyclical or immediate prints
INPUTS/
OUTPUTS
Goes to the first screen in the I/O loop (I0)
The I/O loop displays the status of the digital and analogue inputs / outputs
CLOCK
Goes to the first screen in the Clock loop (L0)
The Clock loop is used to display/set the time, date and On-Off, Temperature and Humidity time
bands
SET POINT
Goes to the screen for setting the temperature and humidity set points (D0)
This loop also displays the set points modified by the compensation function, if enabled
PROGRAM
Goes to the screen to enter the user password (S0)
The User loop is used to display/set the unit parameters, referred to the devices connected
(compressors, valves, probes) and the functions enabled
+
MENU+PROG
Goes to the screen to enter the manufacturer password (Z0)
The Manufacturer loop is used to configure the type of unit (ED/CW) and select the connected
devices and the functions enabled
INFO
Displays the pLAN address of the connected board for a couple of seconds
If pressed in Menu loop of the shared terminal, it switches the displayed board
RED Temporary display of the pLAN address of the connected board
Use of silicone rubber buttons:
1. ON/OFF button: it allows air-conditioning unit start and stop
2. ALARM button: it allows alarms display / delete and buzzer switching off
3. UP ARROW button: it enables two functions: 1. scrolling the previous screens of the same branch when
the cursor is in home position; 2. increasing the value of a setting field when the cursor is on it; in case of a
selection field, the up arrow button allows displaying the previous text
4. DOWN ARROW button: it enables two functions: 1. scrolling the following screens of the same branch when the cursor is in home position; 2.
decreasing the value of a setting field when the cursor is on it; in case of a selection field, the down arrow button allows displaying the following
text
5. ENTER button: it allows moving the cursor from home position to the setting/selection field; it also allows storing the set parameters after
the cursor has left the setting fields.
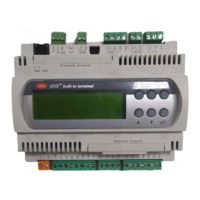
1.2.3 BUILT-IN TERMINAL
As for Alarm, Up arrow, Down arrow and Enter buttons use in the built-in terminal, refer to the external terminal.
START: as the built-in terminal is not provided with ON/OFF button, unit is started/stopped by pushing buttons Esc + Enter together for 20
sec.; after pushing, the displayed screen allows executing the required operation by using button Enter.
SCREEN LOOP: as the built-in terminal is not provided with buttons for accessing the screens loop directly, simply push button Prog to
display the loops list; then, by using the arrow buttons, move the cursor on the selected loop and push Enter to access it.
ALARM PROG ESC
UP DOWN ENTER
built-in terminal
 Loading...