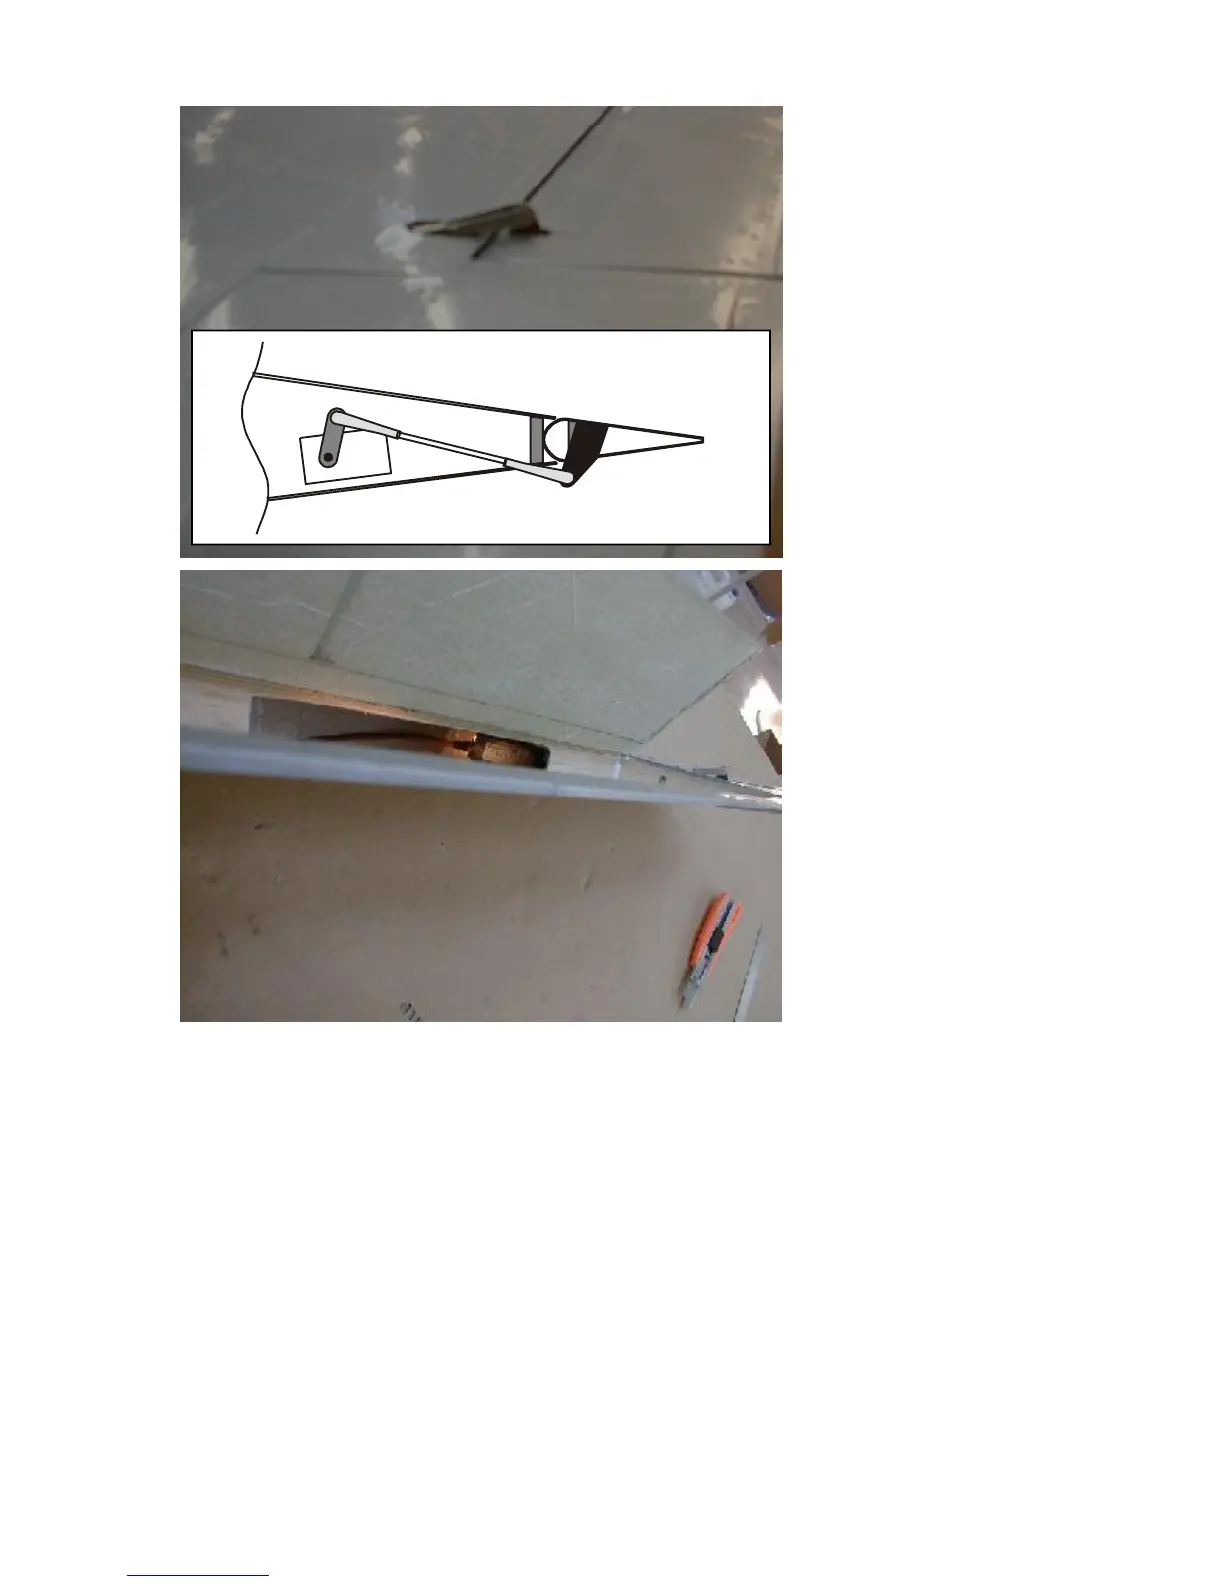
top side of the ailerons. Then
glue in the control horn with 5
minute epoxy, so that the hole
is approx. 6-8mm above the
aileron surface (1/4 - 3/8th”).
Make sure the horn is placed
exactly perpendicular to the
axis of rotation.
Mounting the servo is a bit
tricky. The servo is mounted
reversed into the installed
servo mount. Go ahead with
the following steps:
1. Trial fit the servo into the
mount. Mark the position of the
servo horn on the servo mount
rib. Then take the servo out
again.
2. Now cut a 10-15 mm hand
hole into the bottom wing skin,
exactly where the servo horn is
located. You will need this
hand hole to snap on the clevis
to the servo horn, when the
servo is finally installed. this
hole can be covered with a
small piece of lithoplate
aluminun later.
3. Make the linkage with the supplied M3 all thread. Adjust the length, so that it can accept an M3 clevis on
both sides.
4. Slide the linkage through the slot in the bottom wing skin and snap it on to the control horn in the
aileron. Then check the length and direction of the linkage inside the wing, whether it is matching up with
the mark you set to the servo mount rib. If not matching, adjust the length of the linkage, and if necessary,
the position of the slot. Use the hand hole to check visually the position of the clevis.
5. After all is confirmed, finally mount the servo into the rib. Snap on the linkage to the servo horn. (The
shorter the horn, the better it is, as the control horn on the aileron is also very short)
6. Now use a long Phillips screwdriver (if not long enough available, extend one with a piece of brass- or
carbon tube, to mount the servo screws. You should use a drop of CA glue to fix the screws on the screw
driver, and then insert them into the hole and tighten them carefully. The servo wire will be long enough to
work on it through the hole in the rear spar in the flap area, we suggest to extend the wire permanently by
soldering, better than using a stock extension wire.