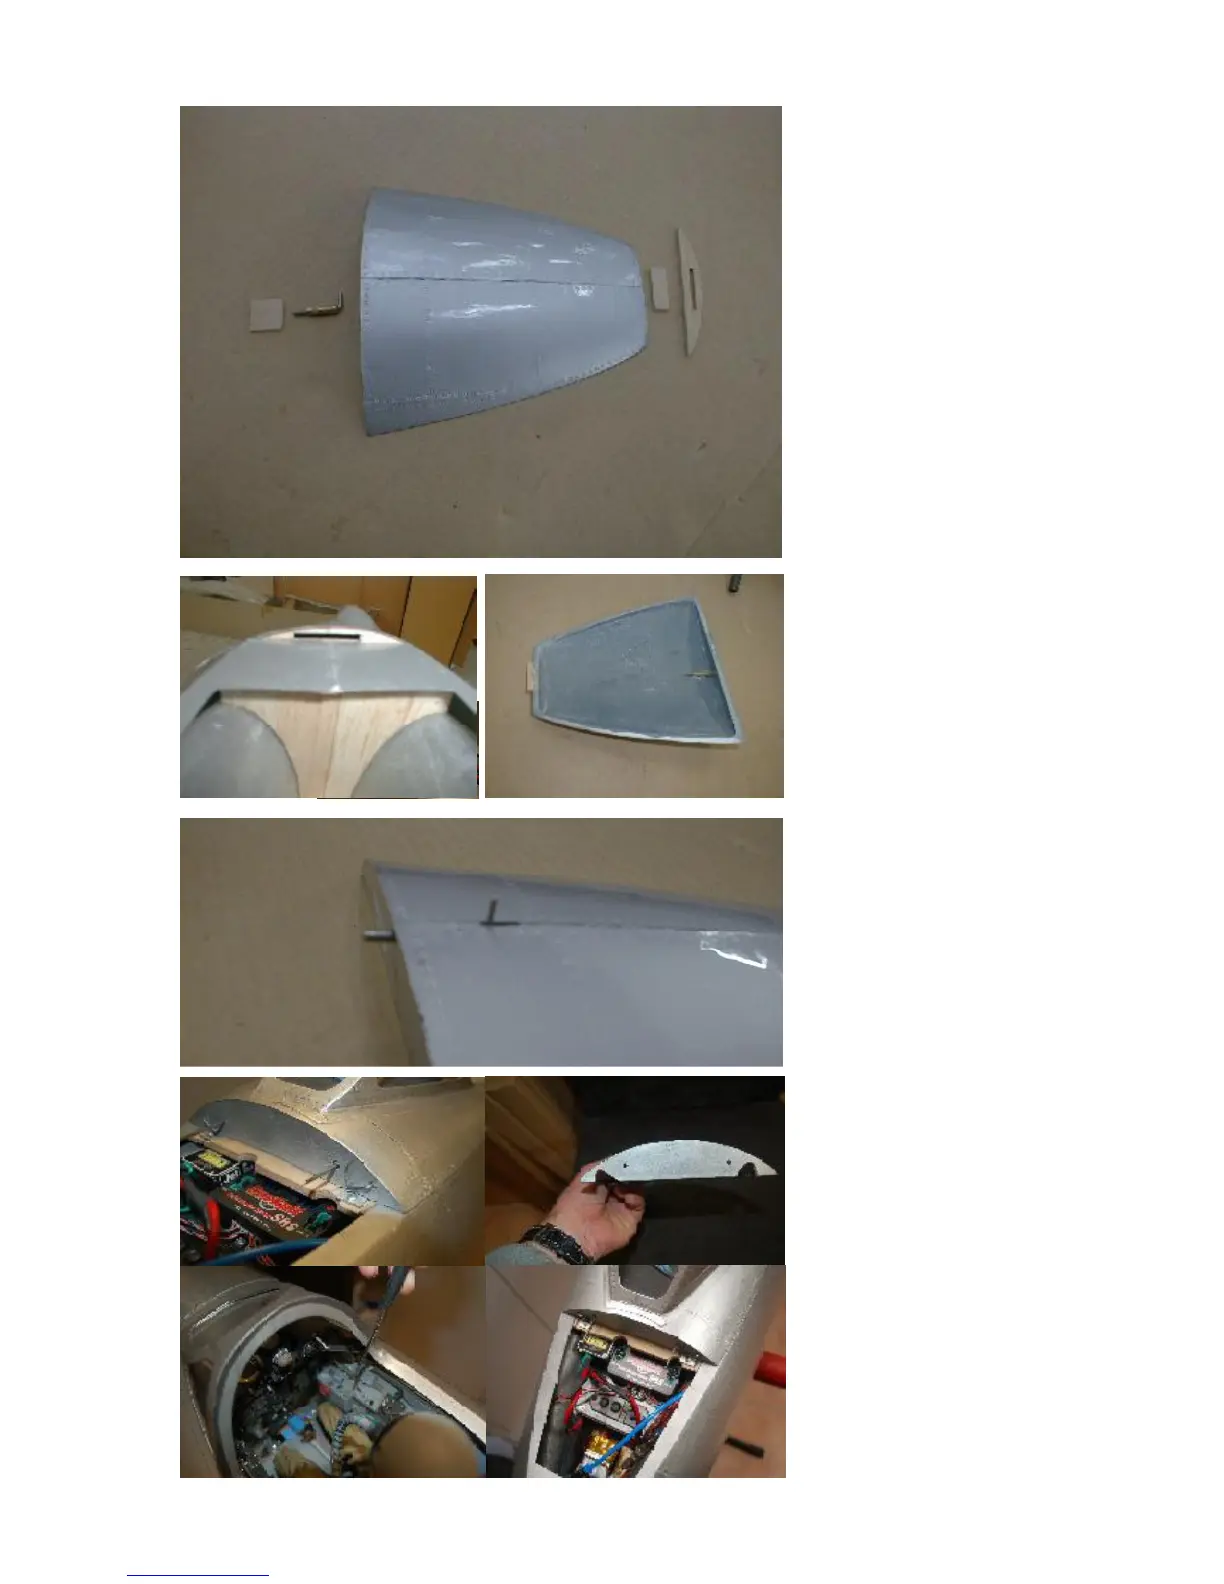
The nose hatch is a small
challenge only. The 3 milled
plywood parts have to be glued
in place Also glue in the hatch
latch. Make sure that the slot
for the latch is long enough, so
that you can release the hatch
easily. The pin must disappear
in the hole completely, when
you pull it back.
As a helpful hint, you might drill
the hole for the hatch latch pin
when all is taped on the
fuselage. So you can make
sure that the wholes are
alligned perfectly.
To do this, you will have to cut
out the canopy before finishing
this step. We explain this on
the next page.
Doing this, you can insert a
dremel through the canopy
cutouts and drill the hole for
the pin through all in one time.
Check the proper fit of the
hatch, and make sure that it is
removable without locking or
hitting.
This is your only real quick
access hatch for any switches
or connectors, which you might
need at the field to start up
your engine or check radio and
landing gear. For more access
to the components you will
have to unscrew the large
hatch.
if you do not want to show the
canopy hatch latch as
discribed above but rather
want the nose hatch latch to be
invisible as well, you can do it
the sane way as we did the
center hatch usuing the piano
wires and plastic tubing. In this
case, to lock an unlock the
hatch you slide the pins inside
the cockpit as shown in the 4
bottom pictures.