EN
77-3090-R2 (9/2019) 5 / 12 www.carlisleft.com
ADJUSTING THE GUN SADDLE
Gun flush box saddles are sold separately. Order the
appropriate saddle for the spray gun to be used on the
system from a Binks distributor. See chart on page 9 for
available saddles.
NOTE
The gun saddle is the plastic part inside the box used to cradle the spray
gun’s front end to ensure proper box operation. Install the gun saddle for
the specic model of spray gun to be used. Two 5/16”-18 screws will pass
through the box side wall and a plastic spacer then thread into the saddle.
The bottom of the gun saddle is threaded with a 2” NPT female thread for
connection to a 2” metal waste drain pipe with mating threads.
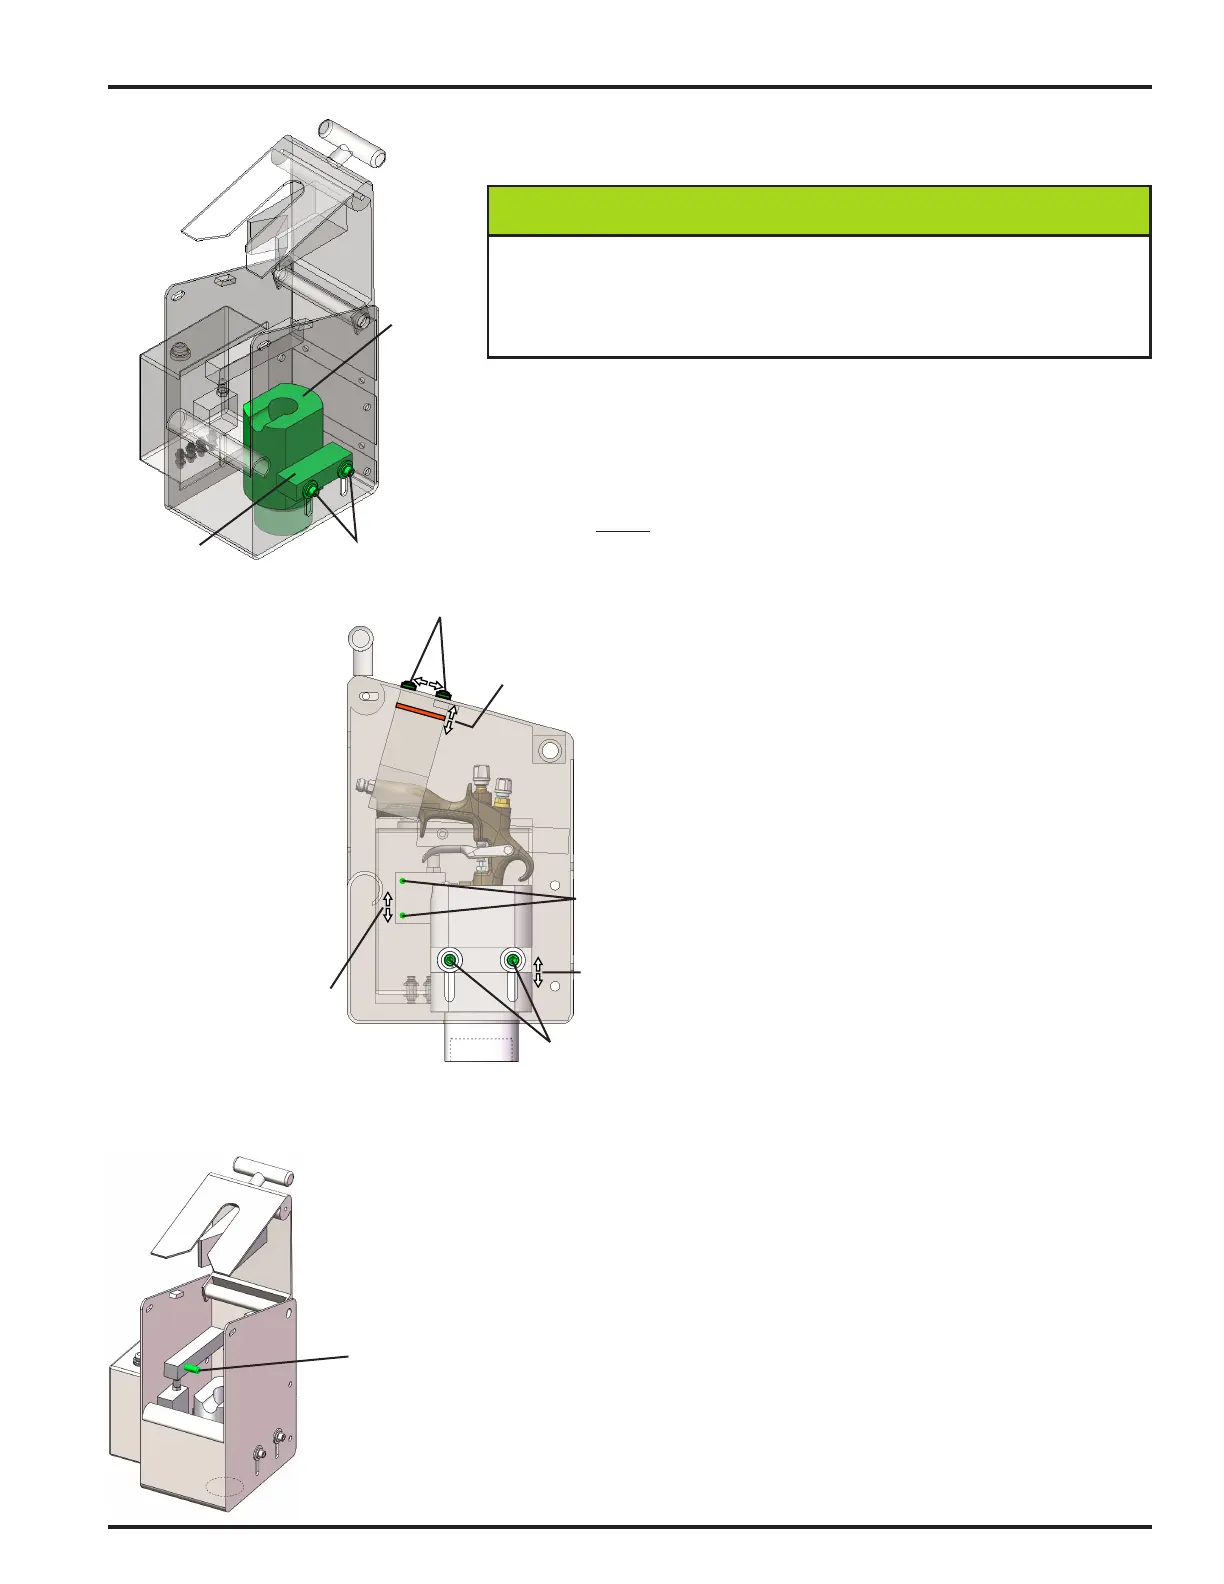
The gun saddle should
be adjusted for proper
gun position. Place the
gun in the saddle as
shown, and attempt to
shut the lid. If the lid
does not close all the
way, use the two screws
to adjust the height of
the gun holder so the
lid will shut properly.
Verify that the gun trigger
actuator pin will catch the
“nger side” of the spray gun
trigger when the lid is closed.
If not, the holder may need
to be adjusted again.
Gun trigger actuator pin
ADJUSTMENT STEPS
1. To properly adjust the gun saddle in the gun
box you need the correct saddle for your gun.
2. Place the gun saddle into the gun box by
removing the 5/16-18 cap screws on the right
side of the gun box.
3. Screw in the new saddle for your gun, leaving
the bolts loose for adjustment.
4. Place gun in holder and bring the gun up to the
actuating pin so that the pin goes under the gun
trigger. Secure bolts on right side of gun box.
5. Position the adjustment for the gun handle so it
clears the gun controls on the back of the gun.
6. Close the gun box lid. If the lid triggers the
air output "Gun in Box" (GIB) signal, the box
is ready to use. If the lid does not trigger
the air output "Gun in Box" (GIB) signal,
continue with steps 7-10 below.
7. Adjust the actuation pin location, pull it up, and
secure its screws.
8. To access the screws for the actuator pin,
remove the four screws on the left side of the
gun box and remove the input-output part of
the box.
9. Loosen the two screws on the actuation
slide block and move upward or downward
depending on gun size and shape. Secure the
bolts.
10. Repeat steps (4 to 9) until the gun box GIB
output is working. You are now ready to use
the box.
Gun
saddle
Spacer
Screws
1-1/2"
Adjustment
Adjustment
locations
Adjustment
locations
Adjustment locations
1"
1/2"
Adjustment
3/16" saddle
movement when
gun is closed in box


 To Next Page
 Loading...
