Carpigiani K 3 User’s guide
This manual is for the exclusive use of licensees and employees of McDonald’s Systems Inc Page 32 of 63
Version 5: October 2012
WASHING
NOTE
DO NOT use tools that can scratch polished surfaces. Do use clean and sanitized brushes instead.
step 1
Wash all pump components with the McD All Purpose Super Concentrate (APSC) and hot water at 122-
140°F (50-60°C) (or with hot McD APSC from the KayStar dispenser at the back sink).
step 2
Rinse them with clear water. Use the supplied brushes to clean the discharge tube assembly and the valve
body. It is recommended to wash the small parts in a pan or in any other similar container so they will not
get lost.
step 3
Sanitize the pump components immerging them in a container with McD Sanitizer diluted in water at 70-
90°F (21-32°C) [1 packet in 2-1/2 gal. (9-1/2 litres) of water = 100 PPM] (and mix the powder)] then, hold on
for 1 minute.
step 4
Allow the pump parts to air-dry after sanitizing.
REASSEMBLY
step 1
Lubricate and position the knob O-ring in its groove on the knob. Put the knob apart.
step 2
Assemble the washer, the spring, the head insert, and the head tube on the piston and
stem assembly.
step 3
Slip the cone shaped collars (if used) onto the head tube, then place the locking collar on
the head tube.
step 4
Hold the head tube and push the piston and stem assembly inside the head tube, compressing
the spring at the same time. When the threaded end of the stem projects through the head
tube, thread the knob onto the piston and onto the stem assembly.
Put the assembled plunger assembly apart.
step 6
Lubricate the O-ring with the appropriate lubricant and install the O-ring in its groove on
the discharge tube assembly joint. Temporarily put the discharge tube assembly apart.
step 7
Lubricate the O-ring with food grade lubricant and install the O-ring in its groove inside the
valve body.
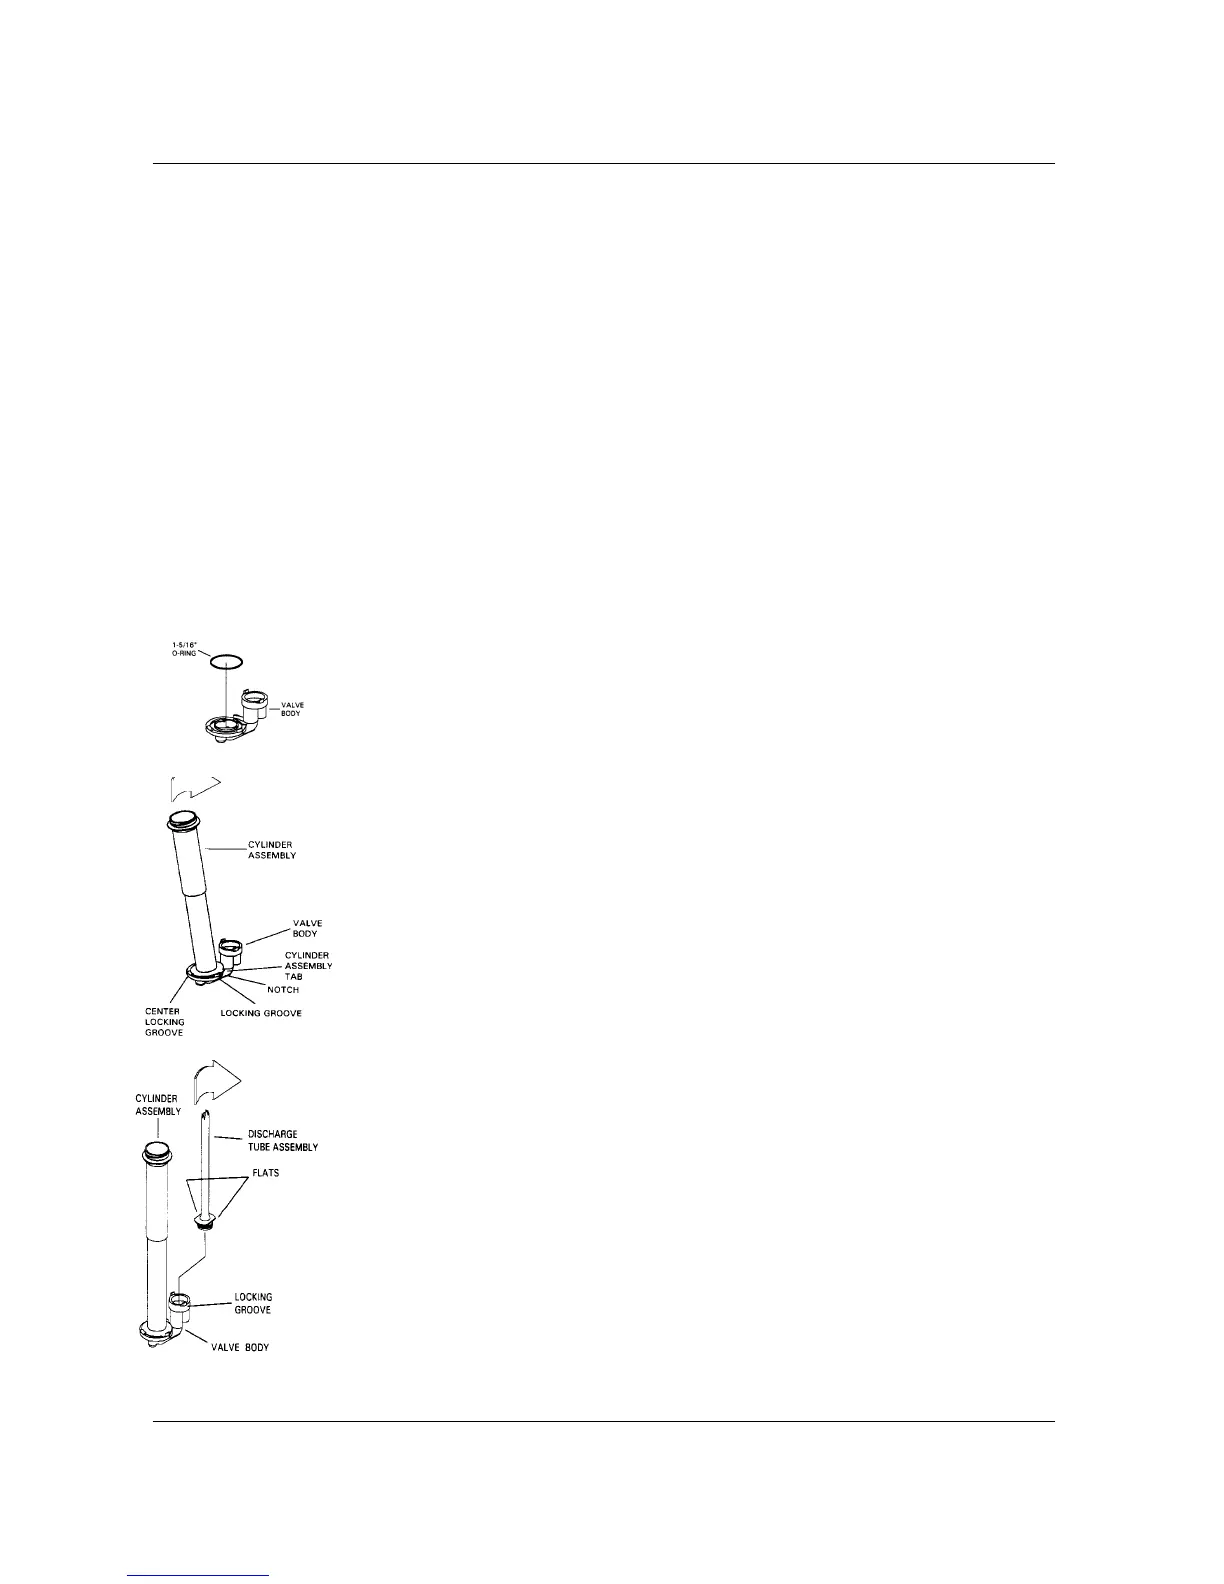
step 8
Align the tabs on the cylinder flange with the notches in the valve body. Tilt the cylinder
assembly slightly and slide the widest section of the flange under the centre locking
groove of the valve body. Rotate the cylinder assembly clockwise and press it downwards
at the same time the flange tabs fully engage the locking grooves of the valve body.
step 9
Position the discharge tube assembly on the valve body, aligning the flats on the
discharge tube assembly’s joints with the locking tabs on the valve body. Push down the
discharge tube assembly until it is seated. Rotate the discharge tube assembly clockwise
to lock it in place.
step 10
Slide the lid onto the discharge tube assembly and onto the cylinder assembly and secure the lid
with the discharge tube nut.
step 11
Apply food grade lubricant onto the discharge fitting O-ring and install the O-ring on the plant.
Install the plant on the discharge tube by pushing it inside and rotating it in a clockwise
direction.
step 12
Apply a small amount of food grade lubricant to the seal flare, install the plunger assembly
in the pump body assembly, and tighten the locking collar.
 Loading...