Carpigiani K 3 User’s guide
This manual is for the exclusive use of licensees and employees of McDonald’s Systems Inc Page 31 of 63
Version 5: October 2012
5. WEEKLY CLEANING
On a weekly basis, certain machine parts must be disassembled, washed, sanitized and re-
assembled. The following is the list of operations to be performed weekly in addition to the regular
daily cleaning procedure.
Make sure your hands are clean and sanitized before performing the following procedures.
5.1 WASHING AND SANITIZING OF THE TOPPING CONTAINERS
5.1.1 CLEANING OF THE TOPPING BINS:
a) Remove the topping pumps and bins from the machine and bring them to the back sink.
b) Discard the toppings weekly to break the bacterial life cycle.
c) Wash the bins thoroughly with the McD All Purpose Super Concentrate (APSC) and hot water 122-
140°F (50-60°C) (or with of hot McD APSC from the KayStar dispenser at the back sink),
eliminating any product’s residue.
d) Place the bins into the McD Sanitizer diluted with water at 70-90°F (21-32°C) [1 packet in 2-1/2 gal.
(9-1/2 liters) of water = 100 PPM] for 1 minute.
e) Make sure that the bins are empty and leave them out to air-dry.
5.1.2 CLEANING OFTHE TOPPING HOPPER
a) Place an empty container under the drain tap inside the syrup compartment.
b) Open the tap and drain the water completely from the tap. (caution: water is hot)
c) Close the tap.
5.2 DISASSEMBLING, WASHING AND SANITIZING OF THE HOT TOPPING PUMPS
Clean the hot-topping pumps:
Place the lower end of the pump into a container with clean warm water and operate the pump until
the discharged water is clear.
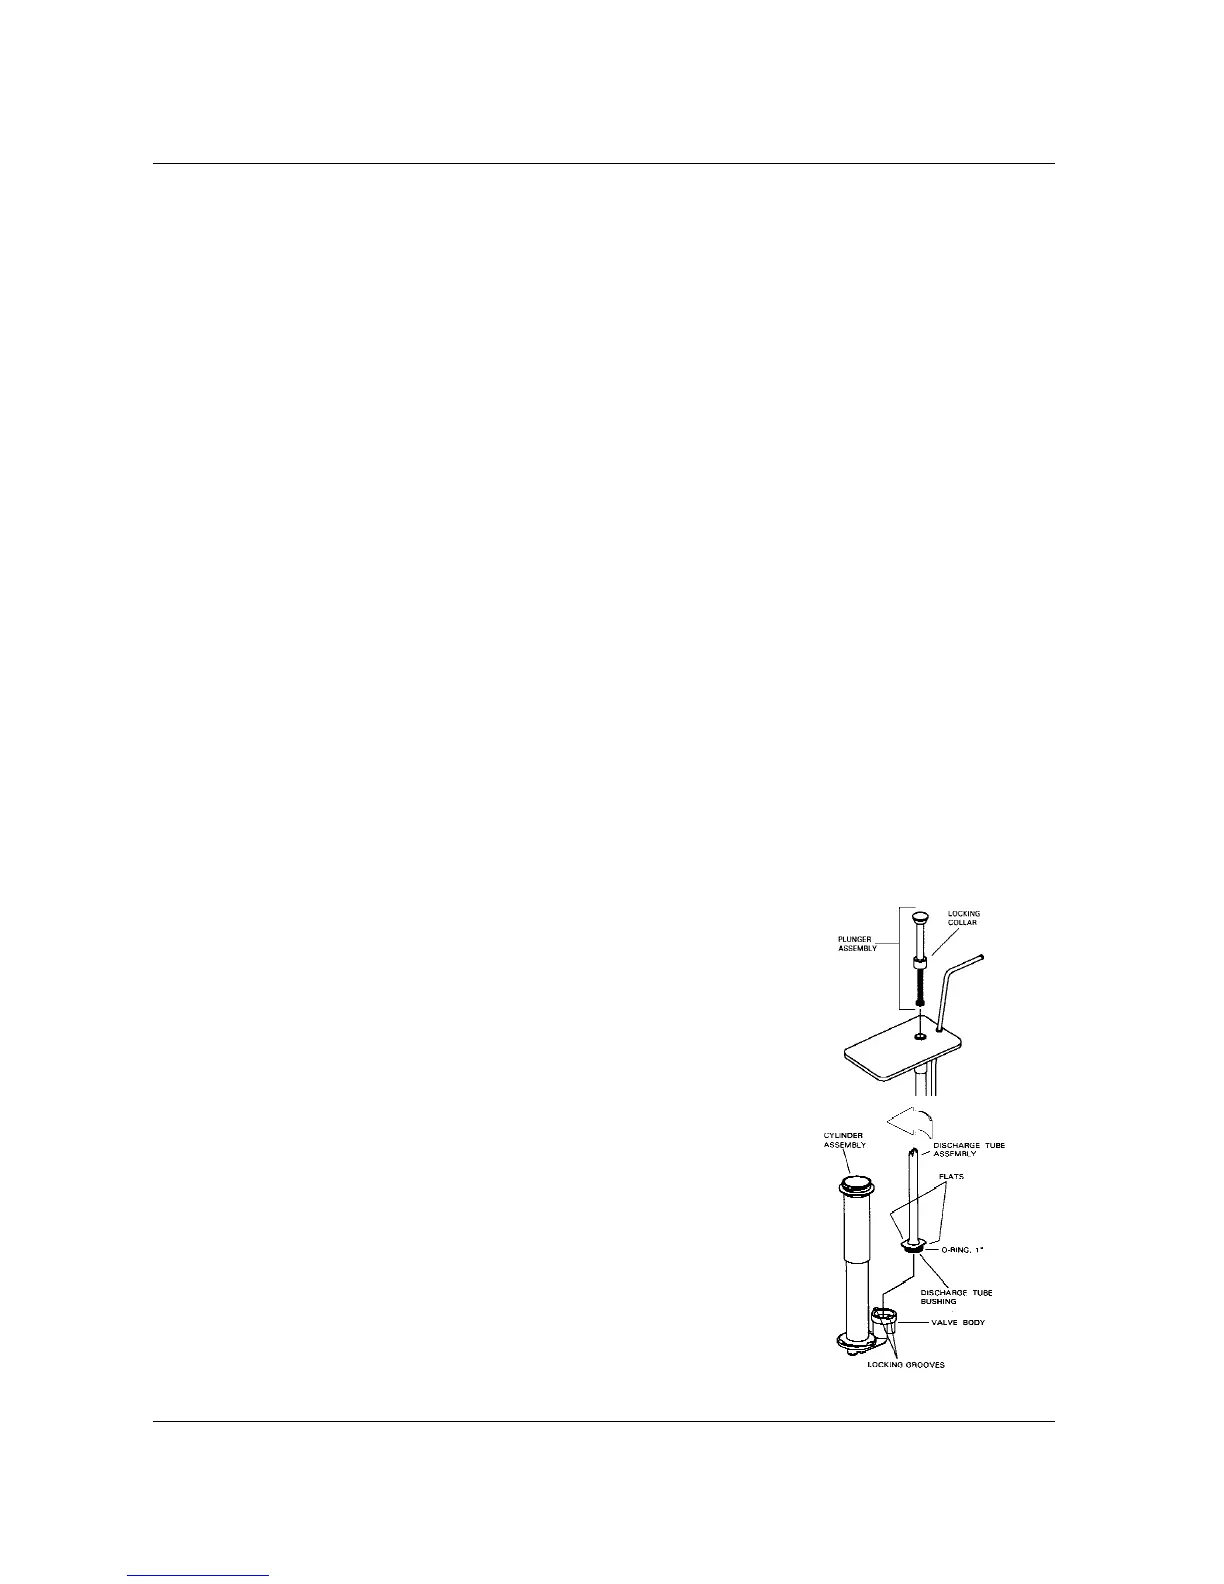
DISASSEMBLY
step 1
Loosen the locking collar until the plunger assembly can be removed from the
pump cylinder.
NOTE
The plunger spring is slightly compressed so be careful when removing the
knob.
step 2
Remove the discharge tube assembly by rotating it counter clockwise until the
flats on the discharge tube move away from the valve body locking grooves,
then pull the discharge tube assembly away from the valve body carefully.
step 3
Separate the O-ring from the discharge tube by pressing the O-ring and sliding
it in the joint groove until the O-ring can roll out from the groove.
step 4
Remove the cylinder assembly from the valve body by pressing downwards the
valve and rotate it counter clockwise at the same time until the tabs of the
cylinder assembly leave the locking grooves on the valve body.
step 5
Remove the O-ring from the valve body.
step 6
Place all parts in a clean container.
 Loading...