Carpigiani K 3 User’s guide
This manual is for the exclusive use of licensees and employees of McDonald’s Systems Inc Page 50 of 63
Version 5: October 2012
6.4.4 REASSEMBLY OF THE MIX HOPPER AGITATOR
step 1
Relocate the agitator back in its seat, pay attention to engage it onto its shaft correctly
6.5 REASSEMBLY OF WASHED AND SANITIZED COMPONENT PARTS
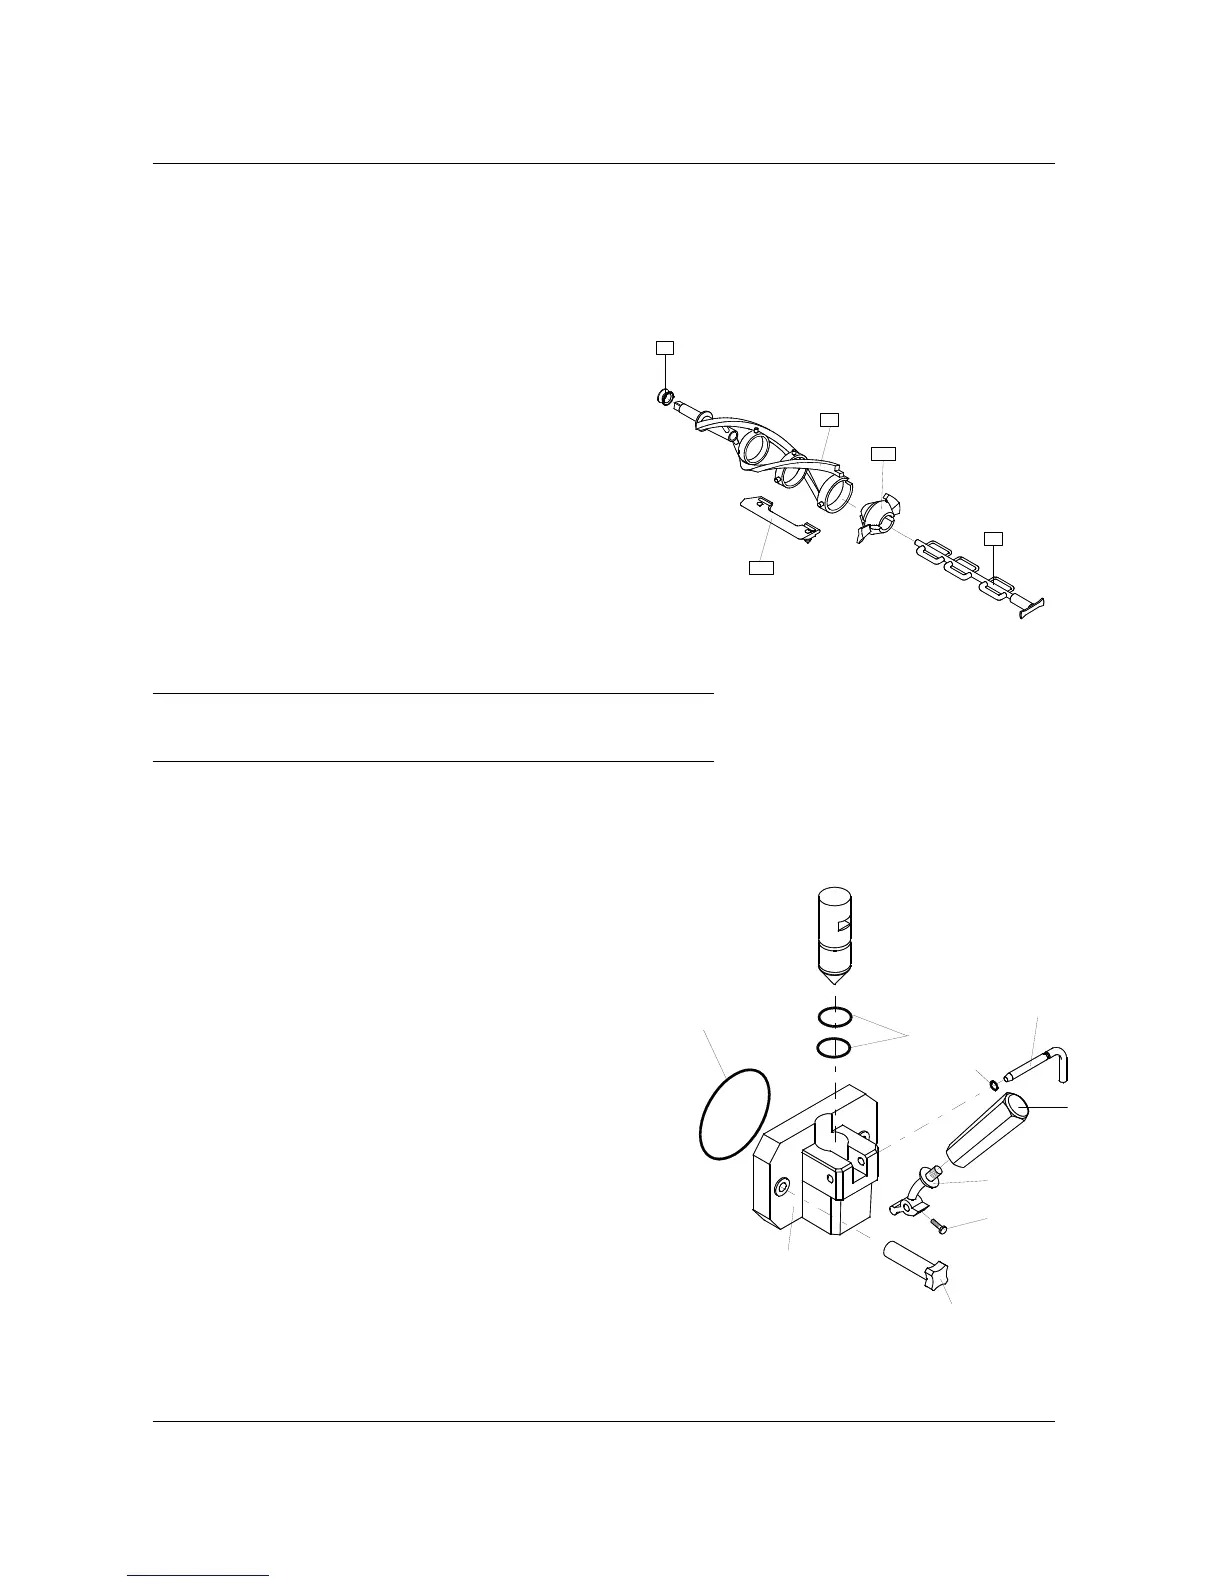
6.5.1 REASSEMBLY OF THE SUNDAE BEATER
step 1
Insert the 3 beater blades (#430) onto the beater
frame. Carpigiani suggests to replace the blades
each 6 months (please see the tune-up kit card).
step 2
Insert the end pusher (#25P) onto the beater frame.
step 3
Insert the end of the idler shaft (#24) in the rear
housing of the beater, through the end pusher. Push
the idler into position.
step 4
Lubricate the sides of the beater seal (#28) and
slide it onto the beater shaft.
IMPORTANT
Check the beater seal for integrity. Replace if worn or damaged.
It should be replaced rather frequently.
step 5
Insert the beater assembly into the cylinder. Push it while turning it clockwise until it engages in its rear
hub, otherwise the dispensing head cannot be fastened properly, mix can flow out and serious damage
may occur.
6.5.2 REASSEMBLY OF THE SUNDAE DISPENSING DOOR
step 1
Lubricate and slide the 2 piston O-ring (#1153) into
their seats.
step 2
Lubricate the piston (#30) and insert it, pointed
end down, in the dispensing head (#7) making
sure that the piston square notch lines up with the
rectangular opening on the spigot front.
step 3
Position the dispensing handle (#5) on the door
(#7) and insert the pivot pin (#6) in its housing
through the handle lever hole. Lubricate and slide
the O-ring (#1289) into its seat on the pivot pin.
Lubricate and slide into its seat the large
dispensing door O-ring (#1188).
step 4
Insert the dispensing door assembly onto the two front panel
studs and fasten it with the two knobs (#8) hand tight.
28
21
24
25P
430
1188
7
1289
214
43
5
6
1153
8
 Loading...