CONTENTS
Page
SAFETY CONSIDERATIONS ...................1
INTRODUCTION ..............................2
General ......................................2
Job Data ....................................2
Equipment Required .........................2
INSTALLATION .............................2-24
Receiving the Chiller .........................2
• INSPECT SHIPMENT
• IDENTIFY CHILLER
• PROVIDE CHILLER PROTECTION
Rigging the Chiller ...........................4
• RIG CHILLER ASSEMBLY
• RIG CHILLER COMPONENTS
Install Chiller Supports ......................10
• INSTALL STANDARD ISOLATION
• INSTALL OPTIONAL ISOLATION
• INSTALL SPRING ISOLATION
Connect Piping .............................12
• INSTALL WATER PIPING TO HEAT
EXCHANGERS
• INSTALL VENT PIPING TO
RELIEF DEVICES
Make Electrical Connections .................17
• CONNECT CONTROL INPUTS
• CONNECT CONTROL OUTPUTS
• CONNECT STARTER
• CARRIER COMFORT NETWORK INTERFACE
Install Field Insulation .......................24
INSTALLATION START-UP REQUEST
CHECKLIST ........................CL-1, CL-2
INTRODUCTION
General —
The 19XL chiller is factory assembled, wired,
and leak tested. Installation (not by Carrier) consists
primarily of establishing water and electrical services to
the chiller. The rigging, installation, field wiring, field pip-
ing and insulation of waterbox covers are the responsibility
of the contractor and/or customer. Carrier has no
installation responsibilities for the equipment.
Job Data
Necessary information consists of:
• job contract or specifications
• chiller location prints
• rigging information
• piping prints and details
• field wiring drawings
• starter manufacturer’s installation details
• Carrier certified print
Equipment Required
• mechanic’s tools (refrigeration)
• volt-ohmmeter and clamp-on ammeter
• leak detector (halide or electronic)
• absolute pressure manometer or wet-bulb vacuum
indicator
• portable vacuum pump
INSTALLATION
Receiving the Chiller
INSPECT SHIPMENT
Do not open any valves or loosen any connections. The
standard 19XL chiller is shipped with a full refrig-
erant charge. Some chillers may be shipped with a ni-
trogen holding charge as an option.
1. Inspect for shipping damage while chiller is still on ship-
ping conveyance. If chiller appears to be damaged or has
been torn loose from its anchorage, have it examined by
transportation inspectors before removal. Forward claim
papers directly to transportation company. Manufacturer
is not responsible for any damage incurred in transit.
2. Check all items against shipping list. Immediately notify
the nearest Carrier representative if any item is missing.
3. To prevent loss or damage, leave all parts in original pack-
ages until beginning installation. All openings are closed
with covers or plugs to prevent dirt and debris from en-
tering chiller components during shipping. A full oper-
ating oil charge is placed in the oil sump before shipment.
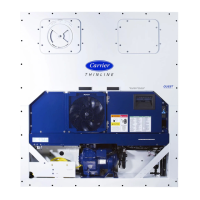
IDENTIFY CHILLER — The chiller model number,
serial number, and heat exchanger sizes are stamped on
chiller identification nameplate (Fig. 1 and 2). Check this
information against shipping papers and job data.
PROVIDE CHILLER PROTECTION — Protect machine and
starter from construction dirt and moisture. Keep protective
shipping covers in place until chiller is ready for
installation.
If chiller is exposed to freezing temperatures after water
circuits have been installed, open waterbox drains and re-
move all water from cooler and condenser. Leave drains open
until system is filled.
Fig. 1 — Model Number Identification
2
 Loading...