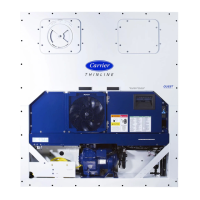
Rigging the Chiller — The 19XL chiller can be rigged
as an entire assembly. It also has flanged connections that
allow the compressor, cooler, and condenser sections to be
separated and rigged individually.
RIG CHILLER ASSEMBLY — See rigging instructions on
label attached to chiller. Also refer to rigging guide (Fig. 3),
physical data in Fig. 4, and Tables 1-5. Lift chiller only from
the 3 points indicated in rigging guide. Each lifting cable or
chain must be capable of supporting the entire weight of the
chiller.
Lifting chiller from points other than those specified may
result in serious damage to the unit and personal injury.
Rigging equipment and procedures must be adequate for
chiller weight. See Tables 1-5 for chiller weights.
NOTE: These weights are broken down into compo-
nent sections for use when installing the unit in
sections. For the complete chiller weight, add all com-
ponent sections and refrigerant charge together. See
Tables 1-5 for chiller component weights.
IMPORTANT: Make sure that rigging cable is over
the motor side of the rigging guide bolt on the motor
end cover before lifting.
RIG CHILLER COMPONENTS — Refer to instructions be-
low, Fig. 5-9, and Carrier Certified Prints for chiller com-
ponent disassembly.
IMPORTANT: Only a qualified service technician should
perform this operation.
Do not attempt to disconnect flanges while the chiller is
under pressure. Failure to relieve pressure can result in
personal injury or damage to the unit.
Before rigging the compressor, disconnect all wires en-
tering the power panel.
NOTE: If the cooler and condenser vessels must be sepa-
rated, place metal spacers under the tube sheets at the points
where they are separated to keep each heat exchanger level.
See Fig. 3.
NOTE: Wiring must also be disconnected. Label each wire
before removal (see Carrier Certified Prints). In order to dis-
connect the starter from the machine, remove wiring for the
oil pump, oil heater, control wiring at the power panel, and
the main motor leads at the starter lugs.
Remove all transducer and sensor wires at the sensor. Clip
all wire ties necessary to pull heat exchangers apart.
HEAT
EXCHANGER
(Cooler and
Condenser)
Size
CENTER OF GRAVITY —
APPROXIMATE DIMENSIONS
MAXIMUM RIGGING
WEIGHT (Without
Refrigerant Charge)
VESSEL
LENGTH
CHAIN LENGTH
A (Length) B (Width C (Height) ‘‘B’’ ‘‘C’’ ‘‘D’’
ft-in. mm ft-in. mm ft-in. mm lb kg ft-in. mm ft-in. mm ft-in. mm ft-in. mm
40 to 43 (Frame 4) 5-5 1689 2-8 813 3-5 1040 21,200 9 616
12-3 3734 12-0 3658 12-10 3912 12-10 3912
50 to 53 (Frame 5) 5-5 1689 2-8 813 3-5 1040 26,400 11 975
55 to 58 (Frame 5) 7-9 2362 2-8 813 3-5 1040 30,850 14 000 17-0 5182 13-9 4166 14-10 4521 14-10 4521
NOTES:
1. Each chain must be capable of supporting the entire weight of the chiller. The maximum weight of each chiller is listed in the table above.
2. Chain lengths shown are typical for 15 ft (4.57 m) lifting height. Some minor adjustment may be required.
Fig. 3 — Chiller Rigging Guide
4
 Loading...