EasyManua.ls Logo

Carrier 38AKS028-044 User Manual

Carrier 38AKS028-044
24 pages
To Next Page IconTo Next Page
Page #1 background imageLoading...
Page #1 background image
Installation, Start-Up and
Service Instructions
CONTENTS
Page
SAFETY CONSIDERATIONS ...................1
BEFORE INSTALLATION .....................1-3
Rigging ......................................1
Placing Unit .................................3
Mounting Unit ...............................3
Compressor Mounting ........................3
INSTALLATION .............................3-12
Refrigerant Piping Connections ...............3
Liquid Line Solenoid Drop Control ............3
Filter Drier and Moisture Indicator ............3
Receiver .....................................4
Piping Procedure ............................4
Power Supply ................................6
Power Wiring ................................6
START-UP ................................13-17
Initial Check ................................13
Leak Test and Dehydration ..................13
Preliminary Charge ..........................13
Start Unit ...................................13
Charge System .............................13
Operation ...................................13
Control Module (CM) ........................13
Bypass Relay (BPR) .........................17
Time-Delay Relay (TDR) .....................17
Sequence of Operation ......................17
Complete Unit Stoppage .....................17
SERVICE ..................................17-20
Access for Servicing ........................17
Fan Adjustment .............................19
Oil Charge ..................................19
Liquid Shutoff/Charging Valve ...............19
Capacity Control ............................19
Oil Pressure Safety Switch (OPS) ............20
Compressor Protection ......................20
High-Pressure Switch .......................20
Low-Pressure Switch ........................20
Winter Start Control .........................20
Head Pressure Control ......................20
TROUBLESHOOTING ........................21
START-UP CHECKLIST .....................CL-1
SAFETY CONSIDERATIONS
Installing, starting up, and servicing air-conditioning equip-
ment can be hazardous due to system pressures, electrical
components, and equipment location (roofs, elevated struc-
tures, etc.).
Only trained, qualified installers and service mechanics
should install, start up, and service this equipment (Fig. 1).
Untrained personnel can perform basic maintenance func-
tions such as cleaning coils. All other operations should be
performed by trained service personnel.
When working on the equipment, observe precautions in
the literature and on tags, stickers, and labels attached to the
equipment.
Follow all safety codes.
Wear safety glasses and work gloves.
Keep, quenching cloth and fire extinguisher nearby when
brazing.
Use care in handling, rigging, and setting bulky
equipment.
See Table 1A or 1B for physical data.
ELECTRIC SHOCK HAZARD
Open all remote disconnects before
servicing this equipment.
BEFORE INSTALLATION
Rigging
Preferred method is with spreader bars from
above the unit. Use 2-in. (50 mm) OD pipe or hooks in lift-
ing holes. Rig with 4 cables and spreader bars. All panels
must be in place when rigging. See rigging label on unit for
details concerning shipping weights, distance between lift-
ing holes, center of gravity, and spreader bar dimensions.
See Fig. 2.
If overhead rigging is not possible, place unit on skid or
pad for rolling or dragging. When rolling, use minimum of
3 rollers. When dragging, pull the pad. Do not apply force
to the unit. When in final position, raise from above to lift
unit off pad.
All panels must be in place when rigging.
38AKS028-044
Air-Cooled Condensing Units
50/60 Hz
Manufacturer reserves the right to discontinue, or change at any time, specifications or designs without notice and without incurring obligations.
Book 1
Tab 3a
PC 111 Catalog No. 533-820 Printed in U.S.A. Form 38A-5SI Pg 1 7-94 Replaces: 38AK-3SI
Question and Answer IconNeed help?

Do you have a question about the Carrier 38AKS028-044 and is the answer not in the manual?

Carrier 38AKS028-044 Specifications

General IconGeneral
RefrigerantR-410A
Phase3
Compressor TypeScroll
SEER Rating13 SEER
Voltage208/230 V
Weight150 kg

Summary

Installation

Placing Unit

Ensure 4 ft (1220 mm) service space and 8 ft (2440 mm) clear air space above unit for proper placement.

Mounting Unit

Use base rail mounting holes for securing to structure or vibration isolators. Mount unit level for oil return.

Compressor Mounting

Compressor is secured by four bolts; loosen them after installation to allow flatwasher movement.

Refrigerant Piping Connections

Select line sizes based on piping length and evaporator, considering liquid lift and compressor oil return.

Liquid Line Solenoid Drop Control

Install factory solenoid at indoor unit to keep refrigerant on high-pressure side during off-cycle, minimizing migration.

Filter Drier and Moisture Indicator

Field-install a filter drier and sight glass for moisture indication to ensure system integrity.

Receiver

The unit is not provided with a receiver, and its use is not recommended by the manufacturer.

Piping Procedure

Use nitrogen during brazing to prevent oxide formation and install TXV in liquid line ahead of each evaporator section.

Power Supply

Power Wiring

Start-Up

Initial Check

Before starting, check auxiliary components, electrical connections, oil level, and perform leak testing and dehydration.

Leak Test and Dehydration

Leak test the entire refrigerant system and dehydrate it as per Carrier Training Booklet procedures for system integrity.

Preliminary Charge

Charge the system with approximately 25 lbs (11.3 kg) of R-22 via the liquid charging method for initial operation.

Start Unit

Close disconnect, set thermostat above ambient, energize crankcase heater for 24 hours, then close breaker and reset thermostat.

Charge System

Conduct charging under supervision, measuring pressure and liquid line temperature against the charging chart.

Operation

Follow control circuit diagrams; ensure the indoor fan system operates during charging or refrigerant removal.

Control Module (CM)

The CM manages anti-short-cycle timing, oil pressure, high-pressure, and thermal protection for the compressor.

Service

Access for Servicing

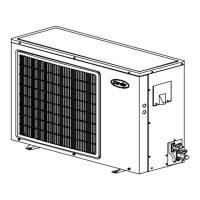
Unit features access panels and a front door for servicing compressor, refrigerant system, and electrical controls.

Compressor Section

Access to the compressor compartment is via two side panels and a front door for component servicing.

Oil Pressure Safety Switch

Manually reset OPS is accessed by removing the left side access panel; open breaker before removing cover.

Bypass Relay (BPR)

BPR provides a 2-minute LPS bypass and energizes unloaders for unloaded compressor start-up.

Time-Delay Relay (TDR) (50 Hz Only)

Factory-set TDR provides a 1-second delay for part-wind start, controlled by dip switch settings.

Sequence of Operation

Details unit start-up, fan cycling, compressor loading/unloading, and shutdown based on thermostat and safety devices.

Complete Unit Stoppage

Explains causes of stoppage (power interruption, over-temp, HPS) and the restart process.

Fan Adjustment

Adjust fan position on the motor shaft using the setscrew to ensure secure tightening.

Oil Charge

Compressors are factory charged with oil; use only Carrier-approved oil for any additional oil or complete charge.

Liquid Shutoff/Charging Valve

Located inside the compressor compartment, this valve has a 1/4-in. flare connection for field charging.

Capacity Control

Controlled by suction pressure actuated unloaders; factory settings may be adjusted for desired control set point.

Head Pressure Control

Maintains adequate discharge pressure under low ambient temperatures using fan cycling.

Low-Pressure Switch

This switch has fixed, non-adjustable settings and is mounted on the compressor.

High-Pressure Switch

This switch has fixed, non-adjustable settings and is mounted on the compressor.

Troubleshooting

Compressor Does Not Run

Lists probable causes like tripped breaker, open power, or defective motor, with corresponding remedies.

Compressor Stops on Low-Pressure Control

Probable causes include closed suction valve or low refrigerant; remedies involve opening valves or adding refrigerant.

Compressor Stops on High-Pressure Control

Causes like closed discharge valve or non-operating fans require valve opening or fan checks.

Unit Operates Too Long or Continuously

Potential causes are low refrigerant, fused contacts, or air in system; remedies include adding refrigerant or replacing controls.

System Is Noisy

Probable causes are piping vibration or compressor noise; remedies involve supporting piping or checking valve plates.

Compressor Loses Oil

Caused by system leaks or unenergized crankcase heaters; remedies involve leak repair or heater checks.

Frosted Suction Line

Caused by expansion valve admitting excess refrigerant; remedy is to adjust the expansion valve.

Hot Liquid Line

Caused by refrigerant shortage or expansion valve opening too wide; remedies are leak repair or expansion valve adjustment.

Frosted Liquid Line

Caused by a restricted filter drier; remedy is to remove or replace the restriction.

Compressor Will Not Unload

Probable causes are defective unloaders or solenoid valves; remedies include replacement or rewiring.

Compressor Will Not Load

Probable causes are miswired solenoid or unloader issues; remedies involve rewiring, replacing valve, or cleaning parts.

Start-Up Checklist

A. Preliminary Information

Collects essential unit details including model, serial numbers, and any additional accessories installed.

B. Pre-Start-Up

Checks for shipping damage, verifies power supply, ground wire, circuit protection, wiring, and compressor holddown bolts.

CONTROLS

Verifies thermostat and indoor fan control wiring connections, terminal tightness, and crankcase heater energization.

INDOOR UNIT

Checks drain pan for proper drainage, air filters, pulley alignment, and fan belt tension for safe operation.

PIPING

Confirms solenoid valve location, performs leak checks, ensures service valves are open, and checks oil sight glass levels.

CHECK VOLTAGE IMBALANCE

Calculate voltage imbalance and do not start the system if imbalance exceeds 2%.

Related product manuals