EasyManua.ls Logo

Carrier 38AE012 User Manual

Carrier 38AE012
20 pages
To Next Page IconTo Next Page
Page #1 background imageLoading...
Page #1 background image
Installation, Start-Up and
Service Instructions
CONTENTS
Page
SAFETY CONSIDERATIONS ...................1
INSTALLATION ..............................1-8
Step 1 Complete Pre-Installation Checks ....1
Step 2 Rig and Mount the Unit .............6
Step 3 Complete Refrigerant Piping
Connections .................................6
Step 4 Install Accessories .................7
Step 5 Complete Electrical Connections ....7
PRE-START-UP ..............................9
Evacuate and Dehydrate ......................9
Leak Test ....................................9
Turn On Crankcase Heaters ..................9
Add Preliminary Charge ......................9
Before Starting Unit ..........................9
START-UP .................................9-13
To Start Unit .................................9
Oil Charge ...................................9
Refrigerant Charge ...........................9
Check Operation ............................13
OPERATING SEQUENCE ....................13
Cooling .....................................13
Heating .....................................13
Fan Cycling .................................13
Winter Start Control .........................13
SERVICE ..................................13,14
Capacity Control ............................13
Head Pressure Control ......................13
Time GuardT II Circuit .......................13
Winter Start Control .........................13
Crankcase Heater ...........................13
Outdoor Fan ................................14
Lubrication .................................14
Cleaning Coils ..............................14
TROUBLESHOOTING ......................15,16
START-UP CHECKLIST ................CL-1,CL-2
SAFETY CONSIDERATIONS
Installing, starting up, and servicing air-conditioning equip-
ment can be hazardous due to system pressures, electrical
components, and equipment location (roofs, elevated struc-
tures, etc.).
Only trained, qualified installers and service mechanics
should install, start-up, and service this equipment (Fig. 1).
Untrained personnel can perform basic maintenance func-
tions such as cleaning coils. All other operations should be
performed by trained service personnel.
When working on the equipment, observe precautions in
the literature and on tags, stickers, and labels attached to the
equipment.
Follow all safety codes. Wear safety glasses and work gloves.
Keep quenching cloth and fire extinguisher nearby when
brazing. Use care in handling, rigging and setting bulky
equipment.
ELECTRIC SHOCK HAZARD
Separate power sources (main and control
power circuits) are used for these units. Be
sure both main and control power circuits are
disconnected before servicing.
INSTALLATION
Step 1 Complete Pre-Installation Checks
UNCRATE UNIT Remove unit packaging except for the
top skid assembly, which should be left in place until after
the unit is rigged into its final location.
INSPECT SHIPMENT File claim with shipping com-
pany if shipment is damaged or incomplete.
CONSIDER SYSTEM REQUIREMENTS
Consult local building codes and National Electrical Code
(NEC, U.S.A.) for special installation requirements.
Allow sufficient space for airflow clearance, wiring, re-
frigerant piping, and servicing unit. See Fig. 1. See
Fig. 2 for unit component locations.
Locate unit so that outdoor coil (condenser) airflow is un-
restricted on all sides and above.
Unit may be mounted on a level pad directly on the base
channels or mounted on raised pads at support points. See
Table 1A-1D for unit operating weights. See Table 2 for
weight distribution based on recommended support points.
NOTE: If vibration isolators are required for a particular
installation, use the data in Table 2 to make the proper
selection.
38AE012,014,016
38AKS024
Air-Cooled Condensing Units
50/60 Hz
Manufacturer reserves the right to discontinue, or change at any time, specifications or designs without notice and without incurring obligations.
Book 1 4
Tab 3a 2a
PC 111 Catalog No. 563-746 Printed in U.S.A. Form 38A-4SI Pg 1 4-94 Replaces: 38AE-17SI
Question and Answer IconNeed help?

Do you have a question about the Carrier 38AE012 and is the answer not in the manual?

Carrier 38AE012 Specifications

General IconGeneral
BrandCarrier
Model38AE012
CategoryAir Conditioner
LanguageEnglish

Summary

Installation Procedures

Complete Pre-Installation Checks

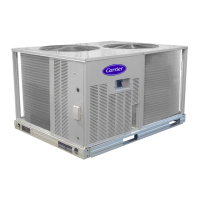
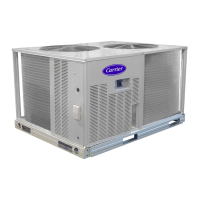
Details checks required before installing the unit, including uncrating and inspection.

Rig and Mount the Unit

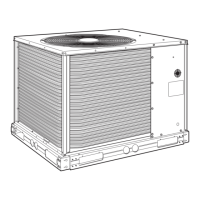
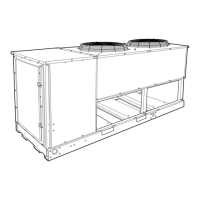
Provides instructions on how to safely rig, lift, and mount the unit.

Complete Refrigerant Piping Connections

Guides on sizing and connecting refrigerant lines, considering length and lift.

Install Accessories

Instructions for installing field-supplied accessories like winter start or low-ambient controls.

Complete Electrical Connections

Covers power and control wiring requirements, grounding, and disconnect switch installation.

Pre-Start-Up Procedures

Evacuate and Dehydrate

Procedures for evacuating and dehydrating the refrigerant system using standard methods.

Leak Test

Method for leak testing the refrigerant system using pressure and inert gas.

Turn on Crankcase Heaters

How to energize crankcase heaters for 24 hours to remove refrigerant from oil.

Add Preliminary Charge

Guidance on adding the initial refrigerant charge by weight using specific procedures.

Before Starting Unit

Essential checks before starting the unit, including oil level, bolts, wiring, and service valves.

Unit Start-Up

To Start Unit

Setting the thermostat and the delay before compressor start.

Oil Charge

Procedure for checking and adding compressor oil after initial run time.

Refrigerant Charge

Explains how to measure and adjust refrigerant charge using pressure and temperature charts.

Check Operation

Verifying operation of all safety controls and ensuring panel covers are closed.

Operating Sequence

Cooling Sequence

Describes the sequence of operations during cooling mode, including thermostat stages and fan activation.

Heating Sequence

Explains the sequence for heating operation, involving the thermostat and fan relay.

Fan Cycling

Details how head pressure control cycles the fans based on liquid line pressure.

Winter Start Control Operation

How the winter start control bypasses the low-pressure switch during start-up.

Service and Maintenance

Capacity Control Adjustment

Describes the suction pressure-actuated unloader and its adjustment.

Head Pressure Control

Explains the fan cycling based on liquid pressure for head pressure control.

Time Guard II Circuit

Details the function of the Time Guard II circuit for preventing short-cycling.

Winter Start Control Installation

Information on installing and using the winter start control accessory.

Crankcase Heater Function

Explains the purpose of the crankcase heater to prevent oil dilution.

Outdoor Fan Information

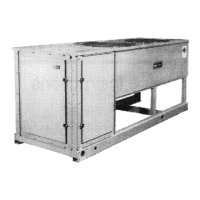
Information on outdoor fan construction, mounting, and motor bearings.

Lubrication Details

Notes that fan motors have sealed bearings and no lubrication is provided.

Cleaning Coils

Instructions on how to clean the outdoor coils using water, air, or brushing.

Troubleshooting Guide

Compressor Not Running

Lists potential causes and solutions when the compressor fails to run.

Compressor Stops on High-Pressure Switch

Troubleshooting steps for when the compressor stops due to high-pressure switch activation.

Compressor Cycles on Low-Pressure Switch

Solutions for issues causing the compressor to cycle on the low-pressure switch.

Airflow Restricted Issues

Identifies causes of restricted airflow and provides cleaning and checking procedures.

Indoor-Air Fan Stopped

Troubleshooting steps for a stopped indoor-air fan, checking connections and motor.

Insufficient Cooling

Addresses issues causing insufficient cooling while the compressor is running.

Low Suction Pressure

Explains causes of low suction pressure and how to resolve them.

High Suction Pressure

Troubleshooting steps for high suction pressure.

Unit Operates Too Long

Solutions for when the unit runs for extended or continuous periods.

System Noise

Addresses causes of system noise, including piping vibration and compressor noise.

Compressor Loses Oil

Identifies reasons for compressor oil loss and necessary repair actions.

Frosted Suction Line

Explains causes of a frosted suction line, like expansion valve issues.

Hot Liquid Line

Troubleshooting for a hot liquid line, often related to refrigerant shortage or expansion valve issues.

Frosted Liquid Line

Addresses causes of a frosted liquid line, such as a restricted filter drier.

Compressor Will Not Unload

Solutions for when the compressor fails to unload its capacity control cylinders.

Compressor Will Not Load

Troubleshooting steps for when the compressor fails to load (engage its full capacity).

Start-Up Checklist

Preliminary Information

Fields for recording outdoor/indoor unit model and serial numbers, and accessories.

Pre-Start-Up Checks

Checklist covering outdoor unit, controls, indoor unit, and piping for readiness.

Start-Up Measurements

Procedures for checking fan speeds and recording operating measurements like pressures and temperatures.

Related product manuals