10
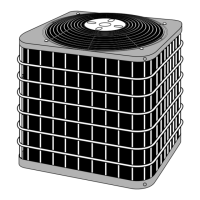
Connect the cable to the outdoor unit
ELECTRICAL WORK
1. Remove the electrical control board cover from the outdoor unit by loosening the screw.
2. Connect the connective cables to the terminals as identified with their respective
matched numbers on the terminal block of indoor and outdoor units.
3. Secure the cable onto the control board with the cord clamp.
4. To prevent the ingress of water, from a loop of the connective cable as illustrated
in the installation diagram of indoor and outdoor units.
5. Insulate unused cords (conductors) with PVC-tape.Process them so they do not
touch any electrical or metal parts.
Fig.21
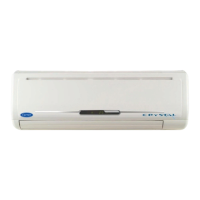
Connect the cable to the indoor unit
1. The inside and outside connecting cable can be connected without removing the front grille.
2. Connecting cable between indoor unit and outdoor unit shall be approved polychloroprene
sheathed flexible cord, type designation H07RN-F or heavier cord.
3. Lift the indoor unit panel up, remove the electrical box cover by loosening the screw.
4. Ensure the colour of wires of outdoor unit and the terminal Nos. are the same to the indoor s
respectively.
5. Wrap those cables not connected with terminals with insulation tapes, so that they will not touch
any electrical components. Secure the cable onto the control board with the cord clamp.
NOTE: Before performing any electrical work, turn off the main power to the system.
,
Fig.20
Panel
Electrical box
cover
Terminal block of indoor unit
To outdoor unit
Wire connector of outdoor unit
Cover
Screw
NOTE: The supply voltage must
be consistent with the rate voltage
of the air conditioner.
Model
Power supply
Input Rated Amp
(Switch/Fuse)
32A/25A
220-240V~ 50Hz
or
220-230V~60Hz
≥21000Btu/h
Minimum norminal cross-sectional
area of conductors:
Rated current
of appliance
(A)
>3 and <6
>6 and <10
>10 and <16
>16 and <25
Nominal cross-sectional
area
(mm )
2
0.75
1
1.5
2.5
 Loading...