Do you have a question about the Carrier 38MARBQ12AA1 and is the answer not in the manual?
Details the recommended wiring method for power and communication between units.
Guidelines for sizing refrigerant lines and insulation requirements for optimal performance.
Procedures for adding refrigerant for piping runs exceeding standard lengths.
Method for achieving a deep vacuum to remove air and moisture from the system.
Step-by-step process for triple evacuation to ensure system purity.
Important check to ensure tubing is secure and not rubbing to prevent damage.
Details safety protections like compressor restart delay, high temp cutout, and inverter module.
Explains operating modes (FAN, COOLING) and indoor fan speed control logic.
Covers protection mechanisms for compressor and evaporator based on temperature readings.
Rules for compressor and outdoor fan operation during the heating cycle.
Rules governing indoor fan speed in cooling and heating, including AUTO fan operation.
Details AUTO, DRYING, FORCED OPERATION, AUTO-RESTART, and Refrigerant Leakage Detection.
Procedure to manually activate or exit the defrost cycle using the remote control.
Explains how outdoor unit errors are displayed and provides a general overview.
Troubleshooting steps for errors related to outdoor PCB EEPROM or compressor driven chip communication.
Steps to diagnose and resolve communication failures between indoor and outdoor units.
Troubleshooting for errors related to abnormal zero crossing signal feedback from the PCB.
Diagnosis and repair for issues where indoor fan speed deviates from normal operating parameters.
Checks and troubleshooting for the DC fan motor's input and output voltage and signal.
Troubleshooting steps when the outdoor fan speed operates outside its normal range.
Procedures for measuring resistance and voltage for the outdoor DC fan motor.
Steps to check for open circuit or short circuit faults in indoor temperature sensors (T1, T2).
Troubleshooting for open circuit or short circuit faults in outdoor temperature sensors (T3, T4, TP, etc.).
Procedure to detect refrigerant leaks, including checks for cool air output and sensor attachment.
Troubleshooting steps for communication failures between the indoor PCB and the display board.
Diagnosing and resolving issues related to abnormal current rise and overload protection activation.
Troubleshooting for IPM module errors, including checks for voltage signals, ventilation, and resistance.
Procedure to measure resistance values on the outdoor PCB and IPM board to diagnose continuity.
Method for checking compressor winding resistance to identify faults.
Diagnosing and resolving voltage protection errors by checking power supply, connections, and reactor.
Troubleshooting for compressor top temperature, IPM module temperature, or high pressure protection.
Diagnosing abnormal inverter compressor drive signals, voltage, rotation, and speed detection.
Steps to address low pressure protection shutdowns, including checking the protector and refrigerant levels.
Explains how to resolve mode conflicts when units operate simultaneously in COOLING and HEATING.
Troubleshooting for communication errors between the outdoor main chip and the compressor driven chip.
Procedure for testing temperature sensors by measuring resistance with a multimeter.
Checking compressor winding resistance values across different models using a multimeter.
Procedure to measure resistance values on the outdoor PCB and IPM board to diagnose continuity.
Testing the 4-way valve by measuring voltage during cooling mode and resistance.
Procedure for checking the Electronic Expansion Valve by measuring winding resistance.
General steps for checking various temperature sensors using a tester.
Step-by-step guide for disassembling the panel plate of 9-12K (115V) outdoor units.
Step-by-step guide for disassembling the panel plate of 24K (208-230V) outdoor units.
Step-by-step guide for disassembling the panel plate of 30K/36K (208-230V) outdoor units.
Steps for disassembling panel plates on 30K/36K inverter models.
Instructions for removing components from PCB Board 2.
Instructions for disconnecting connectors and removing PCB Board 3.
Steps to remove the electronic control box and its components from PCB Board 4.
Procedure for removing connectors and the electronic control board from PCB Board 5.
Steps for removing hooks, connectors, and the electronic control board from PCB Board 6.
Instructions for removing cover, connectors, and the compressor from PCB Board 7.
Procedure for removing connectors, sensors, and the electronic control box from PCB Board 8.
Steps to disconnect the compressor connector and remove the electronic control assembly from PCB Board 9.
Procedure for opening the control box cover and removing the electronic control board from PCB Board 10.
Steps for removing connectors and the electronic control board from PCB Board 11.
Procedure for opening the control box cover and removing the electronic control board from PCB Board 12.
Steps to remove the fan motor, including loosening nuts and screws securing it.
Table providing resistance values for temperature sensors (T1, T2, T3, T4) at various Celsius temperatures.
Table providing resistance values for temperature sensor T5 at various Celsius temperatures.
Table for converting Celsius to Fahrenheit temperatures and vice versa.
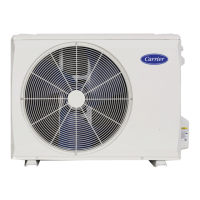
| Model Number | 38MARBQ12AA1 |
|---|---|
| Category | Heat Pump |
| Cooling Capacity (BTU/h) | 12, 000 |
| Voltage (V) | 208/230 |
| Phase | 1 |
| Refrigerant Type | R-410A |
| Heating Capacity (BTU/h) | 12000 |
| SEER Rating | 19.0 |
| HSPF Rating | 10.0 |