Do you have a question about the Carrier 38NYV045M-A and is the answer not in the manual?
| Brand | Carrier |
|---|---|
| Model | 38NYV045M-A |
| Category | Air Conditioner |
| Language | English |
Safety guidelines for the general public regarding power supply cords.
Precautions for using the new HFC refrigerant R410A and its implications.
Warnings about disconnecting power and handling high voltage circuits.
Warnings about combustible gases, overheating, refrigerant mixing, and gas leaks.
Precautions against modifying the unit, improper installation, and electrical hazards.
Advice on storage, vibration, sharp edges, and earthquake preparedness.
Detailed technical specifications for indoor and outdoor units, including capacities and dimensions.
Critical safety precautions for handling R410A refrigerant during installation and servicing.
Guidelines for installing refrigerant piping, including materials and joints.
Required and general tools for installation and servicing of R410A units.
Step-by-step instructions for recharging refrigerant, including precautions.
Methods and materials for brazing refrigerant pipes, including flux usage.
Dimensional views and installation details for the indoor unit.
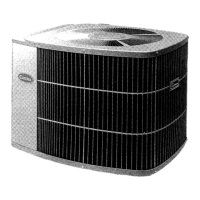
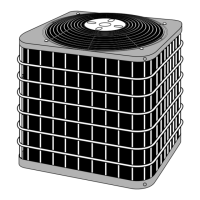
Dimensional views and installation details for the outdoor unit.
Detailed wiring diagrams for specific indoor and outdoor unit model combinations.
Detailed wiring diagrams for specific indoor and outdoor unit model combinations.
Specifications for indoor unit parts like fan motors, sensors, and louvers.
Specifications for outdoor unit parts like reactors, fan motors, sensors, and compressors.
Diagram illustrating the refrigerant flow for specific model series.
Performance data based on temperature conditions for cooling and heating.
Block diagram showing the MCU functions and remote controller interface for indoor units.
Block diagram illustrating the microcomputer control for the outdoor unit.
Overview of the air conditioner's control system, roles of indoor/outdoor controllers.
Detailed descriptions of operations like cooling, heating, fan control, and special modes.
Procedures for setting, cancelling, and handling power failures during auto restart.
How the 7-segment display shows room and setting temperatures.
Explains remote control operations, indicators, and special modes.
Visual guide for positioning and installing indoor and outdoor units.
Lists and describes optional parts, accessories, and installation tools.
Detailed procedures for installing the indoor unit, including placement and drilling.
Guidelines for selecting the outdoor unit location and adding refrigerant.
Steps for performing gas leak tests, test operations, and controller settings.
Basic confirmation of power, voltage, and primary diagnostic methods.
Interpreting flashing LED patterns for self-diagnosis codes.
Using the remote controller in service mode to diagnose faults and check codes.
Diagnosing issues by symptoms, wiring failures, and specific error codes.
Diagnostic procedures for the outdoor unit and its inverter assembly.
Methods for checking main components like PC boards, motors, and sensors.
Step-by-step instructions for disassembling and replacing indoor unit components.
Procedures for replacing the microcomputer and related parts.
Procedures for detaching and attaching outdoor unit parts like cabinets and covers.
Exploded views and part numbers for the indoor unit assembly.
Exploded views and part numbers for specific indoor unit electronic parts.
Exploded views and part numbers for the outdoor unit.
Diagrams showing the layout of components on the PC boards.