EasyManua.ls Logo

Carrier 38QHF036 User Manual

Carrier 38QHF036
2 pages
To Next Page IconTo Next Page
Page #1 background imageLoading...
Page #1 background image
900x315x860
590333
Right rear side
refrigerant pipe
hole 65φ
Left rear side
refrigerant
pipe hole 65φ
Indoor unit outline
45
42QHF025 :(A:800, B:275, C:100, D:95)
A
C
D
B
Right rear side
refrigerant pipe
hole 65φ
Left rear side
refrigerant
pipe hole 65φ
Indoor unit outline
45
A
C
D
B
42QHF036 / 42QHF050: (A:940, B:275, C:110, D:100)
Right rear side
refrigerant pipe
hole 65φ
Left rear side
refrigerant
pipe hole 65φ
Installation plate
A
21.5
C
D
B
45
42QHF060 / 42QHF065 : (A:1045, B:315, C:293, D:163)
Air freshening filter(1)
(used to install on Air filter)
6
Right rear side
refrigerant pipe
hole 65φ
Left rear side
refrigerant
pipe hole 65φ
Indoor unit
outline
C
389
A
B
52
52
332
D
Indoor unit outline
42QHF080: (A:1259, B:362, C:172, D:257)
810x310x558
U
20cm or more
700x240x540
Model
38QHF025
38QHF036 / 38QHF050
845x320x700
38QHF060
38QHF065 / 38QHF080
The holes for fixing anchors should be 5mm.
Question and Answer IconNeed help?

Do you have a question about the Carrier 38QHF036 and is the answer not in the manual?

Carrier 38QHF036 Specifications

General IconGeneral
BrandCarrier
Model38QHF036
CategoryAir Conditioner
LanguageEnglish

Summary

Safety Precautions

Ideal Installation Locations

Indoor Unit Installation Location

Location must bear weight, avoid direct heat sources, and provide adequate clearances.

Outdoor Unit Installation Location

Location should be convenient, protected from strong winds, bear weight, and be level.

Outdoor Unit Mounting Dimensions

Indoor Unit Mounting Plate Dimensions

Accessories

Piping Work

Wiring Work

Indoor Wire Connection

Outdoor Wire Connection

Connection Diagrams

Installation Process Steps

Drill Hole In The Wall

Drill a 65mm hole on the wall, slightly tilted towards the outside.

Install The Mounting Plate

Fix the mounting plate horizontally and level on the wall with five or more A-type screws.

Drainage

Ensure drain line pitches downwards, is not trapped, and is insulated up to the outside wall.

Wrap The Pipe

Properly orient refrigerant piping, electrical cable, and drain lines, ensuring drain hose is not heaved.

Hang The Indoor Unit

Run lines through the wall, hang the unit on hooks, and check secure attachment.

Outdoor Unit Drainage

Connect the drain outlet with an extension hose and gasket, then assemble into the base pan hole.

Air Evacuation

Use a vacuum pump to evacuate air to 76cmHg and perform leakage checks.

Leakage Check

Fully open packed valve stem and use leak detector or soap water to check refrigerant line connections.

Test Operation

Test unit functions by remote or manual operation, allowing for a 3-minute protection delay.
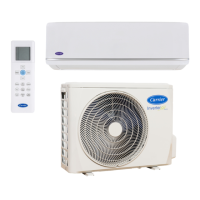
Related product manuals