7
GB-7
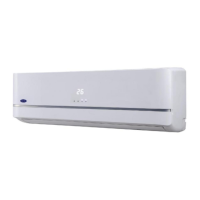
2. INDOOR UNIT INSTALLATION
SPACE REQUIREMENT FOR INDOOR UNIT
Right rear side
refrigerant pipe
hole φ65
Left rear side
refrigerant
pipe hole φ65
Indoor unit outline
45
09/12:(A:800, B:275, C:100, D:95)
A
C
D
B
Right rear side
refrigerant pipe
hole φ65
Left rear side
refrigerant
pipe hole φ65
Indoor unit outline
45
A
C
D
B
18: (A:940, B:275, C:110, D:100)
The dimension of installation plate
Unit: mm
Note: Ensure the spaces indicated by arrows from
the wall, ceilling, fance or other obstacles.
Fix the mounting pate horizontally and level on the wall.
In case the wall is brick, concrete or similar material, drill
5mm diameter holes and insert anchors for the appropriate
mounting screws.
Secure the mounting plate with 5 or move B-type screws.
2.1.3 Install the mounting plate
X
O
X
Drill a 65mm hole on the wall
which is slightly tilted towards
the outsides.
2.1.4 Drill hole in the wall
Indoor Outdoor
The drain line must not have a trap anywhere in its length,
must pitch downwards, and must be insulated up to the
outside wall.
2.1.5 Drainage
Bend
S shape
Drain end
into water
O
X
X
X
The position of drain pipe interface can be
selected according to installation position.
During the adjustment of drain hose,
the unused interface should be sealed
by rubber plug.
Piping is possible in the rear, left, left rear right direction.
2.1.6 Wrap the piping
Right
Rear
Left rear
Left
For proper orientation of the refrigerant piping, electrical
cable and drain lines, refer to below Figure.
- Place the drain hose below the refrigerant piping.
- Make sure that the drain hose is not heaved or snaked.
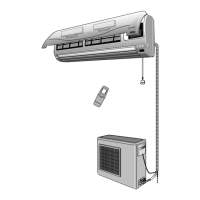
Run refrigerant lines through hole in the wall.
Hang indoor unit on upper hook of mounting plate,then
push lower part of indoor unit up on wall to lower hook.
Move indoor unit from side to side, up and down to check
if it is hooked securely.
2.1.7 Hang the indoor unit
 Loading...