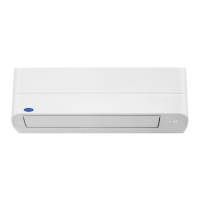
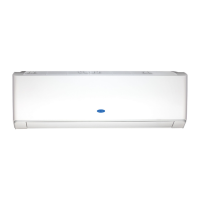
1
3
4
5
2
1 Wi-Fi access (White)
2 ECO (White)
3 PURE (White)
4 Timer (White)
5 Operation Mode
- Cool and dry (Blue)
- Fan only (LED o)
● Display brightness can be adjusted, follow procedure on @.
Require Wireless LAN connecting adapter which available as accessory.
INDOOR UNIT DISPLAY
1
PREPARATION BEFORE USE
2
Preparing Filters
1. Open the air inlet grille and remove the air lters.
2. Attach the lters. (see detail in the installation manual).
Loading Batteries (when use wireless operation.)
1. Remove the slide cover.
2. Insert 2 new batteries (AAA type)
following the (+) and (–) positions.
Clock Setup
1. Push by tip of the pencil.
If timer indication is ashing, go to the next step 2.
2. Press or
: adjust the time.
3. Press : Set the time.
Remote Control Reset
Push by tip of the pencil or
1. Remove the batteries.
2. Press .
3. Insert the batteries.
AIR FLOW DIRECTION
3
1
Press
: Move the louver
in the desired vertical direction.
2
Press
: Move the
louver in the desired horizontal
direction.
3
Press
: For select
louver swing operation.
Vertical
(Up-Down)
Swing
Horizontal
(Left-Right)
Swing
Swing o
Up-Down
Left-Right
Swing
● Vertical (Up-Down) swing
● Horizontal (Left-Right) swing
4
Press : To select provided air ow direciton
Spot
left
Spot
center
Spot
right
Return to
manually setting
“Pi” sound when air ow direction is set and “PiPi” sound when
air ow direction is canceled and return to manually setting.
Note:
● Do not move the louver manually by hands or others.
● The louver may automation positioning by some operation mode.
REMOTE CONTROL
4
1
2
3
4
5
6
7
8
9
0
!
@
#
$
%
^
&
*
(
)
-
=
Note:
● The provided Remote Controller is a wireless type, which also can be
used as a wire. Please see “How to Connect The Remote Controller for
Wired Operation”, located in installation instruction, in case of wired
control is required.
● In wire operation, remote controller will return to initial condition (PRESET,
TIMER and CLOCK will return to initial condition) when user shutdown
power supply of Air conditioner.
AUTOMATIC OPERATION
5
To automatically select cooling, or fan only operation
1. Press : Select Auto A.
2. Press : Set the desired temperature Min. 17°C, Max. 30°C.
3. Press : Select AUTO, LOW , LOW+ , MED ,
MED+ , HIGH or Quiet .
COOLING / FAN ONLY OPERATION
6
1. Press : Select Cool or Fan only .
2. Press : Set the desired temperature.
Cooling: Min. 17°C, Max. 30°C
Fan Only: No temperature indication
3. Press : Select AUTO, LOW , LOW+ , MED ,
MED+ , HIGH or Quiet .
DRY OPERATION
7
For dehumidification, a moderate cooling performance is controlled
automatically.
1. Press : Select Dry .
2. Press : Set the desired temperature Min. 17°C, Max. 30°C.
Note: Dry mode fan speed is set to Auto only.
Hi POWER OPERATION
8
To automatically control room temperature and airflow for faster cooling
operation (except in DRY and FAN ONLY mode)
Press : Start and stop the operation.
Infrared signal emitter
Start/Stop button (
)
Mode select button ( )
Temperature button ( )
Fan speed button ( )
Swing louver button ( )
Set louver Up-Down button ( )
On timer button ( )
O timer button ( )
Setup button ( )
Clear button ( )
Memory and Preset button ( )
AIR FLOW selection button ( )
High power button ( )
Economy button ( )
Plasma lon button ( )
Set louver Left-Right button ( )
ECO SLEEP button ( )
Filter reset button ( )
Set clock button ( )
Check button ( )
Reset button ( )
1
@
2
3
7
#
%
^
8
*
-
)
4
6
5
&
$
!
9
0
=
(

 Loading...