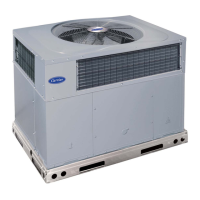
Packaged rooftop units
28
Access to components
Filter drier
Compressor
Particle
separator
The access panels to fi lters, supply fans, compressors and electric
panel are fi tted with:
- quarter-turn latches : models 90 to 180,
- hinges + quarter-turn latches: models 200 to 360.
These latches of stainless steel have triangular insert 8 mm.
Quarter-turn latches
Condensate drain pan
- Check that the condensate pan is suffi ciently clean.
- Check that the drain is not clogged.
- Cleaning of the pan can be done with water and non-abrasive
detergent.
- A cooling recovery circuit is
optionally available for these
units (MRC0 and MRC1
assemblies).
- This makes a complete
circuit with independent
control.
Recovery circuit
compressor
Outdoor coil protection grille (optional)
All the models can include a protection grille for this coil.
This grille is fi xed by modules in the holes made for this goal in
the unit’s support.
Grille module
Holes
V-220004
Caution: Before intervening in the unit, cut off main
power.
Active recovery (optional)
- Closing mode:
• First rotate 90º (anti-clockwise): closing brings
the latch to the locked position. The door cannot
be opened.
Use safety gloves for this task. Take care with the sharp
parts of the coil.
V-220005
Air coil
- Check that the coil is free from dust and grease.
- Cleaning the accumulated dust on the coil can be performed with
a vacuum cleaner perpendicular to the fi ns or with a low-pressure
water cleaner. Grease can be removed with water with degreaser.
Do not put stress on the fi ns as they could deform.
Compressor
In the case of compressor replacement:
- Disconnect the unit from power supply.
- Completely empty the load of refrigerant using a specifi c recovery
unit for R-410A
- Disconnect electrically the compresor.
- Carefully unsolder the suction and discharge piping.
- The compressor is fi xed onto the platform with 4 screws. Unscrew
the fi xings.
- Place the new compressor and check that it has a suffi cient oil charge.
Warning: when tightening the compressor screws, please consult
the maximum torque that can be applied.
If a torque wrench is not available, tighten them until noticing
resistance, then tighten the screws by turning them 3/4 of a revolution.
- Solder the suction and discharge piping.
- Connect the compressor in accordance with the circuit diagram.
- Make vacuum and next, reload the gas into the unit according to
load data provided in the technical characteristics table and in the
unit’s data plate.
Filter drier
- The fi lter function is the preserve the cooling circuit clean and without
humidity, neutralizing the acids that can be found in the cooling circuit.
- Verify dirt measuring the difference in temperature at the piping level,
at the inlet and at the outlet of the fi lter drier.
- If necessary, replace.
 Loading...