OMD Technical Note TN18001
Carrier Fire & Security
8 Newmarket Court, Page 6 of 14
Chippenham Drive,
Kingston, Milton Keynes, MK10 0AQ
This will show the current status of the selected Detector and should be used to advise
the end customer of the expected service life of the Detector.
The parameters displayed also include the Serial Number of the Detector (which is
sometimes no longer visible on the external label due to exposure to oil) and the
software version.
Note the readings for each Detector
4. If safe to do so power down the OMD system or Isolate the Detector as described in the
Mk7 OMD system Installation, Operation & Maintenance (IOM) Manual.
5. Disconnect the cable connector fitted to the top of the Detector Head.
6. Using a 4mm hexagonal key, loosen the two fixing screws in the Detector Base unit. The
screws are self-retaining.
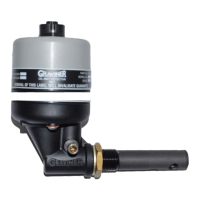
7. Remove and invert the top part of the Detector Head so the Fan is visible.
8. Wipe off any excess oil from the surface of the base and fan.
9. Examine the Detector Base unit seal and replace if damaged or perished or not seated
firmly in its channel.
CAUTION: - Do NOT press the fan label, handle only the fan outer housing.
10. Using the Pulling Tool (see below), slowly remove the Fan Retaining Plug by capturing
the shoulder and pulling. Carefully remove the Fan from its mountings.
BEWARE: - Please take extreme care NOT to lose any of the Compression Springs or the
Fan Retaining Plug.
 Loading...