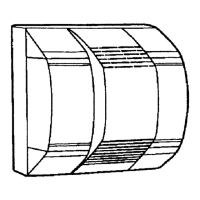
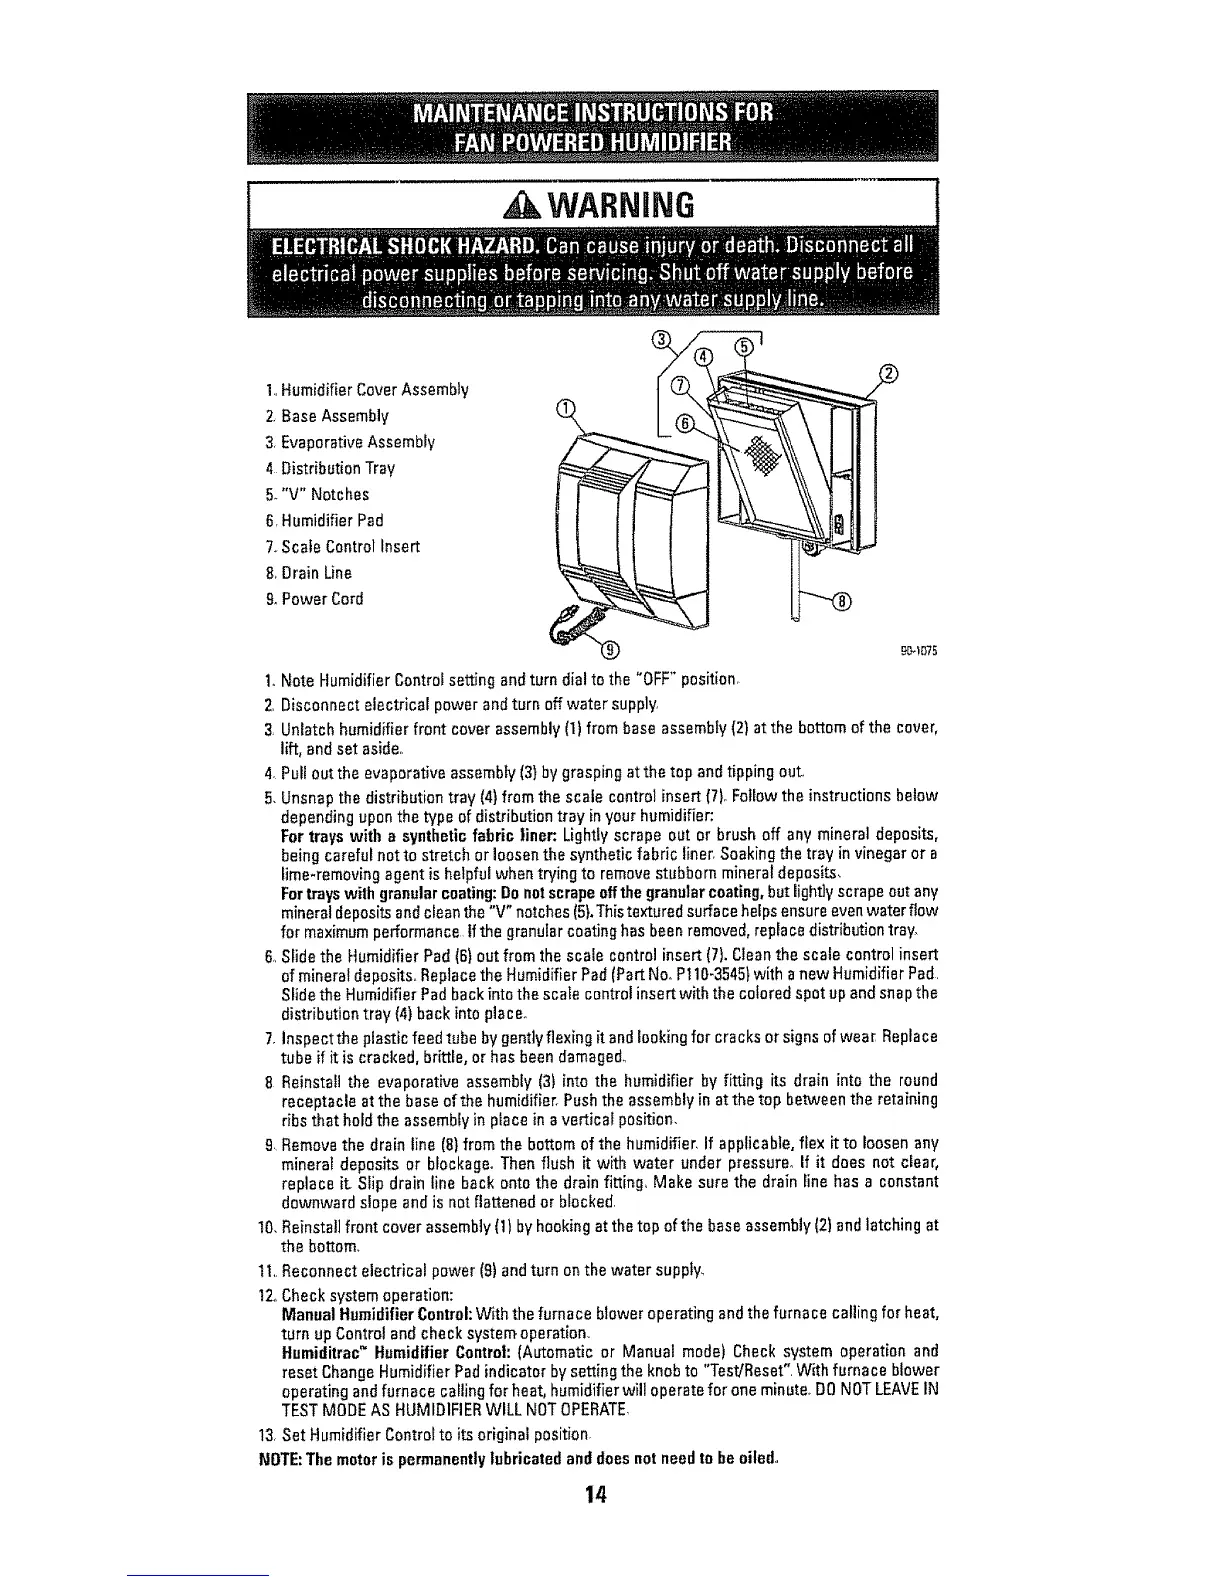
1.,Humidifier Cover Assembly
2,Base Assembly
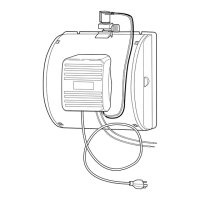
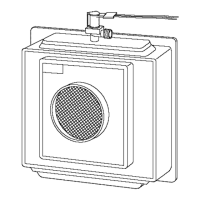
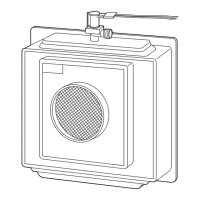
3 EvaporativeAssembly
4 Distribution Trav
5."V" Notches
6,Humidifier Pad
7.,Scale Control Insert
8,Drain Line
9_Power Cord
WARNING
t. Note Humidifier Control setting and turn dial to the "OFF"position,
2, Disconnect electrical power and turn off water supp]y,
3, Unlatch humidifier front cover assembly(I) from base assembly(2) at the bottom of the cover,
lift, and set aside,,
4_Pullout the evaporativeassembly(3}by graspingatthe top and tipping out,
5. Unsnap the distribution tray (4}from the scale control insert {71_Follow the instructions below
depending uponthe type of distribution tray in your humidifier:
Fortrays with a syntheticfabric liner: Lightly scrape out or brush off any mineral deposits,
being carefulnotto stretch or loosenthe syntheticfabric liner,Soakingthe tray in vinegaror a
lime-removing agent ishelpfulwhen t_ing to remove stubborn mineral deposits,
Fortrayswith granularcoating:Donotscrapeoffthegranularcoating,but light]v scrape out any
mineraldeposits andcleanthe"V" notches(5}.Thistextured surfacehelpsensure evenwaterflow
for maximumperformance tfthe granular coatinghas been removed,repracedistribution tray_
6,,Slidethe Humidifier Pad (6) out from the scale controlinsert (7).Cleanthe scale controlinsert
ofmineral deposfts,,Replacethe Humidifier Pad (PartNo,.Pt10_3545}with a new HumidifierPad,
Slidethe Humidifier Padbackinto the scalecontrol insert with the colored spot up and snapthe
distribution tray (4)back intoplace°
7, inspecttheplasticfeed tube by gently flexing it and lookingfor cracksor signsof wear Replace
tube if it is cracked,brittle, or has beendamaged_
8 Reinstall the evaporativeassembly (3) into the humidifier by fitting its drain into the round
receptacle at the base of the humidifier°Push the assembly in at the top between the retaining
ribs thatholdthe assemblyin place in a verticalposition.
9, Removethe drain line (8)from the bottom of the humidifier, If applicable, flex it to loosen any
mineral deposits or blockage. Then flush it with water under pressure° If it does not clear,
replace it.Slip drain line back onto the drain fitting_ Make sure the drain line has a constant
downward slope and is not flattened or blocked.
10.Reinstallfront cover assembly(t) by hooking at the top ofthe baseassembly (2)and latching at
the bottom.
11,,Reconnect electrical power (9)andturn onthe water suppty_
12oChecksystem operation:
Manual HumidifierControl:With the furnace blower operating andthe furnace calling for heat,
turn upControl and checksystem operation.
tlumiditrao" Humidifier Control: (Automaticor Manual mode) Check system operation and
reset ChangeHumidifier Padindicatorby setting the knob to "Test/Reset",With furnace blower
operating andfurnace callingfor heat, humidifier will operate for one minute, DONOTLEAVEIN
TESTMODEAS HUMIDIFIERWILL NOTOPERATE
13 Set Humidifier Controlto its originalposition.
NOTE:The motoris permanentlylubricated anddoesnot needto beoiled,,
14
 Loading...